Blog

  • Spooky Sweetness: Halloween Stuffed Bell Pepper Jack-o’-Lanterns

    Spooky Sweetness: Halloween Stuffed Bell Pepper Jack-o’-Lanterns

    Halloween is the perfect time to embrace playful, edible decorations that double as a meal. These stuffed bell pepper Jack-o’-Lanterns are not just festive—they’re a surprising combination of savory filling and fun presentation. It’s the rare recipe that makes kids giggle and grown-ups feel a bit nostalgic.

    Imagine slicing into a bright orange pumpkin, only to find a hearty, cheesy filling nestled inside. The aroma of roasted peppers mixed with melting cheese fills the kitchen with a warm, inviting scent. Whether for a party or a family dinner, these Jack-o’-Lanterns transform simple ingredients into a fun masterpiece.

    Stuffed Bell Pepper Jack-o’-Lanterns

    These stuffed bell pepper Jack-o’-Lanterns are vibrant orange peppers hollowed out and carved into festive pumpkin faces. They are filled with a savory cheese and rice mixture, then baked until tender and bubbly, resulting in a playful, edible decoration with a hearty texture. The final presentation showcases carved peppers with a melted cheese filling peeking through the facial cuts.
    Prep Time 20 minutes
    Cook Time 30 minutes
    Total Time 50 minutes
    Servings: 4
    Course: Main Course
    Cuisine: American
    Calories: 250

    Ingredients
      

    • 4 large bell peppers preferably orange for Jack-o’-Lantern look
    • 1 cup cooked rice preferably short-grain or medium-grain
    • 1 cup shredded cheddar cheese for filling and topping
    • 1/2 cup cookbook mince or finely chopped onion adds flavor to the filling
    • 2 cloves garlic minced
    • 1 tbsp olive oil
    • to taste salt and pepper

    Equipment

    • Sharp knife
    • Cutting board
    • Mixing bowl
    • Baking sheet
    • Spoon

    Method
     

    1. Preheat your oven to 375°F (190°C). Carefully cut the tops off each bell pepper and remove seeds and membranes, creating a hollowed-out pumpkin shape.
    2. Use a sharp knife to carve faces onto each pepper, creating eyes, a nose, and a jagged mouth to resemble Jack-o’-Lanterns.
    3. Heat olive oil in a skillet over medium heat, then add minced garlic and chopped onion. Sauté until fragrant and the onion becomes translucent, about 3-4 minutes.
      4 large bell peppers
    4. Mix the cooked rice with the sautéed garlic and onion, then stir in half of the shredded cheese. Season with salt and pepper to taste.
      4 large bell peppers
    5. Spoon the filling mixture into each carved pepper, pressing gently to fill evenly up to the opening.
    6. Place the stuffed peppers on a baking sheet lined with parchment paper or a silicone mat. Top each with the remaining shredded cheese for a melty finishing touch.
      4 large bell peppers
    7. Bake in the preheated oven for 25-30 minutes, until the peppers are tender and the cheese is bubbly and golden.
    8. Remove from the oven and let cool slightly before serving, showcasing the carved faces with melted cheese spilling out.

    Notes

    For extra fun, use different vegetable parts to add details to the carved faces or experiment with colored peppers for more variety.
    Making these Halloween stuffed peppers is a delightful way to celebrate the season while satisfying hungry bellies. They invite creativity, allowing you to carve different expressions and fill them with all your favorite ingredients. Each bite combines the smoky sweetness of roasted peppers with the gooey, cheesy core.

    As the night airs down and kids go trick-or-treating, you’ll have a savory visual treat that’s surprisingly easy to prepare. This recipe is a reminder that holiday fun can be both whimsical and comforting—perfect for the cozy, spooky vibe of October nights.

  • Silent Season: The Hidden Charm of Roasted Butternut Squash Soup

    Silent Season: The Hidden Charm of Roasted Butternut Squash Soup

    As the leaves turn and the air gains that crisp scent, I find myself craving something warm and unexpectedly luxurious. This roasted butternut squash soup isnt just cozy comfort; its a quiet ode to autumn, with a depth of flavor that might surprise you. The secret? A slow roast that transforms the squash into caramelized, tender goodness before blending it into silky smoothness.

    What draws me to this recipe is how effortlessly it elevates simple ingredients into something memorable. Theres a rustic, almost nostalgic charm in those roasted edges and that sweet aroma filling the kitchen. Its perfect for chilly evenings when all you want is a little indulgence, but without the fuss.

    Roasted Butternut Squash Soup

    This roasted butternut squash soup features tender, caramelized squash blended into a silky smooth purée. The key cooking methods involve roasting to develop depth of flavor and pureeing to achieve a velvety texture, resulting in a visually appealing, creamy orange soup with a slightly thick consistency.
    Prep Time 15 minutes
    Cook Time 45 minutes
    Total Time 1 hour
    Servings: 4
    Course: Main Course
    Cuisine: Autumn
    Calories: 150

    Ingredients
      

    • 1 large butternut squash peeled, seeded, and cubed
    • 2 tablespoons olive oil
    • 1 medium onion diced
    • 3 cloves garlic minced
    • 4 cups vegetable broth
    • ½ teaspoon ground nutmeg
    • to taste salt and pepper

    Equipment

    • Baking sheet
    • Blender or immersion blender
    • Chef’s knife
    • Cutting board
    • Large pot

    Method
     

    1. Preheat your oven to 400°F (200°C). Spread the cubed butternut squash on a baking sheet, drizzle with olive oil, and toss to coat evenly. Roast for about 25-30 minutes until tender and slightly caramelized around the edges.
    2. While the squash roasts, heat a large pot over medium heat. Add a little olive oil and sauté the diced onion until soft and translucent, about 5 minutes. Add the minced garlic and cook for another minute until fragrant.
    3. Once the squash is roasted and cool enough to handle, add it to the pot with the sautéed onions and garlic. Pour in the vegetable broth and bring to a gentle simmer.
      1 large butternut squash
    4. Use an immersion blender to blend the soup directly in the pot until smooth and creamy. Alternatively, carefully transfer the mixture to a blender and purée until velvety, then return to the pot.
    5. Stir in the ground nutmeg, and season with salt and pepper to taste. Let the soup simmer gently for another 5 minutes to let flavors meld and to ensure everything is heated through.
      1 large butternut squash
    6. Finally, taste and adjust seasoning if needed. Serve the soup hot, garnished with a drizzle of olive oil or fresh herbs if desired. Enjoy the comforting, silky orange bowl of autumn goodness.

    Notes

    For an extra creamy texture, add a splash of coconut milk before blending.

    This soup embodies the season perfectly — warm, hearty, and just the right shade of golden. It pairs wonderfully with crusty bread or a handful of toasted seeds for crunch. No matter how many bowls I make, I find that each spoonful feels like rediscovering autumn in a bowl.

    In a world that moves fast, this simple, soul-warming soup is a gentle reminder to slow down and enjoy the little comforts. The gentle steam rises, carrying memories of past harvests and the promise of cozy nights ahead. A bowl of this soup is a small ritual worth savoring.

  • Chilling Out with a Frozen Margarita Slushie That’s Anything but Ordinary

    Chilling Out with a Frozen Margarita Slushie That’s Anything but Ordinary

    Imagine transforming your usual summer escape into an icy adventure that sparks joy with just a blender and a handful of frozen ingredients. This frozen margarita slushie isn’t your average cocktail; it’s a nostalgic burst of citrus and tequila that feels like a mini vacation in every sip. Plus, the secret to perfect slushie consistency is surprisingly simple, yet often overlooked.

    Real excitement begins when you realize how versatile this frozen delight can be. Whether you’re celebrating a spontaneous occasion or craving a cool-down after a sunny day hike, this recipe evolves with your mood and ingredients. It’s a bright, refreshing twist that reminds you summer is a state of mind, ready whenever you are.

    Frozen Margarita Slushie

    This frozen margarita slushie combines lime juice, tequila, and sweeteners blended with ice to create a smooth, icy beverage. The result is a vibrant, chilled drink with a slightly granular texture and a bright citrus flavor, ideal for hot days or festive occasions.
    Prep Time 10 minutes
    Total Time 10 minutes
    Servings: 2
    Course: Main Course
    Cuisine: Mexican
    Calories: 150

    Ingredients
      

    • 1 cup ice cubes
    • 1/2 cup lime juice freshly squeezed preferred
    • 1/4 cup simple syrup or honey adjust to taste
    • 1/4 cup tequila preferably blanco

    Equipment

    • Blender
    • Measuring cups and spoons

    Method
     

    1. Add the ice cubes to the blender, creating a substantial icy base for the slushie.
    2. Pour in the freshly squeezed lime juice, which provides the tangy citrus flavor and brightens the mixture.
    3. Add the simple syrup or honey to sweeten the drink, balancing the tartness of the lime.
    4. Pour in the tequila, giving the slushie its distinctive boozy kick and depth of flavor.
    5. Secure the lid on the blender and blend on high until the mixture is smooth, with a slightly granular or icy texture that clings to the sides of the container.
    6. Check the texture; if it’s too thick, add a splash of water or additional lime juice and blend briefly again.
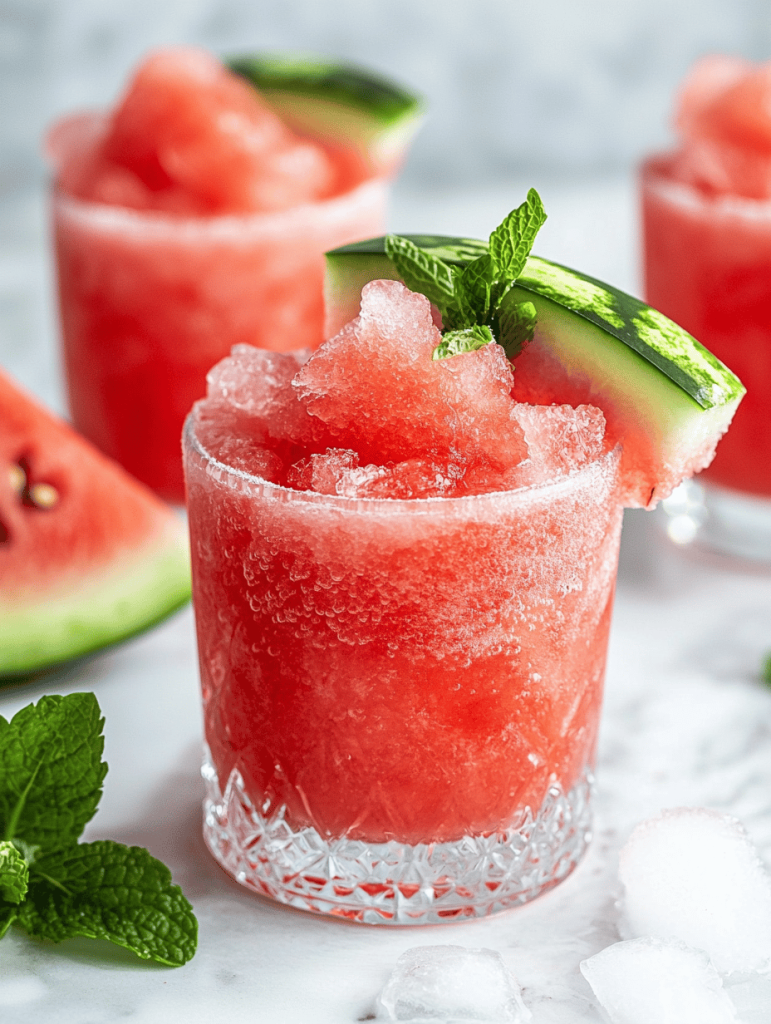
    7. Pour the frozen margarita slushie into chilled glasses, allowing the icy mixture to cascade over the rim for a refreshing presentation.
    8. Optional: garnish with lime wedges or salt-rimmed glasses for a festive touch before serving.
    Creating this frozen margarita slushie is about embracing the casual chaos of summer. The blend of sweet, sour, and salty flavors marries perfectly in each icy gulp, making every sip memorable. Pair it with your favorite chips or a sunset view for maximum impact.

    As the ice shards crackle under your spoon, you’ll appreciate the little joys of a simple, well-loved recipe. It’s perfect for those spontaneous gatherings or lazy afternoons when only a chilled, tangy treat will do. Cheers to keeping summer alive, one slushie at a time.

  • Spookyly Delicious: Halloween Monster Eyeball Cake Pops

    Spookyly Delicious: Halloween Monster Eyeball Cake Pops

    Imagine biting into a sweet, gooey cake pop that looks like a tiny monster eyeball. These treats are the perfect creepy yet adorable addition to any Halloween party. The secret lies in the unexpected pop of color and gooey texture right from the first bite.

    Decorating these cake pops feels a bit like a chaotic art project, but the result is worth every messy second. The bright red and eerie white details will make everyone stare. Plus, they taste just as playful as they look, with a soft crumb and silky coating that melts in your mouth.

    Monster Eyeball Cake Pops

    These cake pops are shaped like miniature eyeballs with a glossy, colorful coating and eerie details, making them a fun and creepy treat. They are made by mixing crumbled cake with frosting, shaping into spheres, and coating with melted candy or chocolate, then decorated with vibrant icing to resemble monster eyes. The final texture is soft and crumbly inside with a shiny, smooth outer shell and detailed eye features.
    Prep Time 30 minutes
    Cook Time 15 minutes
    Total Time 45 minutes
    Servings: 12
    Course: Main Course
    Cuisine: Festive
    Calories: 150

    Ingredients
      

    • 1 box package store-bought cake (vanilla or chocolate) baked and cooled
    • 1 cup frosting vanilla or contrasting flavored frosting to bind cake crumbs
    • 10 oz bag melting chocolate or candy melts for coating
    • Red, white, and black icing gels or food coloring various for decorating eyes to create bloodshot and pupil effects

    Equipment

    • Mixing bowls
    • Baking tray

    Method
     

    1. Crumble the cooled cake into a large mixing bowl until it resembles fine crumbs.
    2. Add the frosting gradually to the cake crumbs, mixing with a spatula until the mixture is moist and holds together when pressed.
    3. Shape the mixture into about 12 equal-sized spheres and place them on a baking tray lined with parchment paper.
    4. While they chill, melt the candy melts or chocolate in a microwave-safe bowl, heating in 30-second bursts until smooth and glossy.
    5. Dip each chilled cake pop into the melted coating, turning to coat evenly, then gently tap off excess and place on a new parchment-lined tray to set.
    6. Once coated and set, use small amounts of icing gels to add bloodshot details and pupils onto each eyeball to resemble monster eyes.
    7. Adjust and refine the eye details to your liking, and let the decorations dry completely before serving.

    Notes

    Keep the coated cake pops chilled until ready to decorate for best results. Be creative with eye designs for a fun, spooky effect.
    These eyeball cake pops are simple enough for a weekend bake, but fun enough to impress any ghoulish guest. They blend childhood nostalgia with a spooky twist that’s perfect for celebrating the season.

    Enjoy creating these creepy little treats—they’ll definitely become a Halloween staple. With just a few ingredients, you can turn a basic dessert into a spooky masterpiece that guests will remember long after the party ends.

  • Morning Magic: Reinventing Pumpkin Oatmeal with a Twist

    Morning Magic: Reinventing Pumpkin Oatmeal with a Twist

    Every fall, pumpkin transforms into a comfort ingredient that warms mornings and sparks nostalgia. But this year, I am tossing traditional pumpkin oatmeal aside and diving into a recipe that’s secretly a flavor mash-up—think pumpkin, spices, and a hint of unexpected zest.

    Imagine waking up to the aroma of toasted oats mingling with cinnamon, pumpkin’s earthiness, and a surprising splash of citrus. This recipe isn’t just about nourishment; it’s about embracing a playful, bold twist that makes breakfast an adventure. It’s my secret move when I want something cozy yet fresh.

    What makes this pumpkin oatmeal truly special is how it turns an ordinary morning routine into a mini celebration. The ingredients come together quick, and each spoonful delivers a complex blend of warmth and brightness. It’s a reminder that breakfast can be both comforting and exciting.

    Spiced Pumpkin Oatmeal with Citrus Zest

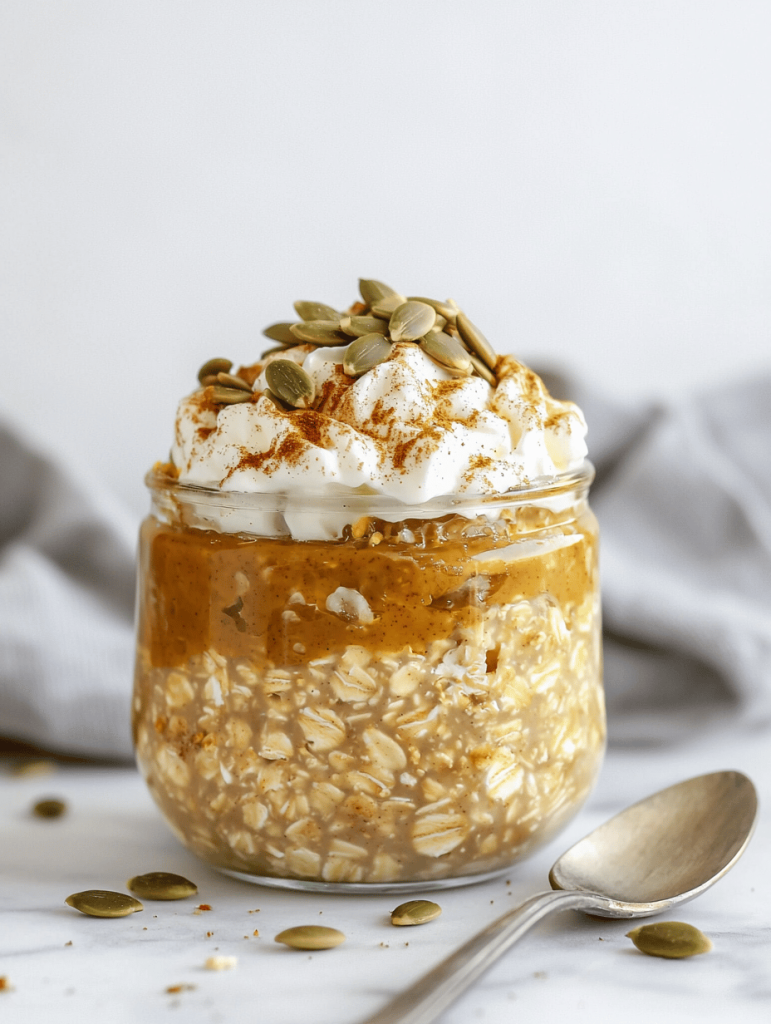
    This pumpkin oatmeal is made by simmering oats with pumpkin puree, warm spices, and a splash of citrus juice, resulting in a creamy, thick porridge. The dish features a blend of earthy pumpkin, aromatic cinnamon, and bright citrus, with a final texture that is smooth and hearty. Topped with additional zest or nuts, it offers a comforting yet vibrant breakfast experience.
    Prep Time 5 minutes
    Cook Time 10 minutes
    Total Time 15 minutes
    Servings: 2
    Course: Main Course
    Cuisine: American
    Calories: 180

    Ingredients
      

    • 1 cup rolled oats plain, quick or old-fashioned
    • 1 cup pumpkin puree canned or homemade
    • 2 cups water or milk for cooking the oats
    • 1 teaspoon ground cinnamon
    • 0.5 teaspoon ground ginger
    • 0.25 teaspoon ground nutmeg
    • 1 tablespoon honey or maple syrup optional sweetener
    • 1 tablespoon fresh lemon or orange juice adds brightness
    • zest of 1 citrus citrus zest lemon or orange

    Equipment

    • Saucepan
    • Wooden spoon

    Method
     

    1. Pour the water or milk into a saucepan and bring it to a gentle simmer over medium heat.
    2. Add the oats to the simmering liquid, stirring occasionally to prevent sticking, and cook for about 5 minutes until they start to thicken.
    3. Stir in the pumpkin puree, ensuring it mixes well with the oats and liquid, creating a vibrant orange swirl throughout the porridge.
    4. Add the ground cinnamon, ginger, and nutmeg, stirring to evenly distribute the warm spices into the mixture.
    5. Continue to cook, stirring gently, for another 3-5 minutes until the oats are fully tender and the mixture has thickened to your desired consistency.
    6. Remove from heat and stir in honey or maple syrup for sweetness, along with the fresh citrus juice for brightness.
    7. Stir in the citrus zest to add a lively aroma and flavor, enhancing the dish’s brightness.
    8. Let the oatmeal rest for a minute to allow the flavors to meld, then give it a final stir.
    9. Divide the pumpkin oatmeal into bowls, and optionally garnish with extra citrus zest, nuts, or a drizzle of honey for added texture and flavor.

    Notes

    Adjust the sweetness and citrus intensity to taste. Serve hot for best flavor and aroma.

    This pumpkin oatmeal is perfect for those crisp mornings when you crave something familiar yet new. The slightly spicy, slightly citrusy flavor profile has become a beloved morning ritual for me. It’s simple enough to make ahead, yet special enough to serve at weekend brunch.

    As the leaves turn and the air cools, I keep this recipe in my back pocket. It’s a little taste of fall’s magic in every bite, a reminder to enjoy the season’s bounty in the most personal way possible. Nothing beats a warm bowl on a chilly morning—embracing the chaos, the spice, and the sweetness all at once.

  • Unconventional Turkey Chili with a Twist

    Unconventional Turkey Chili with a Twist

    As the leaves turn and a hint of chill hits the air, I find myself craving more than just any soup—I’m after something with depth and a touch of surprise. Today, I want to share a Turkey Chili recipe that breaks away from tradition, adding unexpected ingredients like smoky chipotle and a splash of dark chocolate. It turns a simple weeknight dinner into a bold, flavorful adventure.

    This chili is about embracing the chaos of spices while grounding it with familiar comfort. The aroma alone—cumin, oregano, and a hint of cinnamon—will fill your kitchen and warm your spirits. It’s perfect for those evenings when you want a hearty dish with layers of complexity.

    Smoky Turkey Chili with Dark Chocolate

    This turkey chili combines ground turkey with smoky chipotle peppers, spices, and a touch of dark chocolate to create a rich, layered flavor. The chili is cooked until thick and hearty, with a slightly chunky texture and vibrant color. It is often served with toppings like cheese, sour cream, or cilantro for added complexity.
    Prep Time 15 minutes
    Cook Time 40 minutes
    Total Time 55 minutes
    Servings: 6
    Course: Main Course
    Cuisine: American
    Calories: 350

    Ingredients
      

    • 1 lb ground turkey lean preferred
    • 1 can (15 oz) diced tomatoes undrained
    • 1 can (15 oz) black beans rinsed and drained
    • 2 tablespoons olive oil
    • 1 medium onion finely chopped
    • 3 cloves garlic minced
    • 2 chipotle peppers in adobo chipotle peppers finely chopped, plus 1 tablespoon of adobo sauce
    • 1 teaspoon ground cumin
    • 1 teaspoon oregano
    • 1/2 teaspoon ground cinnamon
    • 1 square (1 oz) dark chocolate roughly chopped
    • Salt and pepper to taste

    Equipment

    • Large pot or Dutch oven
    • Wooden spoon or heatproof spatula

    Method
     

    1. Heat the olive oil in a large pot over medium heat. Add the chopped onion and sauté until it becomes translucent and fragrant, about 5 minutes.
    2. Add the minced garlic to the pot and cook for another minute, stirring constantly to prevent burning.
    3. Increase the heat to medium-high and add the ground turkey, breaking it apart with your spoon. Cook until it turns evenly brown and no pink remains, about 7-8 minutes.
    4. Add the finely chopped chipotle peppers along with a tablespoon of adobo sauce, stirring to coat the meat evenly with the smoky spice.
    5. Stir in the cumin, oregano, and cinnamon, letting the spices toast for 30 seconds until fragrant.
    6. Pour in the diced tomatoes along with their juices, stirring to combine all ingredients and scraping up any browned bits from the bottom of the pot.
    7. Bring the mixture to a gentle simmer, cover the pot partially, and cook for 20 minutes to allow flavors to meld and the chili to thicken.
    8. Stir in the rinsed black beans and continue cooking uncovered for another 10 minutes until the chili reaches your desired thickness.
    9. Add the chopped dark chocolate and stir until fully melted and integrated, giving the chili a rich, glossy finish and complex flavor.
    10. Season with salt and pepper to taste, adjust the heat if necessary, and cook for another 2-3 minutes to balance the flavors.
    11. Turn off the heat and let the chili rest for a few minutes—this helps the flavors deepen and the texture settle.
    12. Serve the smoky turkey chili hot, topped with your favorite garnishes like cheese, sour cream, or fresh cilantro.

    This turkey chili pairs well with a fresh cilantro garnish and a side of crispy tortilla chips. It’s a dish that invites lingering conversations and leftovers that taste even better the next day. As seasons change, so does the need for versatile, satisfying meals that can be whipped up in no time.

    Whether you’re cooking for family or just yourself, this recipe promises a delicious respite with every spoonful. It’s a reminder that comfort food can also carry a punch of excitement and innovation, even in the simplest form.

  • A Summer’s Secret: The Unexpected Charm of Peach Crisp

    A Summer’s Secret: The Unexpected Charm of Peach Crisp

    This recipe offers a cozy, nostalgic twist on classic fruit crisps, making it an irresistible seasonal highlight. Whether you’re using garden-fresh peaches or store-bought, the result is consistently delightful. A slice of this warm crisp paired with vanilla ice cream feels like a celebration in every bite.

    Peach Crisp

    This dish is a baked fruit dessert featuring tender, juicy peaches topped with a crispy oatmeal streusel. The peaches are sliced and layered in a baking dish, then covered with a buttery, crumbly topping that bakes until golden brown and bubbling around the edges. The final result is a warm, comforting dessert with a balanced contrast of soft fruit and crunchy topping.
    Prep Time 15 minutes
    Cook Time 35 minutes
    Total Time 50 minutes
    Servings: 6
    Course: Main Course
    Cuisine: American
    Calories: 250

    Ingredients
      

    • 6 cups peach slices peeled, pitted, and sliced
    • 1/2 cup granulated sugar
    • 1 tablespoon lemon juice fresh preferred
    • 1 teaspoon cinnamon
    • 1 cup old-fashioned oats
    • 1/2 cup all-purpose flour
    • 1/2 cup brown sugar packed
    • 1/2 cup unsalted butter cold, cubed
    • 1/4 teaspoon salt

    Equipment

    • Mixing bowls
    • Baking dish
    • Measuring cups and spoons
    • Pastry cutter or fork
    • Oven

    Method
     

    1. Preheat your oven to 350°F (175°C). In a large mixing bowl, gently toss the sliced peaches with sugar, lemon juice, and cinnamon until evenly coated. Spread the peach mixture evenly in a baking dish.
    2. In a separate bowl, combine oats, flour, brown sugar, and salt. Use a pastry cutter or fork to cut in the cold butter until the mixture resembles coarse crumbs. This creates the crunchy topping.
    3. Sprinkle the crumbly topping evenly over the peach filling, covering it completely for a thick layer of streusel.
    4. Bake in the preheated oven for about 35 minutes, until the topping is golden brown and the filling is bubbling around the edges.
    5. Remove from the oven and let cool slightly. Serve warm, ideally with a scoop of vanilla ice cream for added comfort and flavor.
    Enjoy it warm from the oven or chilled after a quick rest. Either way, this dessert promises a comforting end to any meal, with a splash of nostalgia and a burst of fresh fruit flavor.

  • Spooky Seduction: The Bloody Mary Like Never Before

    Spooky Seduction: The Bloody Mary Like Never Before

    Imagine a Halloween cocktail that not only shocks the senses with its vibrant red hue but also tingles your nostalgic memories of childhood mischief. This Bloody Mary variation transforms the classic into a gory masterpiece, perfect for daring spirits and party ghosts. The murky, savory aroma will pull you in, hinting at the wild novelty awaiting your taste buds.

    Crafting this drink is an art of chaos and humor, blending familiar flavors with a haunting twist. It’s more than a cocktail; it’s a celebration of the playful eerie vibe that October lends to our tables. Ready to turn your spooky night into a flavorful nightmare? Then pour, garnish, and prepare for some delighted screams.

    Bloody Mary Halloween Cocktail

    This Bloody Mary variation is a vibrant red cocktail made with tomato juice, vodka, and savory spices, often garnished with vegetables or garnishes to enhance its gory appearance. The drink has a thick, smooth consistency with a spicy and savory aroma, perfect for spooky parties. Its striking color and layered garnishes create a dramatic visual effect.
    Prep Time 5 minutes
    Total Time 5 minutes
    Servings: 1
    Course: Main Course
    Cuisine: Halloween
    Calories: 120

    Ingredients
      

    • 4 oz tomato juice preferably chilled
    • 1.5 oz vodka use a good quality vodka
    • 1 tsp Worcestershire sauce adds depth of flavor
    • 0.5 tsp hot sauce adjust for spice preference
    • Pinch celery salt for seasoning
    • Pinch black pepper freshly ground
    • Lemon or lime wedge for garnish adds acidity and color

    Equipment

    • Shaker or mixing glass
    • Flexible straw or stirrer

    Method
     

    1. Begin by filling a shaker halfway with ice cubes to chill the mixture.
    2. Add the tomato juice, vodka, Worcestershire sauce, hot sauce, celery salt, and black pepper into the shaker.
    3. Secure the lid tightly and shake vigorously for about 10 seconds until all ingredients are well combined and chilled.
    4. Strain the mixture into a tall glass filled with fresh ice to keep it cold and visually appealing.
    5. Garnish the drink with a lemon or lime wedge and a celery stalk or pickled vegetables for a gory, Halloween look.
    6. Serve immediately with a straw or stirrer to enjoy the spicy, savory, and strikingly vibrant beverage.

    As the night deepens, this Bloody Mary keeps the party lively with its shocking appearance and savory depth. The bright, tangy kick keeps everyone on their toes, making it a must-have for any Halloween gathering. It’s simple, bold, and perfectly eerie for the season.

    Enjoy the moments of chaos and laughter as everyone debates whether it’s a drink or a potion. These little touches of horror and humor bring a unique charm to your festive table. Cheers to a Halloween full of flavor and frights!

  • Spooky Spectacle: Halloween Deviled Egg Eyeballs That Will Haunt Your Table

    Spooky Spectacle: Halloween Deviled Egg Eyeballs That Will Haunt Your Table

    Halloween parties are the perfect chance to embrace the spooky and eerie. This year, I decided to craft a dish that combines classic deviled eggs with a grotesque twist—eyeballs that look just as creepy as they taste. The moment I set these mini eyeballs on the platter, my friends’ faces lit up with delight and tiny screams.

    Transforming simple ingredients into something that looks like a set from a horror movie might seem daunting, but these deviled egg eyeballs come together quickly. The real magic is in their chilling presentation, which makes them perfect for a themed gathering or a holiday fright fest. Plus, they’re surprisingly delicious with a smooth, tangy filling that balances out the spooky appearance.

    Deviled Egg Eyeballs

    This dish features classic deviled eggs with a spooky twist, transforming them into creepy eyeballs perfect for horror-themed parties. The eggs are boiled, halved, and filled with a tangy yolk mixture, then topped with an olive slice to mimic an eerie eyeball appearance. The final result is a smooth, creamy filling with a striking visual impact.
    Prep Time 20 minutes
    Cook Time 10 minutes
    Total Time 30 minutes
    Servings: 12
    Course: Main Course
    Cuisine: American
    Calories: 80

    Ingredients
      

    • 6 large large eggs for boiling
    • 2 tbsp mayonnaise for filling
    • 1 tsp yellow mustard adds tanginess
    • to taste salt and pepper for seasoning
    • 12 small black olives for eyeball pupils
    • 12 slices pickled green olives to slice for iris

    Equipment

    • Saucepan
    • Mixing bowl
    • Small spoon
    • Piping bag or plastic sandwich bag
    • Knife

    Method
     

    1. Place the eggs in a saucepan and cover with cold water. Bring to a boil over medium-high heat, then reduce to a simmer and cook for 10 minutes. Transfer eggs to cold water to cool completely, then peel off the shells.
    2. Slice each egg in half lengthwise and carefully remove the yolks into a mixing bowl, keeping the whites intact.
    3. Mash the yolks with mayonnaise and mustard until smooth and creamy. Season with salt and pepper to taste, adjusting flavors as needed.
    4. Using a piping bag or a plastic sandwich bag with the corner snipped off, fill the egg white cavities with the yolk mixture, creating a rounded, intuitive shape that resembles an eyeball.
    5. Slice the pickled green olives into small rings to form the iris of the eyeball, and place one onto each filled egg, pressing lightly so it sits securely on the yolk filling.
    6. Slice the black olives thinly to create the pupil, and carefully place a small piece in the center of the green olive ring to complete the creepy eyeball look.
    7. Arrange the finished deviled egg eyeballs on a serving platter, and refrigerate for at least 15 minutes before serving to let the flavors meld and the presentation chill.

    Notes

    For an extra creepy effect, add edible red food coloring to the yolk mixture for bloodshot veins or extra eerie touches.
    These deviled egg eyeballs are more than just a meal—they’re a conversation starter and a memorable chapter in your Halloween feast. As you slice into them, the creamy yolk filling spills out like a creature from the depths, adding to the eerie fun.

    Enjoy creating these creepy treats, and have fun watching your friends’ reactions. The mix of familiar flavors with a ghastly look makes for a perfect Halloween surprise. And who knows? Maybe they’ll even haunt your dreams in the best way possible.

  • Frozen Vodka Slushies: A Chill Twist for Hot Days

    Frozen Vodka Slushies: A Chill Twist for Hot Days

    As a passionate home bartender, I love turning simple ingredients into something unexpectedly delightful. Vodka slushies often get dismissed as just frozen drinks, but I see them as blank canvases for creativity and nostalgia. Today, I want to explore how a few secret ingredients can elevate this icy treat beyond the usual.

    Imagine the refreshing burst of citrus paired with the boozy kick, all balanced by a whisper of sweetness. This recipe is perfect for those sunny afternoons when you crave something cool but crave a little more personality. Let’s dive into what makes these slushies not just a drink, but an experience.

    Citrus Vodka Slushie

    This vodka slushie features a blend of citrus juice, vodka, and sweetener, frozen into a smooth, icy texture. The mixture is blended until slushy and served in a chilled glass, showcasing a vibrant, frosty appearance with a refreshing, tangy aroma.
    Prep Time 10 minutes
    Total Time 10 minutes
    Servings: 2
    Course: Main Course
    Cuisine: beverage
    Calories: 150

    Ingredients
      

    • 1 cup freshly squeezed citrus juice (e.g., lemon, lime, or orange) preferably chilled
    • 1/2 cup simple syrup or honey adjust to taste
    • 1/2 cup vodka your choice of vodka
    • 1 cup ice cubes preferably small or crushed
    • Optional fresh mint or citrus slices for garnish

    Equipment

    • Blender
    • Measuring cups and spoons
    • Citrus juicer or reamer

    Method
     

    1. Pour the chilled citrus juice into the blender.
    2. Add the simple syrup or honey to the blender for sweetness and balance.
    3. Pour in the vodka, ensuring the mixture will have a nice boozy kick.
    4. Add the ice cubes to the blender to create a frosty, slushy consistency.
    5. Secure the lid on the blender and blend on high speed until the mixture is smooth, thick, and icy, about 30-45 seconds.
    6. Check the texture—if it’s too thick, add a splash of citrus juice or water and pulse briefly.
    7. Pour the icy slushie into chilled glasses, filling them generously.
    8. Garnish with fresh mint or a slice of citrus for an appealing presentation and aroma.
    9. Serve immediately with a straw or small spoon to enjoy the refreshing, textured beverage.

    Notes

    Adjust the sweetness and citrus to your taste. For a frozen cocktail with a smoother texture, blend longer or add more ice. Best enjoyed fresh while icy cold.

    In the end, making a vodka slushie is all about experimenting with flavors and textures that excite your palate. It’s a versatile, easy-to-customize recipe that adapts to your mood and ingredients on hand. As the seasons shift, this icy concoction can be your loyal companion.

    Whether it’s a spontaneous happy hour or a planned gathering, these slushies will surprise and delight. Feel free to tweak sweetness levels or add a splash of soda for extra sparkle. Cheers to spontaneous, chilled moments of joy that bring a little frost to everyday life.