Category: Desserts

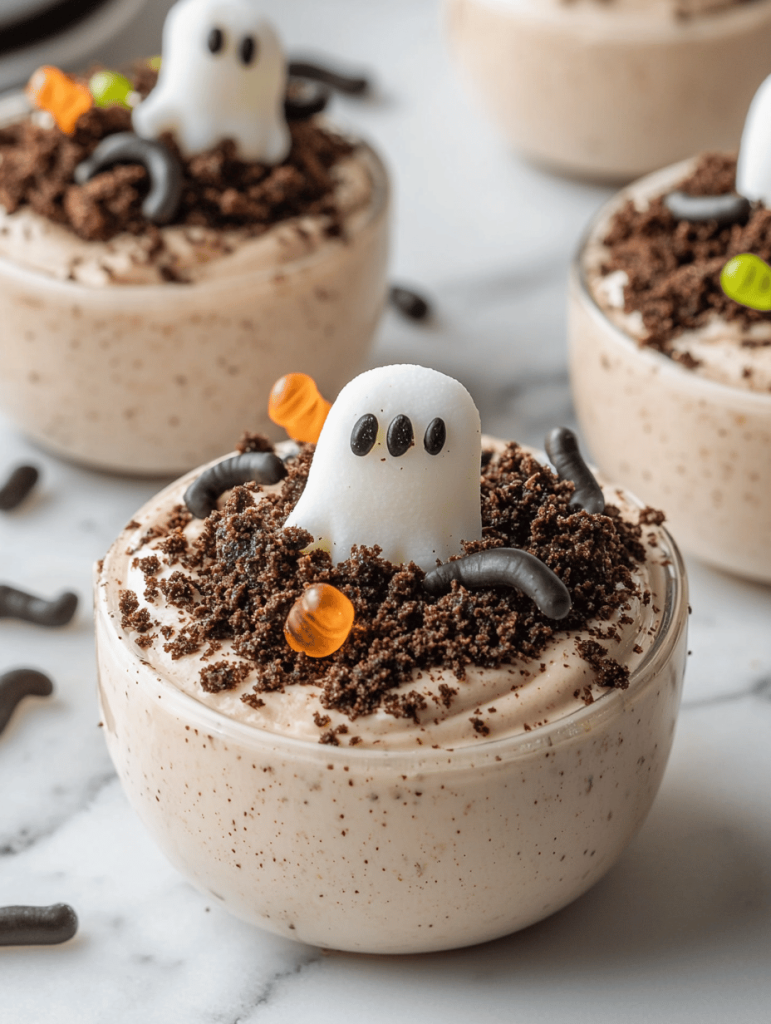
  • Spooky Sweetness: Halloween Graveyard Pudding Cups

    Spooky Sweetness: Halloween Graveyard Pudding Cups

    Ever wondered how to turn a simple dessert into a hauntingly fun Halloween spectacle? These Graveyard Pudding Cups are not just treats; they are mini-morbid landscapes that add a spooky twist to your holiday table. The clever mix of chocolate pudding, crushed cookies, and eerie decorations make them a hit among kids and adults alike.

    What sets this recipe apart is its quirky theme. It’s perfect for those who love a bit of chaos in their kitchen but still crave something adorable and delicious. Plus, it’s a hands-on project that invites creativity and giggles from start to finish.

    Graveyard Pudding Cups

    Graveyard Pudding Cups are layered desserts featuring creamy chocolate pudding topped with crushed cookies to resemble dirt, decorated with eerie edible details to mimic graveyards and tombstones. The dish combines smooth pudding and crunchy cookie textures, with spooky decorations that create a fun Halloween-themed presentation.
    Prep Time 20 minutes
    Total Time 20 minutes
    Servings: 6
    Course: Main Course
    Cuisine: American
    Calories: 250

    Ingredients
      

    • 1 pack chocolate pudding mix prepared according to package instructions
    • 2 cups cold milk for pudding
    • 1 ½ cups semi-sweet chocolate cookies crushed for dirt layer
    • ¼ cup granulated sugar optional, for decorations
    • 2 cup vanilla wafers or rectangular cookies cut into tombstone shapes
    • random quantity edible decorations (such as candy skeletons, gummy worms, candy eyes) for spooky effects

    Equipment

    • Mixing bowls
    • Whisk
    • Measuring cups and spoons
    • Serving cups or small clear containers
    • Spoon or rubber spatula

    Method
     

    1. Prepare the chocolate pudding by whisking the pudding mix with cold milk in a mixing bowl until smooth and thickened, about 2-3 minutes. Chill in the fridge if needed for a few minutes to set slightly.
      1 pack chocolate pudding mix, 2 cups cold milk
    2. Divide the pudding evenly among six small cups or containers, smoothing the top with a spoon or spatula for a clean finish.
    3. Place the crushed cookies into a shallow bowl and sprinkle generously over the pudding layer to resemble dirt and create a textured, earthy surface.
      1 ½ cups semi-sweet chocolate cookies
    4. Use a cookie cutter or a sharp knife to cut vanilla wafers into tombstone shapes, then insert them upright into the pudding, standing on the crushed cookie layer.
      2 cup vanilla wafers or rectangular cookies
    5. Add edible decorations like gummy worms, candy skeletons, or candy eyes on top of the cookies and around the pudding for spooky effects.
      random quantity edible decorations (such as candy skeletons, gummy worms, candy eyes)
    6. If desired, sprinkle a little granulated sugar over the top for extra shimmer, or add some more crushed cookies to enhance the dirt effect.
      ¼ cup granulated sugar, 1 ½ cups semi-sweet chocolate cookies
    7. Refrigerate the jars for about 10-15 minutes to allow the textures to set, then serve chilled and enjoy this spooky, crunchy dessert.

    Notes

    For an even spookier presentation, add edible glitter or dry ice just before serving for a foggy effect.

    Bringing this spooky scene to life each year feels like a small victory. The way the crushed cookies mimic dirt and the candy eyes stare back adds a delightfully creepy vibe that fits right into any Halloween gathering. It’s a simple recipe with a big visual impact, making it a perennial favorite.

    As the season shifts and ghosts, goblins, and ghouls take center stage, these pudding cups help celebrate with a touch of playful darkness. They’re easy to assemble, quick to vanish, and undeniably charming. Here’s to more nights of sweet mischief and spooky smiles.

  • Spiced Pumpkin Cheesecake with a Surprise Crust

    Spiced Pumpkin Cheesecake with a Surprise Crust

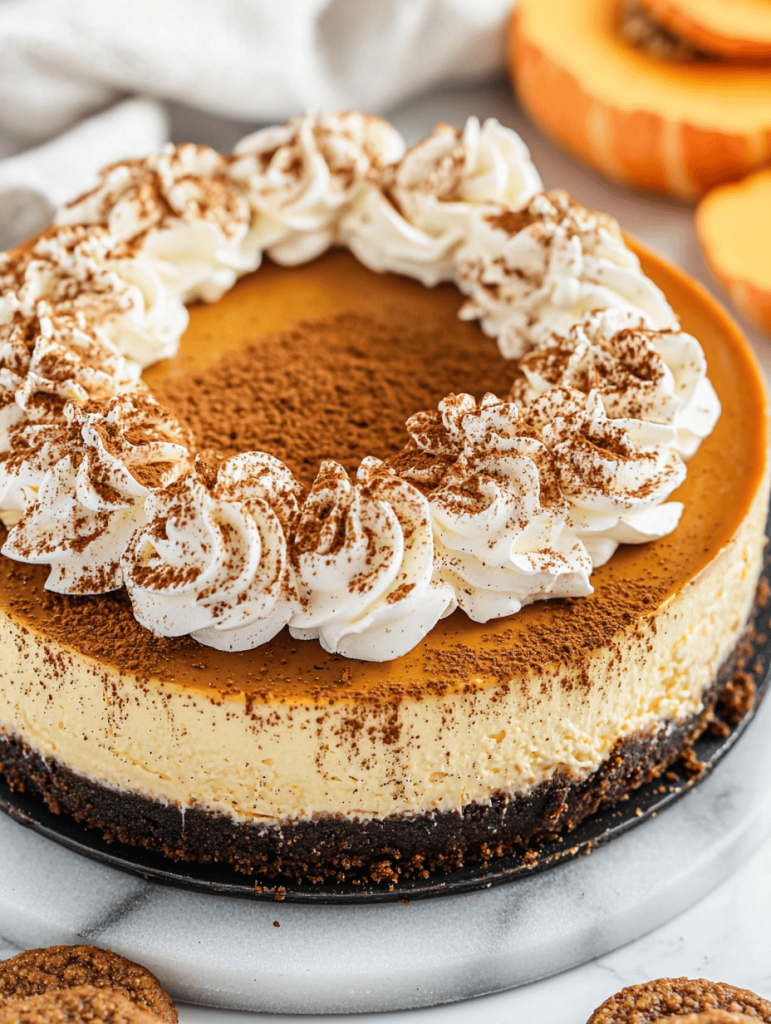
    As the leaves turn and autumn’s chill settles in, I love exploring desserts that whisper seasonal charm. This pumpkin cheesecake takes a quirky twist by incorporating a gingersnap cookie crust, adding a burst of spicy crunch that perfectly balances the creamy filling. It’s a dessert that sparks nostalgia and elevates your fall table.

    The process feels like a cozy ritual, with warm spices filling the air and the batter’s silky texture promising comfort in every bite. I’ve found that the right cinnamon and a touch of nutmeg turn this cheesecake into a true seasonal masterpiece. Plus, it’s surprisingly easy to assemble, making it ideal for both weeknights and special gatherings.

    Pumpkin Gingersnap Cheesecake

    This pumpkin cheesecake features a gingersnap cookie crust that adds a spicy crunch, paired with a smooth, creamy pumpkin filling seasoned with warm spices like cinnamon and nutmeg. The final dessert has a rich, velvety texture with a slightly firm crust, beautifully layered and inviting in appearance.
    Prep Time 20 minutes
    Cook Time 1 hour
    Total Time 1 hour 20 minutes
    Servings: 8
    Course: Main Course
    Cuisine: American
    Calories: 440

    Ingredients
      

    • 1 1/2 cups gingersnap cookies crushed into fine crumbs
    • 1/4 cup unsalted butter melted
    • 3 cups pumpkin puree
    • 24 oz cream cheese softened
    • 1 cup granulated sugar
    • 1/4 cup all-purpose flour
    • 4 large eggs beaten
    • 1 1/2 teaspoons ground cinnamon
    • 1/2 teaspoon ground nutmeg
    • salt pinch

    Equipment

    • Food processor
    • Springform pan
    • Mixing bowls
    • Electric mixer
    • Spatula

    Method
     

    1. Place gingersnap cookies in a food processor and blend until finely ground. Pour in melted butter and pulse until the mixture resembles wet sand. Press this mixture evenly into the bottom of a springform pan to form the crust.
    2. Bake the crust in a preheated oven at 350°F (175°C) for 8-10 minutes until set and fragrant. Remove from oven and let it cool slightly while preparing the filling.
    3. In a large mixing bowl, beat softened cream cheese with an electric mixer until smooth and creamy, about 2-3 minutes. Add granulated sugar and beat until combined and fluffy.
    4. Mix in pumpkin puree, followed by eggs one at a time, beating well after each addition to ensure a smooth, silky batter. Incorporate cinnamon, nutmeg, and a pinch of salt, blending until fragrant and evenly distributed.
    5. Pour the pumpkin filling over the cooled crust, smoothing the top with a spatula. Tap the pan lightly on the counter to remove air bubbles.
    6. Bake the cheesecake in a preheated oven at 350°F (175°C) for about 50-60 minutes, or until the edges are set but the center remains slightly jiggly. Remember that residual heat will continue to cook it as it cools.
    7. Turn off the oven and leave the cheesecake inside with the door ajar for about 1 hour to prevent cracking. Then, refrigerate for at least 4 hours or overnight until fully chilled and set.
    8. Once chilled, carefully remove the sides of the springform pan. Slice the cheesecake with a sharp knife and serve chilled, optionally garnished with whipped cream or extra spices.

    Notes

    For best flavor, prepare the cheesecake a day ahead to allow the spices to meld and the flavors to develop fully.

    This pumpkin cheesecake not only captures the essence of autumn but also invites a bit of culinary adventure. The unexpected crust gives it a playful edge that friends will remember. As it chills, I enjoy the aroma that fills my kitchen—rich, spicy, and sweet—perfect for cozy evenings.

    Sharing this dessert feels like a warm hug after a crisp day outside. It’s perfect for the season of gatherings and gratitude. With its comforting flavors and a hint of unexpected flair, this pumpkin cheesecake will surely become a fall favorite in your home.

  • Spooky Elegance: The Halloween Spider Web Cake You Cant Resist

    Spooky Elegance: The Halloween Spider Web Cake You Cant Resist

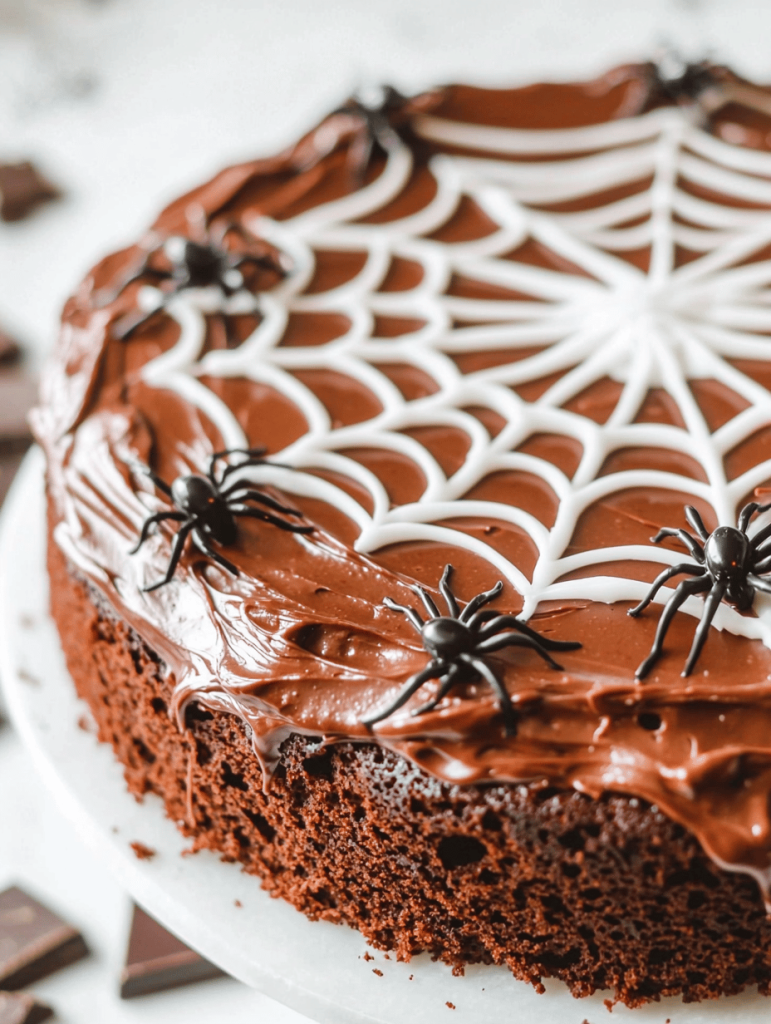
    Every October, I find myself craving more than just candy; I want to create something that captures the eerie elegance of the season. This Halloween Spider Web Cake transforms a simple bake into a mysterious masterpiece that invites curiosity and awe. The intricate web design, achieved with just a simple twist of icing, feels like conjuring a spell in the kitchen.

    But beyond its spooky look, this cake is a celebration of texture and flavor—rich chocolate layers contrasted by a tangy cream filling. The web decoration not only looks stunning but also adds a delightful crunch, echoing the crunch of autumn leaves underfoot. It’s a perfect centerpiece for gatherings that want a touch of both chaos and beauty.

    Halloween Spider Web Chocolate Cake

    This chocolate cake features moist, layered chocolate sponge with a tangy cream filling. The exterior is decorated with a web pattern made from icing, creating a striking, web-like appearance that contrasts crunchy detailing with soft cake layers.
    Prep Time 30 minutes
    Cook Time 40 minutes
    Total Time 1 hour 10 minutes
    Servings: 8
    Course: Main Course
    Cuisine: Halloween
    Calories: 480

    Ingredients
      

    • 2 cups all-purpose flour sifted
    • 2 cups granulated sugar
    • ¾ cups unsweetened cocoa powder sifted
    • 2 teaspoons baking powder
    • 1 teaspoon baking soda
    • ½ teaspoon salt
    • 1 cup buttermilk at room temperature
    • ½ cup vegetable oil
    • 2 large eggs at room temperature
    • 2 teaspoons vanilla extract
    • 1 cup heavy cream
    • 8 oz cream cheese softened
    • 2 cups powdered sugar sifted
    • ½ cup unsalted butter softened
    • 2 cups confectionery icing for decorating
    • 1 cup dark chocolate melts melted, for decoration

    Equipment

    • Mixing bowls
    • Electric mixer
    • Cake pans
    • Cooling racks
    • Piping bag
    • Small decorative spatula

    Method
     

    1. Preheat your oven to 350°F (175°C) and grease two 9-inch round cake pans. In a large mixing bowl, whisk together the sifted flour, cocoa powder, baking powder, baking soda, salt, and sugar until combined.
    2. In a separate bowl, mix the buttermilk, vegetable oil, eggs, and vanilla extract until smooth. Pour the wet ingredients into the dry ingredients and gently fold everything together until the batter is uniform and slightly fluffy.
    3. Divide the batter evenly between the prepared cake pans and smooth the tops with a spatula. Bake for about 35-40 minutes, or until a toothpick inserted in the center comes out clean. Let the cakes cool in their pans for 10 minutes, then transfer to a wire rack to cool completely.
    4. While the cakes cool, prepare the cream filling. Beat the softened cream cheese and butter together in a bowl until creamy and fluffy. Gradually add the powdered sugar, then pour in the heavy cream and continue beating until the mixture is smooth and spreadable.
    5. Once the cakes are completely cooled, spread a layer of the cream filling on top of one cake layer. Place the second layer on top and apply a thin crumb coat all over the cake to seal in crumbs. Chill in the refrigerator for about 30 minutes.
    6. Finish frosting the cake with the remaining cream filling, smoothing the sides and top with a spatula. Transfer the icing to a piping bag fitted with a small round tip.
    7. Use the piping bag to pipe concentric circles of icing on the top of the cake. Starting from the center, draw a spiral outward, then use a small spatula or decorative tool to gently drag the icing from the center outward, creating a web pattern.
    8. Melt the dark chocolate and drizzle it in thin lines across the web, mimicking the spider web look. Optionally, add edible decorations like small sugar spiders or leaves for extra effect.
    9. Place the finished cake in the refrigerator for at least 15 minutes to set the decorations and allow the flavors to meld.
    10. Serve slices of the spooky web cake to reveal the moist chocolate layers and tangy cream filling inside. Enjoy the visual drama and delightful textures with each bite!

    Notes

    For an extra spooky effect, add small plastic spiders or glow-in-the-dark decorations on top before serving.

    This cake isn’t just a visual stunt; it’s a reminder of the joy in crafting something with your own hands. As the aroma of cocoa and vanilla fills the air, I remember why baking remains a comforting ritual amidst the spooky chaos of October.

    Every slice reveals layers of flavor and a web of memories tangled in sweet nostalgia. Making this cake is a small act of magic—celebrating the season with a treat that’s as mesmerizing as it is delicious.

  • Spookyly Delicious: Halloween Monster Eyeball Cake Pops

    Spookyly Delicious: Halloween Monster Eyeball Cake Pops

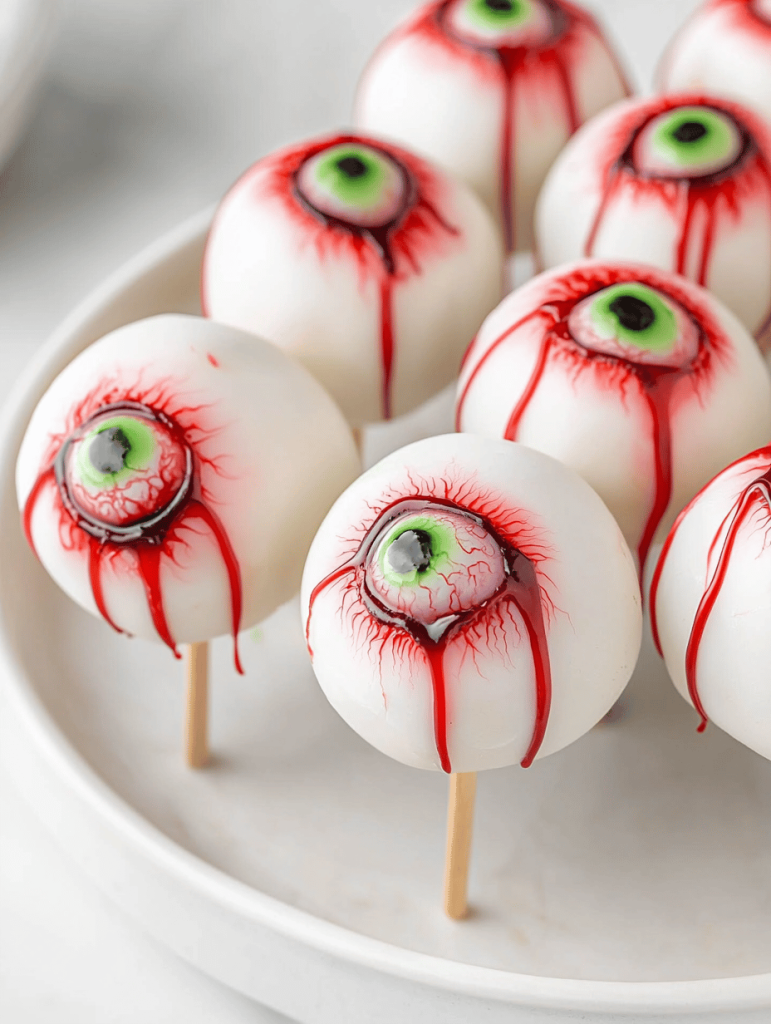
    Imagine biting into a sweet, gooey cake pop that looks like a tiny monster eyeball. These treats are the perfect creepy yet adorable addition to any Halloween party. The secret lies in the unexpected pop of color and gooey texture right from the first bite.

    Decorating these cake pops feels a bit like a chaotic art project, but the result is worth every messy second. The bright red and eerie white details will make everyone stare. Plus, they taste just as playful as they look, with a soft crumb and silky coating that melts in your mouth.

    Monster Eyeball Cake Pops

    These cake pops are shaped like miniature eyeballs with a glossy, colorful coating and eerie details, making them a fun and creepy treat. They are made by mixing crumbled cake with frosting, shaping into spheres, and coating with melted candy or chocolate, then decorated with vibrant icing to resemble monster eyes. The final texture is soft and crumbly inside with a shiny, smooth outer shell and detailed eye features.
    Prep Time 30 minutes
    Cook Time 15 minutes
    Total Time 45 minutes
    Servings: 12
    Course: Main Course
    Cuisine: Festive
    Calories: 150

    Ingredients
      

    • 1 box package store-bought cake (vanilla or chocolate) baked and cooled
    • 1 cup frosting vanilla or contrasting flavored frosting to bind cake crumbs
    • 10 oz bag melting chocolate or candy melts for coating
    • Red, white, and black icing gels or food coloring various for decorating eyes to create bloodshot and pupil effects

    Equipment

    • Mixing bowls
    • Baking tray

    Method
     

    1. Crumble the cooled cake into a large mixing bowl until it resembles fine crumbs.
    2. Add the frosting gradually to the cake crumbs, mixing with a spatula until the mixture is moist and holds together when pressed.
    3. Shape the mixture into about 12 equal-sized spheres and place them on a baking tray lined with parchment paper.
    4. While they chill, melt the candy melts or chocolate in a microwave-safe bowl, heating in 30-second bursts until smooth and glossy.
    5. Dip each chilled cake pop into the melted coating, turning to coat evenly, then gently tap off excess and place on a new parchment-lined tray to set.
    6. Once coated and set, use small amounts of icing gels to add bloodshot details and pupils onto each eyeball to resemble monster eyes.
    7. Adjust and refine the eye details to your liking, and let the decorations dry completely before serving.

    Notes

    Keep the coated cake pops chilled until ready to decorate for best results. Be creative with eye designs for a fun, spooky effect.
    These eyeball cake pops are simple enough for a weekend bake, but fun enough to impress any ghoulish guest. They blend childhood nostalgia with a spooky twist that’s perfect for celebrating the season.

    Enjoy creating these creepy little treats—they’ll definitely become a Halloween staple. With just a few ingredients, you can turn a basic dessert into a spooky masterpiece that guests will remember long after the party ends.

  • A Summer’s Secret: The Unexpected Charm of Peach Crisp

    A Summer’s Secret: The Unexpected Charm of Peach Crisp

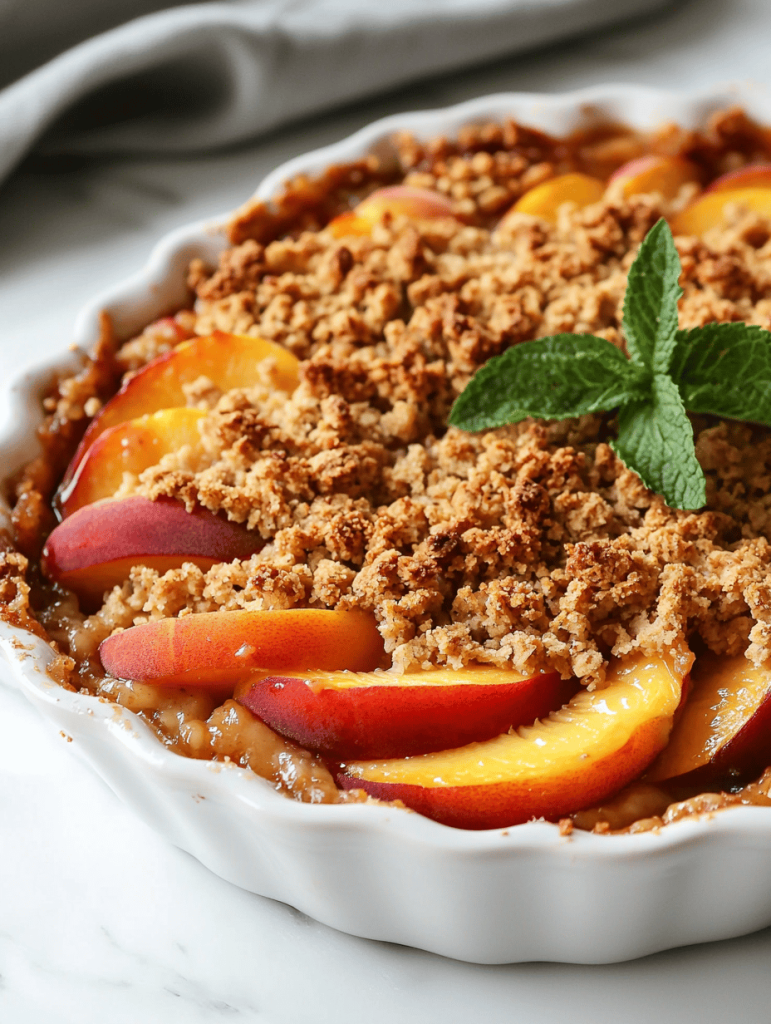
    This recipe offers a cozy, nostalgic twist on classic fruit crisps, making it an irresistible seasonal highlight. Whether you’re using garden-fresh peaches or store-bought, the result is consistently delightful. A slice of this warm crisp paired with vanilla ice cream feels like a celebration in every bite.

    Peach Crisp

    This dish is a baked fruit dessert featuring tender, juicy peaches topped with a crispy oatmeal streusel. The peaches are sliced and layered in a baking dish, then covered with a buttery, crumbly topping that bakes until golden brown and bubbling around the edges. The final result is a warm, comforting dessert with a balanced contrast of soft fruit and crunchy topping.
    Prep Time 15 minutes
    Cook Time 35 minutes
    Total Time 50 minutes
    Servings: 6
    Course: Main Course
    Cuisine: American
    Calories: 250

    Ingredients
      

    • 6 cups peach slices peeled, pitted, and sliced
    • 1/2 cup granulated sugar
    • 1 tablespoon lemon juice fresh preferred
    • 1 teaspoon cinnamon
    • 1 cup old-fashioned oats
    • 1/2 cup all-purpose flour
    • 1/2 cup brown sugar packed
    • 1/2 cup unsalted butter cold, cubed
    • 1/4 teaspoon salt

    Equipment

    • Mixing bowls
    • Baking dish
    • Measuring cups and spoons
    • Pastry cutter or fork
    • Oven

    Method
     

    1. Preheat your oven to 350°F (175°C). In a large mixing bowl, gently toss the sliced peaches with sugar, lemon juice, and cinnamon until evenly coated. Spread the peach mixture evenly in a baking dish.
    2. In a separate bowl, combine oats, flour, brown sugar, and salt. Use a pastry cutter or fork to cut in the cold butter until the mixture resembles coarse crumbs. This creates the crunchy topping.
    3. Sprinkle the crumbly topping evenly over the peach filling, covering it completely for a thick layer of streusel.
    4. Bake in the preheated oven for about 35 minutes, until the topping is golden brown and the filling is bubbling around the edges.
    5. Remove from the oven and let cool slightly. Serve warm, ideally with a scoop of vanilla ice cream for added comfort and flavor.
    Enjoy it warm from the oven or chilled after a quick rest. Either way, this dessert promises a comforting end to any meal, with a splash of nostalgia and a burst of fresh fruit flavor.

  • Hidden Gems: Pumpkin Muffins for the Adventurous Baker

    Hidden Gems: Pumpkin Muffins for the Adventurous Baker

    Baking with pumpkin often feels like a cozy fall tradition, but I like to take it a step further by adding unexpected spices and textures. These pumpkin muffins are not the usual mash-and-mix—they embrace the vibrant, earthy flavors of pumpkin while playing with a hint of cardamom and a crunchy topping. It’s a recipe that invites a little chaos in the best way possible.

    What makes these muffins special? They’re my secret weapon for weekend mornings when I want warmth and surprise in every bite. The aroma of cinnamon and toasted pumpkin seeds filling the kitchen turns simple ingredients into a little celebration. Plus, they’re just forgiving enough to spark your creativity in the kitchen.

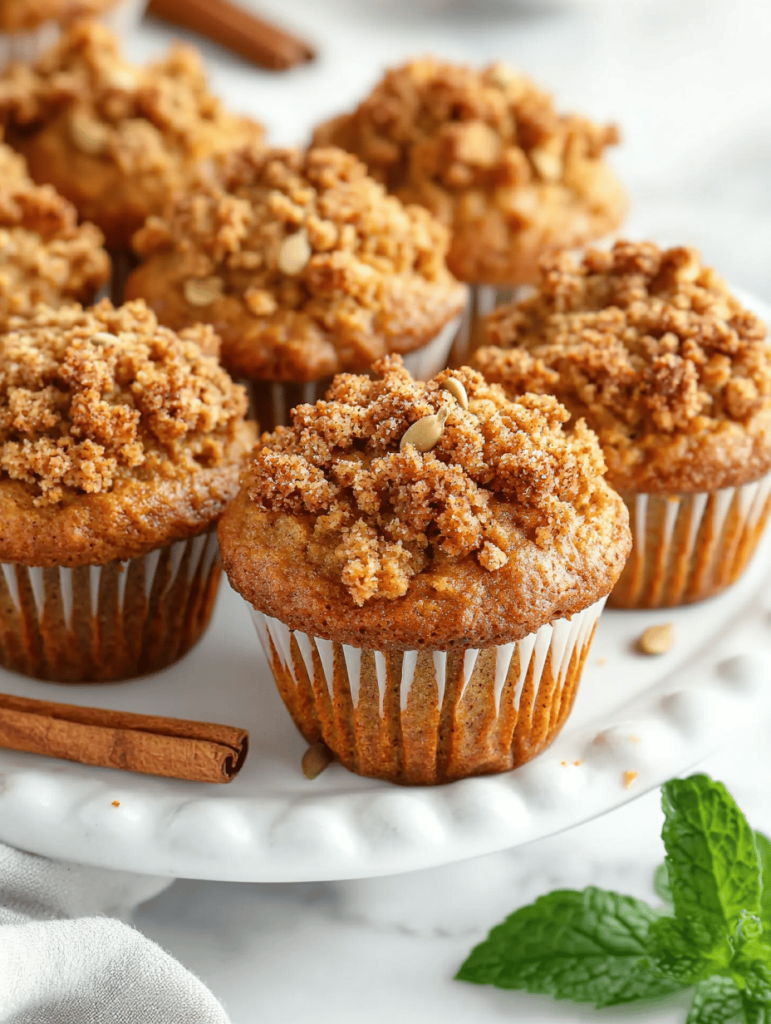
    Spiced Pumpkin Muffins with Crunchy Topping

    These pumpkin muffins combine the earthy sweetness of pumpkin with warm spices like cinnamon and cardamom, baked to a tender, moist interior with a crunchy topping of toasted seeds. They showcase a balance of soft crumb and textures that add visual and sensory appeal, perfect for cozy mornings or festive snacks.
    Prep Time 15 minutes
    Cook Time 25 minutes
    Total Time 40 minutes
    Servings: 12
    Course: Main Course
    Cuisine: baking
    Calories: 200

    Ingredients
      

    • 1 1/2 cups all-purpose flour
    • 1 cup pumpkin puree
    • 1/2 cup granulated sugar
    • 1/4 cup vegetable oil
    • 2 large eggs
    • 1 1/2 teaspoons ground cinnamon
    • 1/2 teaspoon ground cardamom
    • 1/2 teaspoon baking soda
    • 1/2 teaspoon salt
    • 1/4 cup pumpkin seeds for topping, toasted
    • 2 tablespoons brown sugar for topping

    Equipment

    • Mixing bowls
    • Whisk or spoon
    • Muffin tin
    • Measuring cups and spoons
    • Toothpick or cake tester

    Method
     

    1. Preheat your oven to 350°F (175°C) and line a muffin tin with paper liners or lightly grease it.
    2. In a large bowl, whisk together the flour, cinnamon, cardamom, baking soda, and salt to combine evenly.
    3. In a separate bowl, mix the pumpkin puree, sugar, vegetable oil, and eggs until smooth and well combined.
    4. Pour the wet mixture into the dry ingredients and gently fold everything together until just combined; do not overmix to keep the muffins tender.
    5. Spoon the batter into the prepared muffin tin, filling each cup about two-thirds full.
    6. Sprinkle pumpkin seeds and a touch of brown sugar on top of each muffin for a crunchy, sweet topping.
    7. Bake in the preheated oven for 20 to 25 minutes, or until a toothpick inserted into the center comes out clean and the tops are golden brown.
    8. Remove the muffins from the oven and let them cool in the tin for a few minutes before transferring to a wire rack.
    9. Enjoy these moist, spiced pumpkin muffins warm or at room temperature, with their fragrant aroma filling the kitchen.
    Making these pumpkin muffins reminds me how a simple ingredient can be transformed into something memorable. Each batch feels like a small victory, especially when paired with a steaming cup of coffee on a crisp morning.

    Whether you’re baking for yourself or sharing with friends, this recipe offers comfort with a dash of adventure. It’s a reminder that even classic flavors have room for a little twist, making every bite a delightful discovery.

  • Spooky & Sweet: The Haunted Ghost Brownies You Need This Halloween

    Spooky & Sweet: The Haunted Ghost Brownies You Need This Halloween

    If you love turning simple desserts into Halloween masterpieces, this recipe is your new best friend. Expect a bit of mess, some giggles, and plenty of ‘oohs’ when you unveil your ghostly creations. They’re not just treats but conversation starters, blending nostalgia with a touch of seasonal magic.

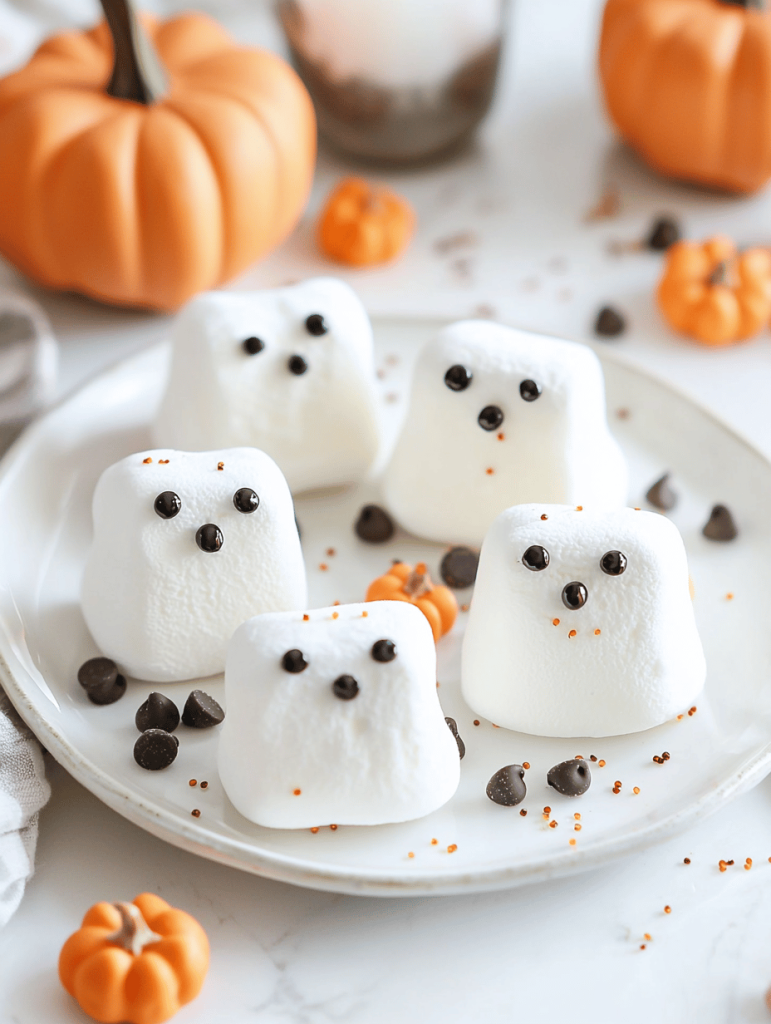
    Ghostly Halloween Marshmallow Treats

    This recipe transforms marshmallows into spooky ghost-shaped confections using melting and shaping techniques. The mixture becomes gooey and smooth, then is molded into ghost forms and decorated to resemble ghosts, resulting in soft, chewy treats with a playful, Halloween-inspired appearance.
    Prep Time 15 minutes
    Cook Time 10 minutes
    Total Time 25 minutes
    Servings: 12
    Course: Main Course
    Cuisine: Halloween
    Calories: 150

    Ingredients
      

    • 10 cups large marshmallows preferably fresh and soft
    • 3 tbsp butter unsalted, helps melt the marshmallows smoothly
    • 6 cups powdered sugar sifted for a smooth, pliable dough
    • 1 tsp vanilla extract flavor enhancer
    • 1 cup white chocolate melts for decorating and faces
    • as needed black edible marker to draw eyes and mouths

    Equipment

    • Saucepan
    • Silicone spatula
    • Baking sheet
    • Parchment paper
    • Black edible marker or chocolate writer

    Method
     

    1. Grease a baking sheet or line it with parchment paper to prevent sticking.
    2. In a large saucepan over low heat, melt the butter and add the marshmallows, stirring constantly until completely melted and smooth, filling the air with a sweet, marshmallow aroma.
    3. Remove from heat and gradually add the sifted powdered sugar, mixing well with a spatula until a sticky, pliable dough forms. The mixture will be thick but manageable.
    4. Stir in the vanilla extract for added flavor, blending it evenly into the dough.
    5. Lightly dust your work surface with powdered sugar, then turn out the dough onto it. Knead gently until smooth and no longer sticky, about 2-3 minutes.
    6. Pinch off small portions of dough and roll them into balls about the size of a golf ball. Flatten the tops slightly to resemble ghosts.
    7. Place each shaped ghost on the prepared baking sheet, spacing them evenly apart.
    8. Warm the white chocolate melts following package instructions until smooth and pourable.
    9. Using a spoon or piping bag, drizzle or spread the melted white chocolate over the ghost shapes to create a smooth, ghostly surface, ensuring to cover the entire figure.
    10. Let the coated ghosts sit at room temperature until the chocolate sets and hardens, about 15-20 minutes.
    11. Use the black edible marker to draw eyes and mouths on the white chocolate surface, giving each ghost a spooky expression.
    12. Finish by placing your ghostly treats on a serving platter. They’re ready to spook your guests or to enjoy as fun Halloween confections!

    Notes

    For best results, work quickly when shaping the dough as it can become sticky. You can also refrigerate the shaped ghosts briefly to make handling easier.
    Remember, the best part about this recipe is the joy it sparks—from mixing to decorating. Every ghost has its quirks, and so do these brownies, making them uniquely yours. Enjoy creating your spooky dessert tableau, one brownie at a time.

  • The Secret to a Juicy, Fluffy Apple Cake That Turns Heads

    The Secret to a Juicy, Fluffy Apple Cake That Turns Heads

    Imagine biting into a slice of apple cake that’s bursting with fresh fruit and a tender crumb, yet somehow still holding onto a charming rustic appeal. This recipe is not your everyday apple cake; it’s infused with a subtle hint of spice and a splash of vanilla that elevates each bite to a cozy, nostalgic experience.

    I’ve always been obsessed with how simple ingredients can become something extraordinary. This apple cake uses a special technique you won’t find in most recipes—paring the apples just right to make them melt into the batter. The result is a moist, flavorful cake that’s perfect for crisp fall afternoons or lazy weekend mornings.

    What makes this apple cake truly unique is its texture contrast—soft and moist inside with a gentle crunch of sugar on top. The aroma alone can fill your kitchen with a comforting scent of cinnamon, apples, and baked goodness. It’s a showstopper that brings a little magic to any table, whenever you need a warm hug in cake form.

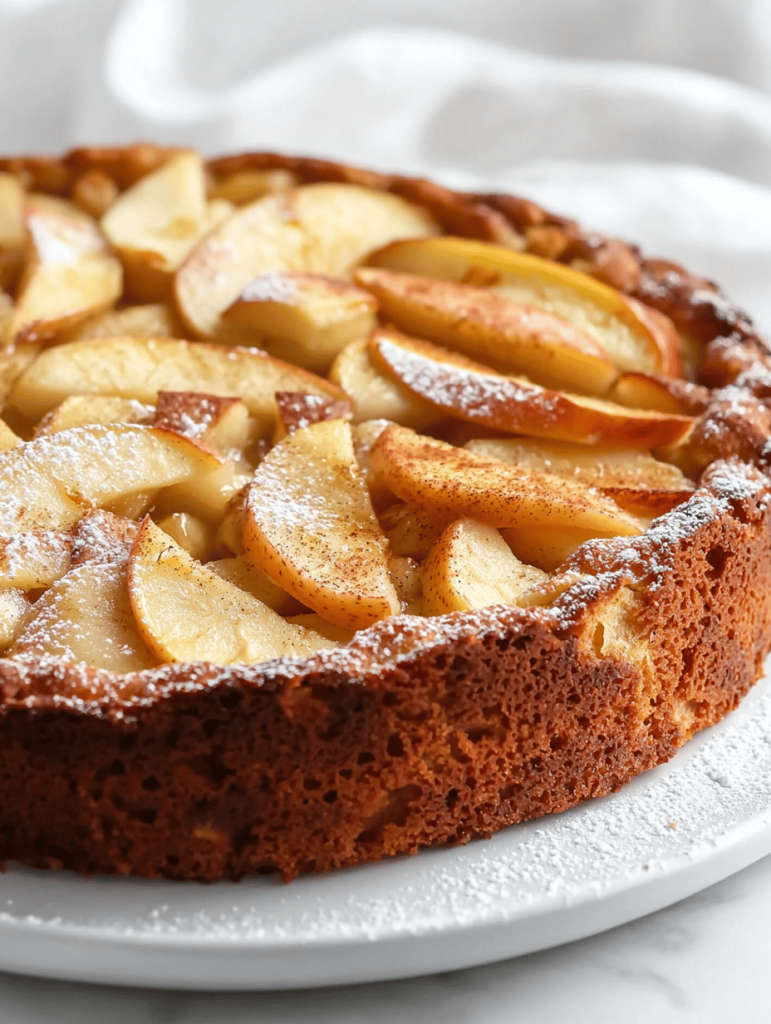
    Rustic Apple Cake

    This apple cake features tender slices of fresh apples incorporated into a moist, lightly spiced batter with a tender crumb. The top develops a gentle crunch of sugar, while the interior remains soft and flavorful, creating a delightful contrast in textures. Its rustic appearance and warm aroma make it a cozy dessert or brunch treat.
    Prep Time 20 minutes
    Cook Time 40 minutes
    Total Time 1 hour
    Servings: 8
    Course: Main Course
    Cuisine: American
    Calories: 280

    Ingredients
      

    • 3 medium apples preferably tart variety like Granny Smith
    • 1 1/2 cups all-purpose flour
    • 1 cup granulated sugar
    • 1/2 cup unsalted butter melted
    • 2 large eggs
    • 1 teaspoon vanilla extract
    • 1 1/2 teaspoons ground cinnamon optional, for flavor
    • 1/4 teaspoon ground nutmeg optional
    • 1/4 teaspoon salt
    • 1/4 cup granulated sugar for sprinkling on top

    Equipment

    • Mixing bowls
    • Whisk
    • Rubber spatula
    • 9-inch round cake pan
    • Paring knife
    • Peeler
    • Measuring cups and spoons
    • Cooling rack

    Method
     

    1. Peel and core the apples, then slice them into thin, even pieces. Set aside.
    2. In a large mixing bowl, whisk together the flour, sugar, cinnamon, nutmeg, and salt until well combined.
    3. In a separate bowl, beat the eggs until slightly frothy, then add the melted butter and vanilla extract, mixing well.
    4. Pour the wet mixture into the dry ingredients and gently fold until just combined—be careful not to overmix.
    5. Gently fold the sliced apples into the batter, distributing them evenly to ensure a moist, apple-filled cake.
    6. Pour the batter into a greased 9-inch round cake pan, smoothing the top with a spatula for an even surface.
    7. Sprinkle the remaining sugar evenly over the top of the batter for a sweet, crunchy topping.
    8. Bake in a preheated oven at 350°F (175°C) for about 40 minutes, or until the top is golden brown and a toothpick inserted in the center comes out clean.
    9. Remove the cake from the oven and let it cool in the pan for 10 minutes, then transfer to a wire rack to cool completely.
    10. Slice and serve the cake warm or at room temperature, enjoying the tender crumb with a hint of spice and the crisp topping.

    Sharing this apple cake with friends or family is a simple pleasure that never gets old. It’s a slice of comfort wrapped in a golden crust, perfect for both casual afternoons and special gatherings. Plus, it’s adaptable—add walnuts or a drizzle of caramel for an extra treat.

    As the seasons turn and apples come into season again, this recipe feels like a cozy tradition. Its humble charm reminds us that sometimes, the simplest desserts can bring the most joy. A warm piece, a cup of tea, and a quiet moment—love in every bite.