Category: Desserts

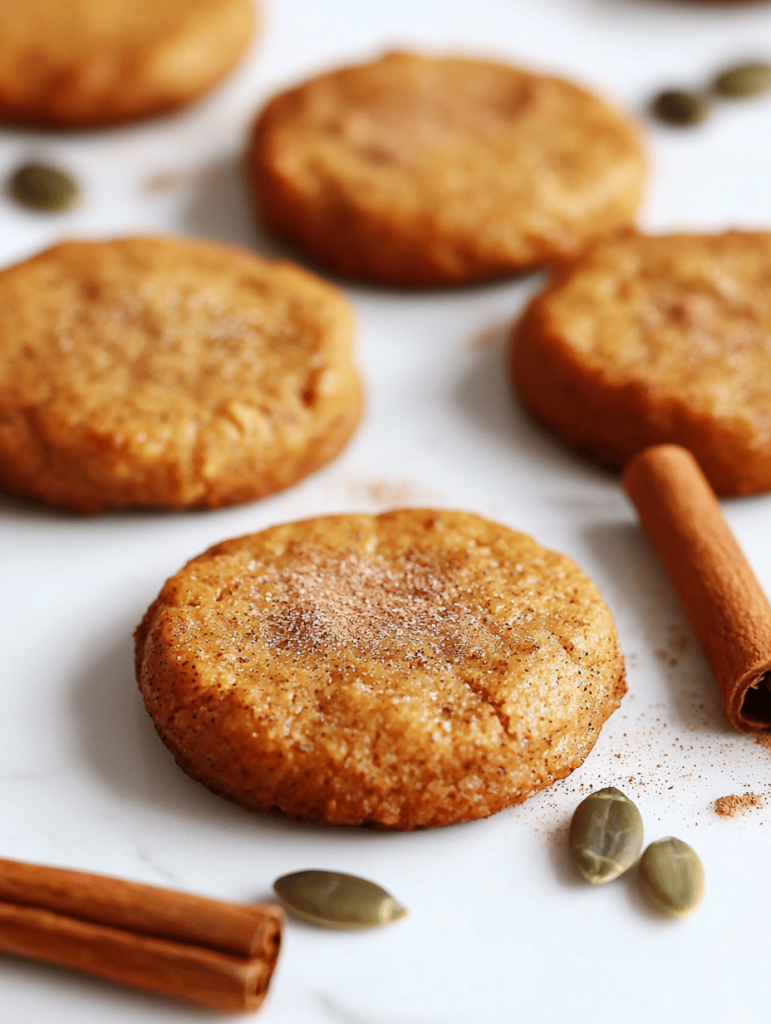
  • Hidden Spice Twist: Enchanting Pumpkin Cookies to Brighten Your Fall

    Hidden Spice Twist: Enchanting Pumpkin Cookies to Brighten Your Fall

    As autumn leaves swirl around in a kaleidoscope of reds and golds, my kitchen fills with a warm, spicy aroma that hints at a secret ingredient. These pumpkin cookies transform the classic pumpkin flavor into a cozy, nostalgic treat with an unexpected dash of cinnamon and a whisper of nutmeg. It’s the comfort I crave on chilly mornings and the perfect accompaniment to a mug of cider.

    But what truly sets this recipe apart isn’t just the rich pumpkin sweetness; it’s the subtle spice blend that makes every bite a delightful surprise. I’ve experimented with adding a pinch of cardamom and a splash of vanilla, turning simple cookies into something memorable. This recipe is made for those who love a touch of elegance in their seasonal baking.

    Spiced Pumpkin Cookies

    These pumpkin cookies are soft and chewy with a tender crumb, featuring a warm spice blend of cinnamon, nutmeg, and a hint of vanilla that enhances the pumpkin flavor. The dough is mixed until smooth, shaped into rounds, and baked until golden, resulting in cookies with a slightly crisp edge and a moist interior.
    Prep Time 20 minutes
    Cook Time 12 minutes
    Total Time 32 minutes
    Servings: 24
    Course: Main Course
    Cuisine: American
    Calories: 150

    Ingredients
      

    • 1 ½ cups all-purpose flour
    • ½ cup granulated sugar
    • ½ cup brown sugar packed
    • ½ cup unsalted butter melted and cooled
    • 1 cup pure pumpkin puree
    • 1 large egg beaten
    • 1 ½ teaspoons ground cinnamon
    • ¼ teaspoon ground nutmeg
    • ½ teaspoon vanilla extract
    • ½ teaspoon baking soda
    • ¼ teaspoon salt

    Equipment

    • Mixing bowls
    • Whisk
    • Measuring cups and spoons
    • Baking sheet
    • Parchment paper
    • Cooling rack

    Method
     

    1. Preheat your oven to 350°F (175°C) and line a baking sheet with parchment paper.
    2. In a large mixing bowl, whisk together the flour, cinnamon, nutmeg, baking soda, and salt until well combined. This sets a flavorful dry base for your cookies.
    3. In a separate bowl, combine the melted butter, granulated sugar, and brown sugar, then whisk until the mixture is smooth and slightly thickened with added air.
    4. Whisk in the beaten egg, pumpkin puree, and vanilla extract to the wet ingredients until the mixture is uniform and velvety.
    5. Pour the wet mixture into the bowl with the dry ingredients and fold gently until all the flour is just incorporated. The dough will be soft but manageable.
    6. Using a cookie scoop or tablespoon, portion out the dough and shape into round balls, placing them evenly spaced on the prepared baking sheet.
    7. Gently flatten each dough ball with the back of a fork or your fingers to encourage even baking and a slightly crispy edge.
    8. Bake in the preheated oven for 12 minutes, or until the edges turn golden and the centers look set but slightly soft.
    9. Remove the baking sheet from the oven and let the cookies cool on the sheet for 5 minutes, allowing them to firm up slightly.
    10. Transfer the cookies to a wire rack and let them cool completely before serving to enjoy their tender, chewy texture with a touch of spice.
    11. Serve these cozy pumpkin cookies with a glass of cold milk or a warm beverage for a perfect seasonal treat.

    Notes

    For an extra touch, sprinkle a bit of coarse sugar on top before baking for a sweet crust.
    Baking these pumpkin cookies is more than just a step into fall; it’s an invitation to slow down and indulge in the small joys of the season. Their tender texture and aromatic spices evoke memories of cozy firesides and family gatherings.

    Whether you’re sharing them with friends or savoring them solo with a hot drink, these cookies bring a moment of warmth and comfort. No matter the chaos of the day, they remind us that simple pleasures often come wrapped in the most charming bites.

  • Spiced Pumpkin Bread with a Secret Twist

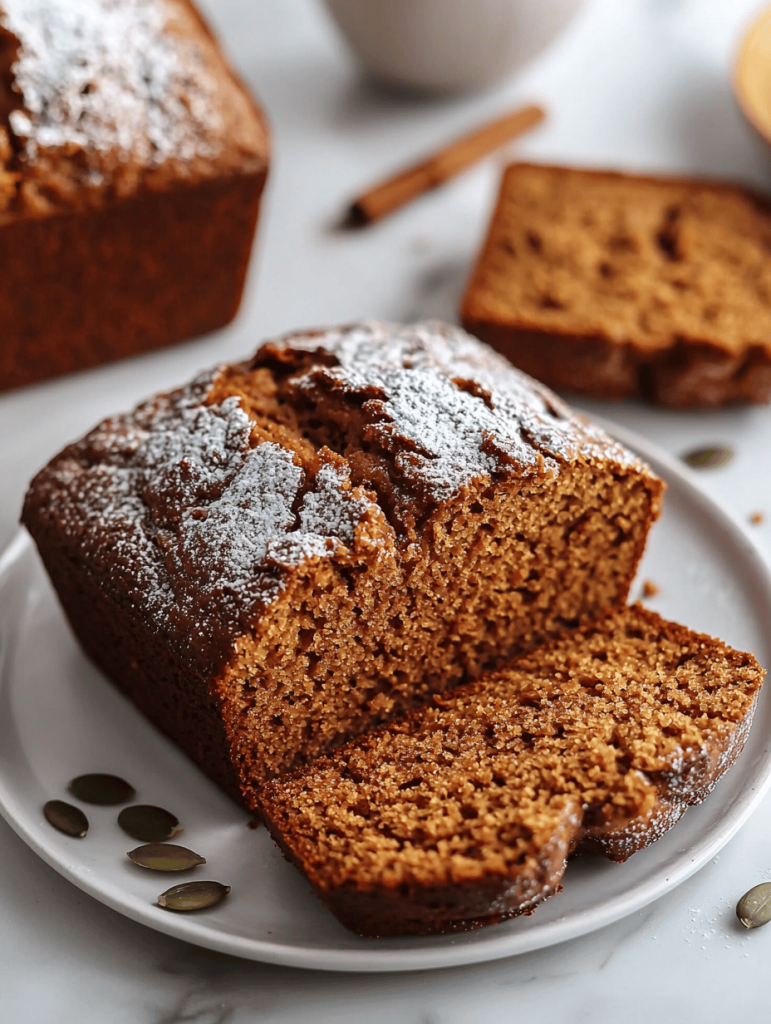
    Spiced Pumpkin Bread with a Secret Twist

    As the leaves turn golden and a cool breeze whispers through the air, I find myself craving more than just pumpkin spice lattes. This pumpkin bread offers a cozy, fragrant escape that celebrates fall’s bounty in every slice. Its moist crumb and tender crumb are a soothing antidote to brisk mornings and lazy Sunday afternoons.

    What sets this bread apart is a hint of unexpected warmth—perhaps a dash of cardamom or a swirl of cream cheese—that elevates a classic into something memorable. Baking this loaf feels like gathering loved ones around; the smell alone promises a comforting embrace. It’s perfect for those quiet moments when you want the scent of autumn to fill your home.

    Autumn Pumpkin Bread

    This pumpkin bread is a moist, tender loaf baked with pureed pumpkin and warm spices, creating a fragrant and hearty treat. Its slightly dense crumb and golden crust make it ideal for cozy mornings or afternoon tea. The addition of subtle flavors like cardamom and a swirl of cream cheese elevate it beyond a basic quick bread.
    Prep Time 15 minutes
    Cook Time 50 minutes
    Total Time 1 hour 5 minutes
    Servings: 8
    Course: Main Course
    Cuisine: American
    Calories: 250

    Ingredients
      

    • 1 3/4 cups all-purpose flour sifted
    • 1 cup sugar
    • 1/2 cup vegetable oil
    • 3 large eggs
    • 1 cup pure pumpkin puree
    • 1 1/2 teaspoons baking soda
    • 1/2 teaspoon salt
    • 1 teaspoon ground cinnamon
    • 1/2 teaspoon ground cardamom
    • 4 oz cream cheese for optional swirl

    Equipment

    • Mixing bowls
    • Whisk
    • Rubber spatula
    • Loaf pan
    • Oven

    Method
     

    1. Preheat your oven to 350°F (175°C) and grease a standard loaf pan to ensure easy removal of the bread once baked.
    2. In a large mixing bowl, whisk together the melted vegetable oil and sugar until well combined and slightly glossy.
    3. Add the eggs one at a time, whisking thoroughly after each addition until the mixture is smooth and creamy.
    4. Stir in the pumpkin puree until evenly incorporated, creating a thick, orange batter.
    5. Sift together the flour, baking soda, salt, cinnamon, and cardamom in a separate bowl to distribute the spices evenly.
    6. Gradually fold the dry ingredients into the wet mixture using a spatula, mixing just until no streaks remain and the batter is thick but foldable.
    7. Pour the batter into the prepared loaf pan, spreading it evenly with a spatula for a smooth top.
    8. If desired, warm the cream cheese slightly and swirl it into the top of the batter for a fun marbled effect.
    9. Bake for about 50 minutes, or until a toothpick inserted into the center comes out clean and the loaf turns a deep golden brown.
    10. Remove the bread from the oven and allow it to cool in the pan for 10 minutes before transferring it to a wire rack to cool completely.
    11. Slice the loaf once cooled, revealing a moist crumb with a tender interior and a slightly crisp crust, ready to serve and enjoy.

    Notes

    For added flavor, consider sprinkling chopped pecans or walnuts on top before baking.

    This pumpkin bread isn’t just a treat; it’s a way to mark the season with something homey and delightful. Each bite is a reminder that simple ingredients, with a little bit of love, create the most satisfying moments. Whether toasted with butter or enjoyed plain, it’s a staple that always brings a smile.

    Now that you know how to whip up this seasonal favorite, it’s ready to become part of your autumn traditions. The aroma alone makes it worth the effort, but the rich, spiced flavor keeps everyone coming back for more. Happy baking, and enjoy the cozy comfort this bread provides as the days grow cooler.

  • The Secret Ingredient That Turns Peach Crumble into Nostalgic Bliss

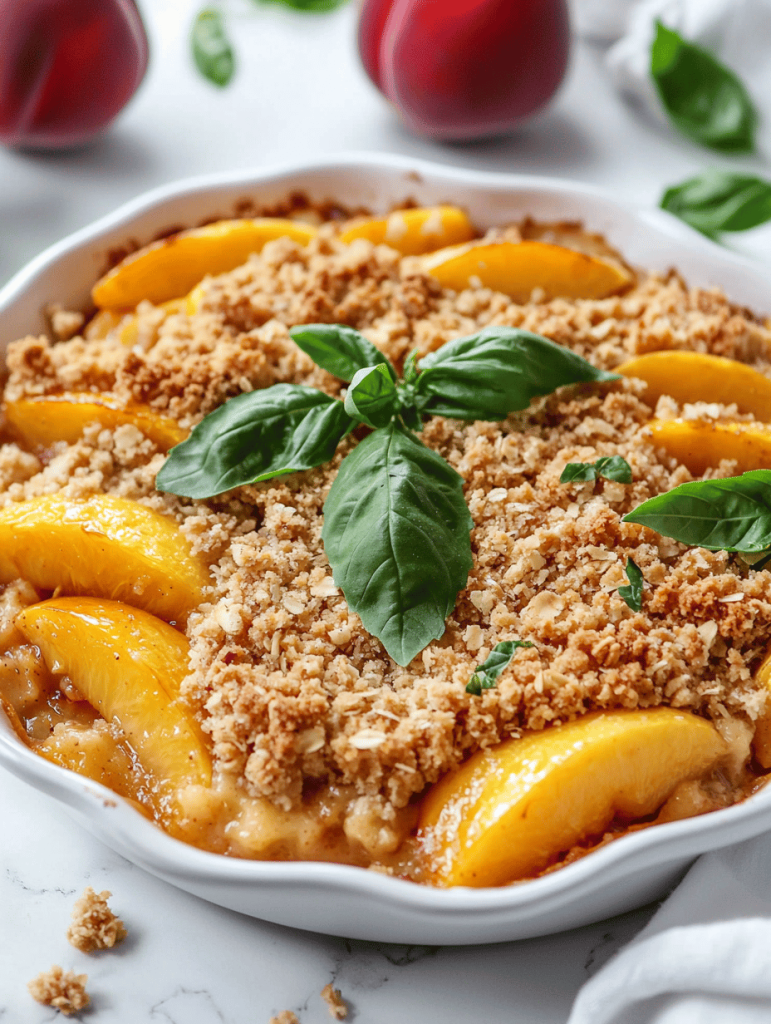
    The Secret Ingredient That Turns Peach Crumble into Nostalgic Bliss

    As summer wanes, I find myself craving a dessert that holds onto those warm-weather memories. Peach crumble is my go-to, but what really makes it special is an unexpected twist—adding a dash of finely chopped fresh basil. It feels almost rebellious, yet the basil elevates the sweet fruit aroma with a hint of herbal brightness that dances on the tongue.

    This recipe isn’t just about the peaches and sugar—it’s about creating a sensory experience that transports you back to lazy afternoons in the garden, listening to buzzing bees and feeling the sun on your skin. The aroma as it bakes is a cozy mix of caramel and ripe fruit, but with that herbal whisper that’s hard to forget. It’s simplicity, with a touch of unexpected charm.

    Peach Basil Crumble

    Peach basil crumble combines ripe, juicy peaches with a crunchy oat topping infused with fresh basil, creating a dessert with contrasting textures of tender fruit and crisp crumble. The dish is baked until golden brown, with bubbling fruit and fragrant herbal notes on top, showcasing a rustic, inviting appearance.
    Prep Time 15 minutes
    Cook Time 40 minutes
    Total Time 55 minutes
    Servings: 6
    Course: Main Course
    Cuisine: American
    Calories: 290

    Ingredients
      

    • 6 cups ripe peaches peeled, pitted, and sliced
    • 1 tablespoon finely chopped fresh basil
    • 1/2 cup granulated sugar
    • 1 tablespoon lemon juice
    • 1 cup old-fashioned oats
    • 1/2 cup all-purpose flour
    • 1/3 cup light brown sugar
    • 1/2 cup unsalted butter cold, cut into small cubes
    • a pinch salt

    Equipment

    • Mixing bowls
    • Baking dish
    • Measuring cups and spoons
    • Oven

    Method
     

    1. Preheat your oven to 375°F (190°C). In a large bowl, gently toss the sliced peaches with granulated sugar, lemon juice, and the chopped basil. Spread the peach mixture evenly into a greased baking dish.
    2. In another bowl, combine oats, flour, brown sugar, and a pinch of salt. Mix well to evenly distribute the dry ingredients.
    3. Add the cold, cubed butter to the dry ingredients. Use your fingertips or a pastry cutter to mix until the mixture resembles coarse crumbs with some pea-sized pieces.
    4. Sprinkle the crumble topping evenly over the peach filling, covering all the fruit to get a full, textured topping.
    5. Place the baking dish in the preheated oven and bake for about 40 minutes, until the topping is golden brown and the peaches are bubbling around the edges.
    6. Remove the crumble from the oven and let it cool slightly. Serve warm, optionally garnished with fresh basil or a scoop of vanilla ice cream for added richness.

    Sharing this peach crumble feels like reliving a nostalgic summer evening, even as the season turns. It’s a dessert rooted in tradition but kissed with a playful flavor that surprises each spoonful. A perfect ending for gatherings or quiet nights alone, when you want comfort in every bite.

    Once you’ve tried this twist, it becomes part of your seasonal repertoire—an ode to the fleeting sweetness of summer peaches. Paired with a cold glass of milk or a dollop of whipped cream, it’s a treat that invites slow savoring and gentle smiles. The kitchen fills with a warm, fruity aroma, inviting you to linger just a bit longer.

  • Eerie Delights: Crafting the Perfect Halloween Brain Jello Mold

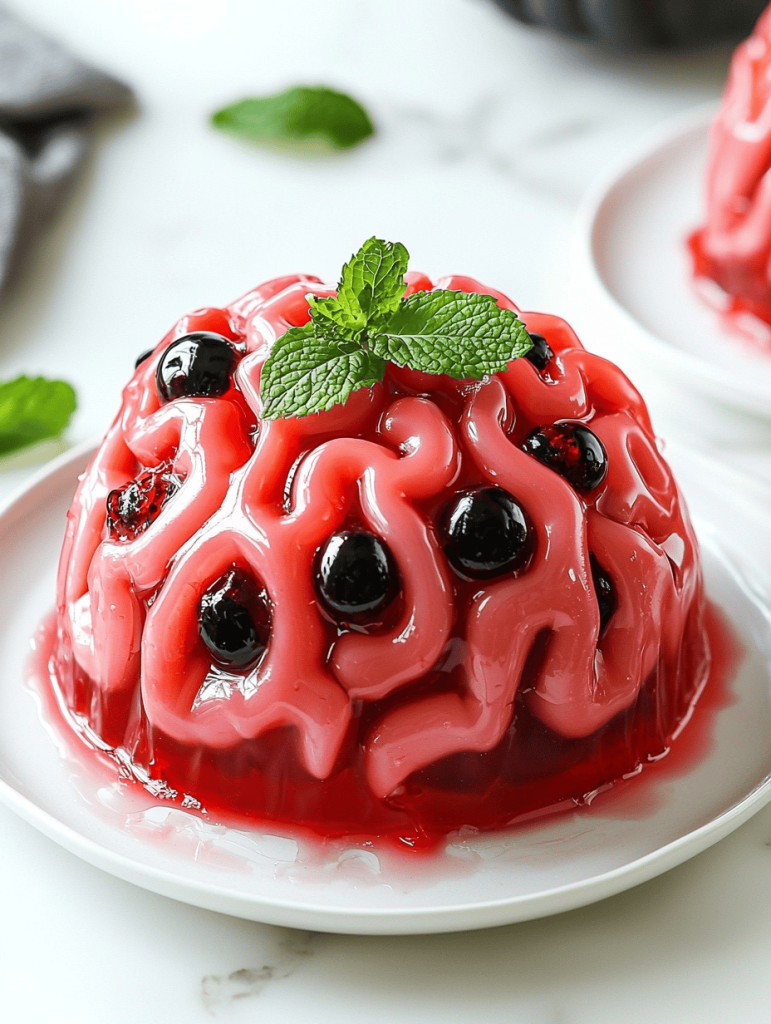
    Eerie Delights: Crafting the Perfect Halloween Brain Jello Mold

    Imagine a spooky dinner table adorned with a ghoulish centerpiece thats as edible art. The Halloween Brain Jello Mold transforms simple gelatin into a grossly realistic brain, perfect for shocking guests and sparking giggles.
    This recipe offers a fun twist on tradition, blending culinary creativity with childhood nostalgia. Its not just a treat, but also a conversation starter that brings everyone closer through shared giggles and gross-out moments.

    Using everyday ingredients, you can achieve a surprisingly spine-chilling look that makes every bite a little more memorable. The secret lies in the texture and color, creating the illusion of brain matter with just a few tricks. So, gather your ingredients and prepare to turn your kitchen into a mad scientists lab—minus the chaos, plus lots of fun.

    Halloween Brain Jello Mold

    This dish is a gelatin-based dessert that resembles a realistic brain, crafted by combining flavored gelatin with a creamy component to achieve a lumpy, brain-like texture. The final presentation features a grotesque, brain-shaped mold with a pinkish hue, offering a fun and spooky table centerpiece that looks terrifying yet tastes sweet and fruity.
    Prep Time 20 minutes
    Cook Time 10 minutes
    Total Time 30 minutes
    Servings: 8
    Course: Main Course
    Cuisine: Halloween
    Calories: 120

    Ingredients
      

    • 3 envelopes unflavored gelatin powder
    • 2 cups fruit juice (e.g., grape or cherry) for flavor and color
    • 1 cup water divided
    • 1 cup heavy cream for a milky, brain-like appearance
    • 1/4 cup sugar optional, for sweetness
    • 1 tsp vanilla extract

    Equipment

    • Saucepan
    • Brain-shaped gelatin mold
    • Mixing bowls
    • Whisk
    • Measuring cups and spoons
    • Plastic wrap

    Method
     

    1. Pour 1 cup of fruit juice into a mixing bowl and sprinkle the gelatin powder evenly over the surface. Let it sit for 5 minutes to let the gelatin bloom and soften.
    2. Heat 1/2 cup of water in a saucepan until just simmering, then pour it over the bloomed gelatin. Whisk until completely dissolved and smooth.
    3. Add sugar and vanilla extract to the gelatin mixture, then stir until the sugar dissolves completely. Allow the mixture to cool slightly.
    4. In a separate bowl, whip the heavy cream until it forms soft peaks. Gently fold the whipped cream into the cooled gelatin mixture to create a lumpy, brain-like texture.
    5. Pour the remaining 1/2 cup of water into a saucepan and warm until just simmering, then add the remaining fruit juice. Stir well.
    6. Slowly add the warm fruit juice mixture into the gelatin-cream mixture, folding gently until combined and slightly thickened, resembling brain tissue.
    7. Pour the combined gelatin mixture into the brain-shaped mold, smoothing the surface with a spatula. Cover tightly with plastic wrap and refrigerate for at least 4 hours or until fully set.
    8. Once set, carefully invert the mold onto a serving plate. Gently tap or wiggle the mold to release the gelatin, revealing a realistic, brain-like structure with a textured, gross appearance.
    9. Decorate with additional colored gels or edible blood if you’d like for extra gruesome detail. Slice and serve, revealing the fleshy, brain-like interior.

    Notes

    For a more authentic look, use uneven textures and add small ridges with a toothpick before refrigerating.

    This Halloween, go beyond candy and costumes. Serve up a creepy edible centerpiece that gets everyone talking.
    The thrill is in the details: the oozing green, the slimy texture, the perfect gross-out factor. Your guests will be sharing stories and snapping photos, making your party the one to remember.
    Enjoy crafting this eerie delicacy and revel in the reactions it provokes. Its a deliciously wicked way to celebrate the spooky season with a dash of culinary horror fun.

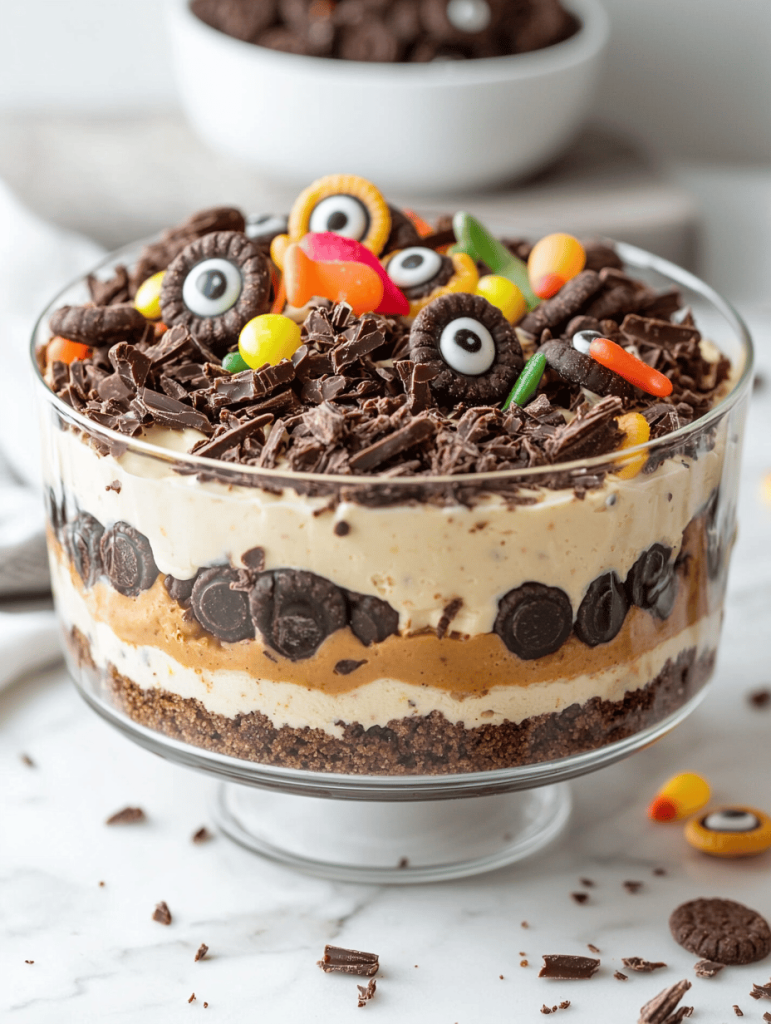
  • Spooky Sensation: Halloween Dirt Cake with Gummy Worms

    Spooky Sensation: Halloween Dirt Cake with Gummy Worms

    Halloween is a season when chaos reigns and creative treats take center stage. This Dirt Cake is not just dessert; it4s a nostalgic mash-up of chocolatey crunch and creepy crawly gummy worms that evoke childhood giggles. The best part? It4s effortless to assemble, making it perfect for last-minute spooky parties.

    Imagine a layered landscape of chocolate pudding, crushed cookies, and wiggle-jiggly gummy worms. As you dig in, you get that satisfying crunch and gooey texture with a sweet, slightly bitter chocolatey scent that fills the room. It4s a playful, slightly gory centerpiece that kids and adults will love to stare at and devour.

    Halloween Dirt Cake

    Halloween Dirt Cake is a layered dessert featuring chocolate pudding, crushed cookies, and gummy worms to mimic a muddy, creepy landscape. It has a crunchy, creamy texture with a playful appearance, combining smooth pudding layers with crumbly cookie beds and jiggly gummy accents.
    Prep Time 15 minutes
    Cook Time 10 minutes
    Total Time 25 minutes
    Servings: 8
    Course: Main Course
    Cuisine: American
    Calories: 350

    Ingredients
      

    • 1 box chocolate instant pudding mix just the mix, plus ingredients on package
    • 2 cups cold milk
    • 1 package chocolate sandwich cookies like Oreos, about 15-20 cookies
    • Gummy worms variable gummy worms for decoration and creepy crawly effect

    Equipment

    • Mixing bowls
    • Instant pudding whisk or spoon
    • Measuring cups and spoons
    • Food processor or zip-top bag and rolling pin
    • Large serving dish or individual cups
    • Spoon or spatula

    Method
     

    1. Combine the chocolate pudding mix with cold milk in a mixing bowl and whisk vigorously until the mixture thickens and becomes smooth, about 2-3 minutes.
    2. Place the cookies in a food processor or insert them into a zip-top bag and crush them into fine crumbs using a rolling pin or the back of a spoon.
    3. Spoon a layer of crushed cookies into the bottom of a large serving dish or individual cups, creating a crumbly bed resembling dirt.
    4. Pour the prepared chocolate pudding over the cookie layer, spreading it evenly to create a smooth, dark surface.
    5. Add another layer of crushed cookies on top of the pudding to build up a layered, muddy landscape effect.
    6. Decorate the top with gummy worms, inserting them partially into the pudding and cookie layers to resemble creepy crawlies emerging from the dirt.
    7. Chill the cake in the refrigerator for at least 1 hour to allow the layers to set and the flavors to meld.
    8. Once chilled, serve the Dirt Cake in slices or individual cups, with gummy worms visibly crawling through the layers for a fun Halloween presentation.
    This Halloween Dirt Cake is a delightfully chaotic dessert that brings out the kid in everyone. Its simple ingredients hide a world of delicious mischief within each spoonful. Perfect for grabbing a spoon and tossing together in a flash, it frees you to enjoy the tricks and treats of the night.

    As the season turns colder, this treat adds a fun and slightly wild element to your festivities. The crunch, the chocolate, and the gummy worms are a reminder that sometimes, the most memorable moments come from the messiest, most playful dishes.

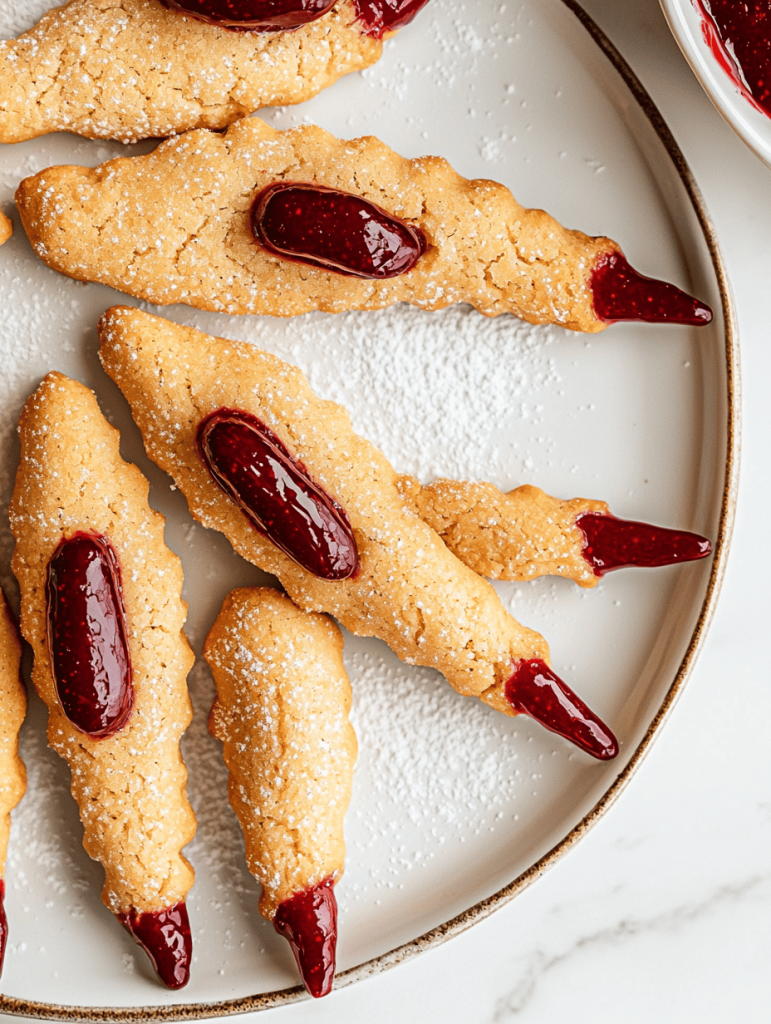
  • Magic in Every Bite: Haunted Witch Finger Cookies for Halloween

    Magic in Every Bite: Haunted Witch Finger Cookies for Halloween

    As a food blogger with a penchant for the spooky, I always seek out treats that tell a story beyond their ingredients. These Witch Finger Cookies do just that, bringing a touch of eerie elegance to my Halloween spread. The smell of buttery dough mingled with a hint of almond is the first whisper of magic in the air.

    Each cookie looks like a tiny enchanted finger, complete with knuckles and a sinister nail made from a slivered almond. The process transforms a simple shortbread into a playful, slightly chaotic ritual that’s perfect for costume parties or family ghost stories. There’s a mischievous joy that comes from creating these tiny bits of edible folklore.

    Witch Finger Cookies

    Witch Finger Cookies are playful, spooky-looking shortbread treats shaped like tiny enchanted fingers. They are crafted from buttery dough with almond slivers for fingernails, resulting in a crisp and crumbly final texture with a slightly chewy bite. The detailed shaping and finishing touches give them an eerily realistic appearance perfect for Halloween festivities.
    Prep Time 20 minutes
    Cook Time 15 minutes
    Total Time 35 minutes
    Servings: 24
    Course: Main Course
    Cuisine: Halloween
    Calories: 150

    Ingredients
      

    • 1 cup unsalted butter softened
    • 1 cup granulated sugar
    • 1 large egg at room temperature
    • 1 teaspoon vanilla extract
    • 2 1/2 cups all-purpose flour sifted for best results
    • 1/4 teaspoon salt
    • 24 slivered almond slices for nails

    Equipment

    • Mixing bowl
    • Baking sheet
    • Parchment paper
    • Knife
    • Baking Spatula

    Method
     

    1. In a large mixing bowl, beat the softened butter and sugar together until the mixture is light and fluffy, with a pale color and a gentle aroma of vanilla.
    2. Add the egg and vanilla extract to the butter-sugar mixture, then beat again until combined and smooth, about 1-2 minutes.
    3. Gradually add the sifted flour and salt to the wet ingredients, folding gently with a spatula or mixing on low speed until the dough just comes together and is soft but manageable.
    4. Divide the dough into manageable portions, then roll each into a long, thin cylinder about 8 inches long, shaping them into finger-like logs.
    5. Place the shaped fingers onto a parchment-lined baking sheet, spacing them slightly apart.
    6. Use the tip of a knife to indent knuckles along each finger, creating a natural finger joint appearance.
    7. Press a slivered almond at the tip of each finger to resemble a sinister fingernail.
    8. Bake the cookies in a preheated oven at 350°F (175°C) for 12-15 minutes, or until they are lightly golden around the edges and firm to the touch.
    9. Remove from the oven and allow the cookies to cool on the baking sheet for 5 minutes before transferring them to a wire rack to cool completely.
    10. Once cooled, check the nails and knuckles, adjusting or reattaching almonds if needed, and serve the spooky treats for your Halloween party.

    Notes

    Ensure the almond nails are pressed firmly to prevent falling off during baking. For extra creepiness, you can draw blood or cracks with red icing.

    In the end, these Witch Finger Cookies are more than just a treat—they’re a celebration of the playful, spooky spirit of Halloween. Watching friends and family bite into these creepy confections never fails to spark giggles and surprise. They’re a reminder that sometimes, the messiest kitchen adventures create the most memorable joys.

    As the season dims and the last spooky shadow fades, these cookies leave behind a little spark of Halloween magic. They turn a simple cookie jar into a cabinet of curiosities that keeps the spirit alive well beyond October 31st. And that’s precisely why I always keep the ingredients on hand for the next haunting season.

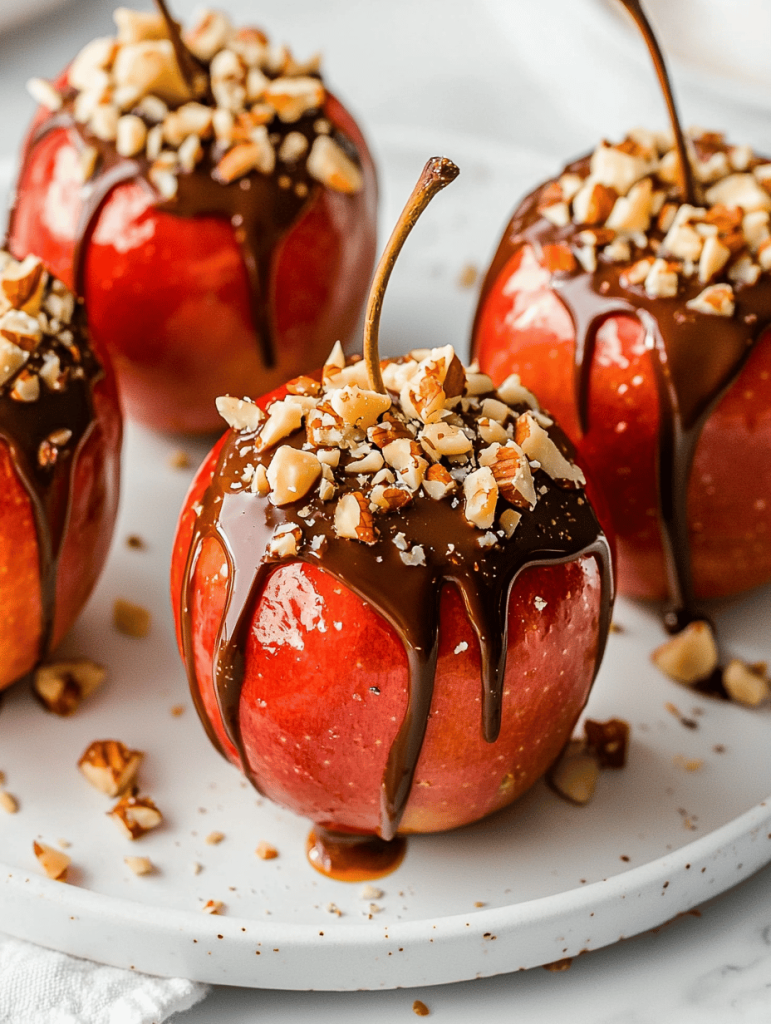
  • Haunted Sweetness: The Spooky Art of Poison Toffee Apples

    Haunted Sweetness: The Spooky Art of Poison Toffee Apples

    Ever wondered how to turn a nostalgic treat into a spooky spectacle? This Halloween, I invite you to delve into a world where sweet meets sinister with Poison Toffee Apples. It’s not just about biting into that glossy coating; it’s about feeling the crunch, the sticky caramel, and a whisper of fateful intrigue.

    The magic of this recipe lies in its playful chaos—perfect for Halloween parties or a cheeky twisted tradition. The vibrant colors, the sharp bites of apple, and the ghostly sheen of toffee make it an eye-catching centerpiece. Plus, the thrill of creating something that looks just a little too dangerous is a delight in itself.

    Let’s explore how you can craft these eerie delights that dance on the line between sweetness and spook. They’re a perfect treat to surprise friends or to add an unusual twist to your holiday table.

    Poison Toffee Apples

    Poison Toffee Apples are whole apples coated in glossy, amber-colored toffee, with a crunchy exterior and a chewy interior. They are decorated with vibrant, colorful sprinkles or edible glitter to create an eerie, festive look perfect for Halloween celebrations. The final appearance is a shiny, colorful apple with a textured coating that invites biting into a sweet, sticky treat.
    Prep Time 15 minutes
    Cook Time 10 minutes
    Total Time 25 minutes
    Servings: 4
    Course: Main Course
    Cuisine: Halloween
    Calories: 250

    Ingredients
      

    • 4 pieces apples (firm, preferably Granny Smith or Fuji) washed and dried
    • 2 cups granulated sugar for toffee
    • 1/2 cup corn syrup light corn syrup adds gloss and prevents crystallization
    • 1/2 cup unsalted butter adds richness and helps achieve the right texture
    • 1 teaspoon vanilla extract vanilla extract
    • optional food coloring or edible glitter for spooky decoration

    Equipment

    • Wooden skewers or sticks
    • Heavy-bottomed saucepan

    Method
     

    1. Insert wooden skewers or sticks into the stem end of each apple, pressing them in firmly.
    2. Combine sugar, corn syrup, and a splash of water in a heavy-bottomed saucepan over medium heat, stirring gently until the sugar dissolves completely and the mixture begins to boil.
    3. Allow the mixture to boil without stirring until it reaches a deep amber color, about 300°F (hard crack stage). Watch carefully as it can quickly darken.
    4. Remove the pan from heat and carefully stir in the butter and vanilla extract until smooth.
    5. Quickly dip each apple into the hot toffee mixture, tilting the pan as needed to coat evenly. Let the excess drip off for a few seconds.
    6. Place the coated apples on a parchment-lined tray to cool and harden. Repeat with remaining apples.
    7. Once the toffee has set and cooled, decorate with vibrantly colored edible glitter or sprinkles for a spooky effect.
    8. Serve the Poison Toffee Apples at room temperature, showcasing their shiny, colorful coating, perfect for Halloween festivities.

    Notes

    Ensure the toffee reaches the correct temperature for a hard crack finish. Use caution as the hot sugar mixture is very hot and can cause burns. Decorating with edible glitter enhances the spooky visual effect.
    These Poison Toffee Apples are more than just a treat; they’re a line of playful mischief in your Halloween repertoire. The combination of crunchy, sticky, and sweet flavors creates a memorable bite every time.

    As the season shifts and the nights grow longer, these apples remind us of childhood mysteries and the delight of a little chaos. They’re spectacular on a darkened table or wrapped as spooky gifts. Whatever your plans, they’ll leave a lasting impression of fun and fright.

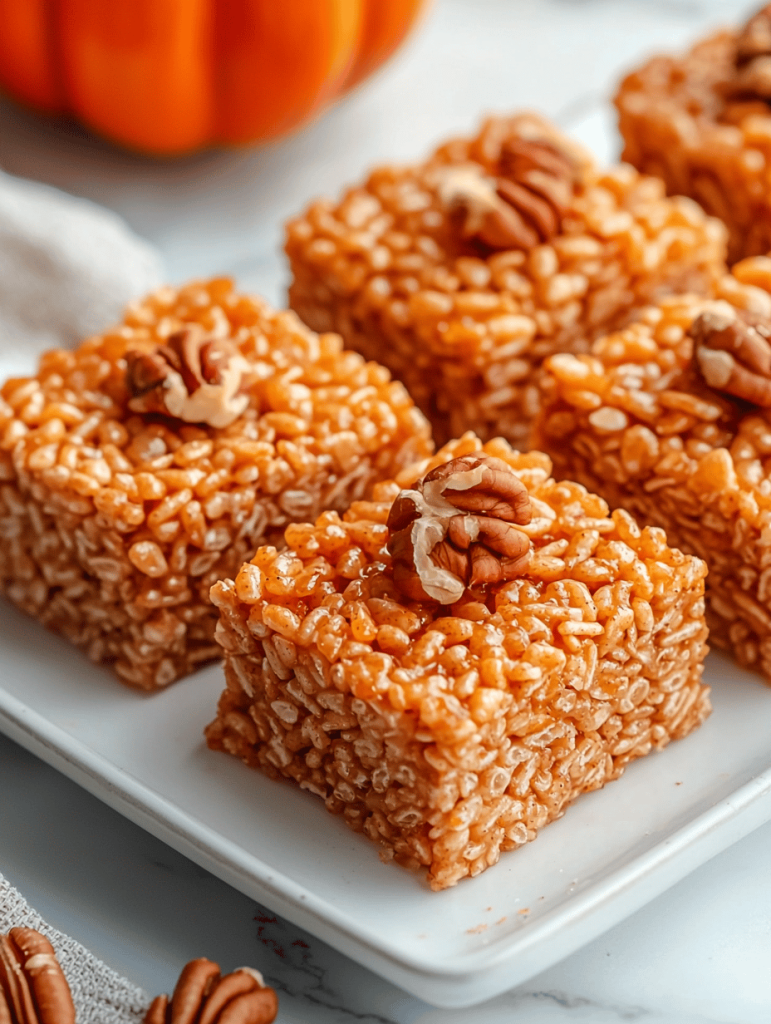
  • Spooky Sweetness: Halloween Pumpkin Rice Krispie Treats

    Spooky Sweetness: Halloween Pumpkin Rice Krispie Treats

    As the air turns crisp and orange leaves dance on the sidewalks, I find myself craving a treat that captures the essence of fall with a playful twist. This year, I decided to craft something unexpected for Halloween — pumpkin-flavored Rice Krispie treats that look as adorable as they taste. The combination of sweet marshmallow and warm pumpkin spices makes every bite a nostalgic yet festive experience.

    What sets these treats apart is not just their flavor, but their vibrant orange hue and the joy of creating something both simple and striking. They’re perfect for spooky parties or a cozy evening watching horror classics with loved ones. Plus, they add a splash of whimsy to any candy table without demanding hours in the kitchen.

    Pumpkin-Flavored Rice Krispie Treats

    These Rice Krispie treats are made by melting marshmallows with butter and mixing in warm pumpkin puree and spices, resulting in a vibrant orange, chewy snack. They are pressed into a pan to set, creating a soft, sticky, and festive treat with a slight crunch from the cereal. The final product is a colorful, pumpkin-spiced dessert perfect for Halloween or fall gatherings.
    Prep Time 15 minutes
    Cook Time 10 minutes
    Total Time 25 minutes
    Servings: 12
    Course: Main Course
    Cuisine: American
    Calories: 150

    Ingredients
      

    • 6 cups Rice Krispies cereal
    • 10 ounces marshmallows mini or large, depending on preference
    • 4 tablespoons unsalted butter
    • 1 cup canned pumpkin puree not pumpkin pie filling
    • 1 teaspoon cinnamon ground
    • 1/2 teaspoon nutmeg ground
    • 1/4 teaspoon clove ground
    • 1/4 teaspoon ginger ground

    Equipment

    • Large saucepan
    • Rubber spatula
    • 9×13 inch baking pan
    • Parchment paper or non-stick spray

    Method
     

    1. Grease your baking pan or line it with parchment paper to prevent sticking.
    2. In a large saucepan, melt the butter over medium heat until it starts bubbling and smells rich.
    3. Add the marshmallows to the melted butter and stir continuously until completely melted and smooth, creating a gooey mixture.
    4. Stir in the pumpkin puree along with the cinnamon, nutmeg, clove, and ginger until the mixture is fragrant and uniform in color.
    5. Remove the saucepan from heat and immediately fold in the Rice Krispies cereal until evenly coated with the pumpkin-spiced marshmallow mixture.
    6. Using a spatula, press the mixture into the prepared baking pan, spreading it out evenly to about 1-inch thickness.
    7. Press down gently to compact the treats, ensuring they hold together well.
    8. Let the treats cool at room temperature for at least 30 minutes, or until they are firm enough to cut.
    9. Once cooled, cut into squares or rectangles with a sharp knife for clean edges.
    10. Arrange the treats on a serving platter and enjoy their soft, sticky, and festive flavor.

    Notes

    For an extra touch, decorate with mini chocolate chips or orange sprinkles before serving.

    These pumpkin Rice Krispie treats are a delightful way to celebrate the season’s flavors with minimal fuss. The first bite brings that perfect crunch followed by gooey marshmallow and the comforting aroma of cinnamon and nutmeg. They’re a reminder that you don’t need elaborate ingredients to make memorable holiday sweets.

    Enjoy these treats as a charming centerpiece or a fun gift for friends and family. They capture the spirit of Halloween—playful, spooky, and sweet—without any fuss. Every batch is a small reminder that the simplest ideas often bring the biggest smiles, especially when flavored with a little seasonal magic.

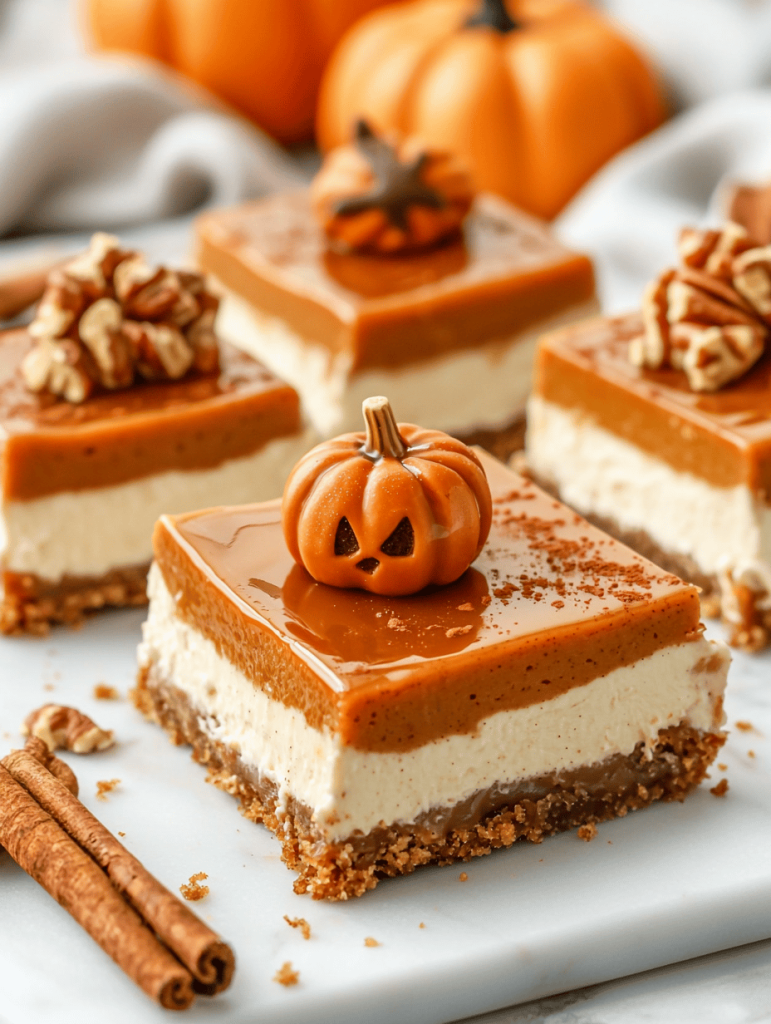
  • Spooky Sweetness: Halloween Pumpkin Cheesecake Bars with a Twist

    Spooky Sweetness: Halloween Pumpkin Cheesecake Bars with a Twist

    As October’s chill sets in, I find myself craving desserts that tell a story of nostalgia with a dash of chaos. These Halloween Pumpkin Cheesecake Bars are not your average treat—they’re a carnival of textures and flavors, blending the creamy richness of cheesecake with the spicy kiss of fall pumpkin. What makes them truly special? A secret swirl of caramel that sneaks a hint of warmth through every bite.

    Imagine a buttery graham cracker crust, topped with velvety pumpkin mixture, all crowned with a whip of cinnamon-spiced cream. I love how they balance sweetness and spice, echoing the cozy chaos of Halloween night. Plus, they look downright spooky, yet taste like a sweet hug that comforted me through many haunted seasons.

    ## WHY I LOVE THIS RECIPE?
    – It captures the essence of fall in every bite, from cinnamon to nutmeg.
    – The caramel swirl adds an unexpected gooey surprise that delights the senses.
    – Perfect for parties—children and adults will cheer for the bold flavors.
    – Making it is a playful chaos that ends with a delightful, comforting reward.

    Halloween Pumpkin Cheesecake Bars

    These Pumpkin Cheesecake Bars feature a buttery graham cracker crust topped with a velvety pumpkin-spiced filling. Swirled with caramel and finished with cinnamon-spiced whipped cream, they combine creamy textures with fruity and spicy flavors, finished with a glossy, inviting appearance.
    Prep Time 20 minutes
    Cook Time 40 minutes
    Total Time 1 hour
    Servings: 12
    Course: Main Course
    Cuisine: American
    Calories: 350

    Ingredients
      

    • 1 1/2 cups graham cracker crumbs about 10 full sheets crushed
    • 1/4 cup granulated sugar
    • 1/2 cup unsalted butter melted
    • 16 oz cream cheese softened
    • 1 cup granulated sugar
    • 1 cup canned pumpkin not pie filling
    • 3 large eggs
    • 1 1/2 teaspoons ground cinnamon
    • 1/2 teaspoon ground nutmeg
    • 1/4 teaspoon ground cloves
    • 1/4 teaspoon salt
    • 1/3 cup caramel sauce for swirling
    • 1 cup heavy cream
    • 2 tablespoons powdered sugar
    • 1 teaspoon ground cinnamon for whipped cream

    Equipment

    • 8×8-inch baking pan
    • Mixing bowls
    • Electric mixer
    • Spatula
    • Whisk
    • Measuring cups and spoons
    • Parchment paper

    Method
     

    1. Line the baking pan with parchment paper and in a mixing bowl, combine the graham cracker crumbs and sugar. Pour in the melted butter and mix until the crumbs are evenly coated and the mixture looks like wet sand. Press this mixture firmly into the bottom of the prepared pan to form an even crust.
    2. In a large bowl, beat the softened cream cheese until smooth and creamy, about 2-3 minutes. Add the sugar and continue beating until combined, and the mixture is fluffy.
    3. In a separate bowl, whisk together the pumpkin, eggs, cinnamon, nutmeg, cloves, and salt until smooth. Gently fold this pumpkin mixture into the cream cheese batter until fully incorporated.
    4. Pour the pumpkin filling over the prepared crust, spreading it out evenly with a spatula. Tap the pan gently on the counter to release any air bubbles and create a smooth top.
    5. Spoon the caramel sauce in small dollops over the pumpkin filling. Use a toothpick or skewer to swirl the caramel into the filling to create a marbled effect.
    6. Bake in a preheated oven at 325°F (160°C) for about 40 minutes, or until the edges are set and the center slightly jiggles when shaken. Let the bars cool completely in the pan on a wire rack.
    7. In a chilled bowl, whip the heavy cream with powdered sugar, cinnamon, until stiff peaks form. Spread or pipe the cinnamon-spiced whipped cream over the cooled bars.
    8. Slice into squares and serve, enjoying the combination of creamy, spiced pumpkin filling, crunchy crust, and swirl of caramel in each bite.
    Baking these Halloween Pumpkin Cheesecake Bars has become a seasonal ritual I genuinely look forward to. The aroma of pumpkin mixed with warm spices quickly fills my kitchen, turning even the busiest day into a cozy celebration. Every slice reminds me of autumns past and the simple joys of sharing something sweet.

    This recipe isn’t just about the taste; it’s about creating moments of joy amid the fall chaos. Whether for a festive gathering or a quiet evening alone, these bars bring a touch of magic to any moment. As the season changes, I find comfort in the little traditions, and these bars are now one of my favorites.

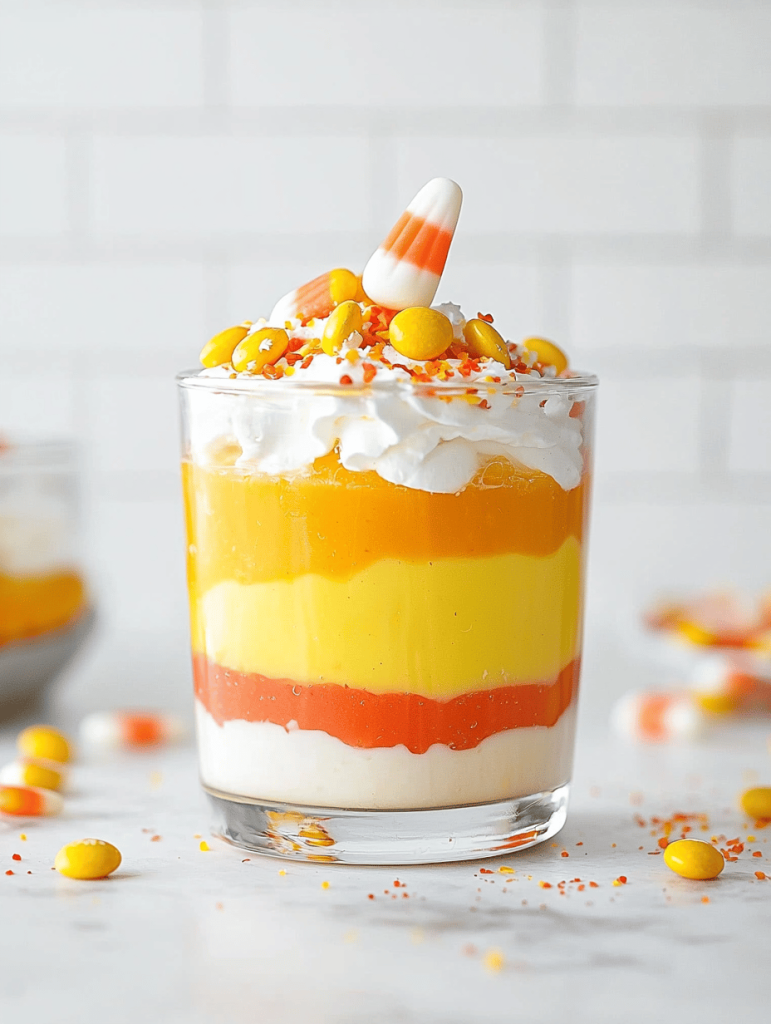
  • Halloween Candy Corn Parfaits: A Nostalgic Spectacle in Every Spoon

    Halloween Candy Corn Parfaits: A Nostalgic Spectacle in Every Spoon

    Walking down the candy aisle, I often find myself reminiscing about childhood Halloween nights. The bright orange, white, and yellow of candy corn always evoke a playful chaos, like a sweet treasure hunt. This recipe transforms that classic treat into a layered parfait that’s both fun to assemble and delightful to eat.

    Imagine a dessert that captures the whimsical spirit of Halloween with each spoonful, yet is unexpectedly sophisticated. It’s the perfect way to surprise guests or indulge in some seasonal nostalgia. Plus, it’s so easy to assemble, you’ll want to make it every year.

    ## WHY I LOVE THIS RECIPE?
    – It sparks joy and childhood memories with every bite.
    – The layers look like a mini Halloween celebration.
    – An effortless way to elevate simple candies into a fancy dessert.
    – Perfect for parties, family dinners, or a solo treat after a long week.
    – Absolutely chaotic to assemble but totally worth it.

    Candy Corn Parfait

    This layered parfait features colorful candy corn candies layered with creamy yogurt or pudding, creating a visually appealing and sweet dessert. The dish is assembled in glasses or jars, with contrasting layers that resemble the classic Halloween treat, resulting in a playful and festive presentation.
    Prep Time 10 minutes
    Total Time 10 minutes
    Servings: 4
    Course: Main Course
    Cuisine: American
    Calories: 150

    Ingredients
      

    • 1 cup vanilla yogurt or pudding smooth and creamy
    • 1 cup candy corn candies assorted colors and sizes

    Equipment

    • Small mixing bowls
    • Serving glasses or jars
    • Spoon
    • Knife

    Method
     

    1. Spoon a generous layer of vanilla yogurt or pudding into the bottom of each glass or jar.
    2. Add a handful of colorful candy corn on top of the first layer, creating a bright, playful contrast.
    3. Repeat the layering process: add another layer of yogurt or pudding over the candies, then top with more candy corn, until the glasses are filled.
    4. Gently press down the layers to ensure they settle and are visually distinct, with the colorful candy corn visible at the top.
    5. Optionally, garnish the top with a few more pieces of candy corn for a festive touch.
    6. Chill the parfaits in the refrigerator for about 10 minutes to allow the flavors to meld and any layers to firm up slightly.
    7. Serve the parfaits chilled, with their colorful layers clearly visible, ready to enjoy as a fun Halloween dessert.
    These Candy Corn Parfaits are more than just a treat—they’re a small ritual of seasonal joy. They remind me that desserts can be simple, playful, and full of nostalgic magic. Sharing them makes the holiday feel even more special.

    Whenever I make these, I feel a little more connected to those carefree Halloween nights. The mixture of creamy texture and crunchy candy brings a tactile dimension that keeps everyone reaching for just one more spoonful. Seasons change, but these parfaits stay a sweet reminder of fun and creativity.