Category: Beverages

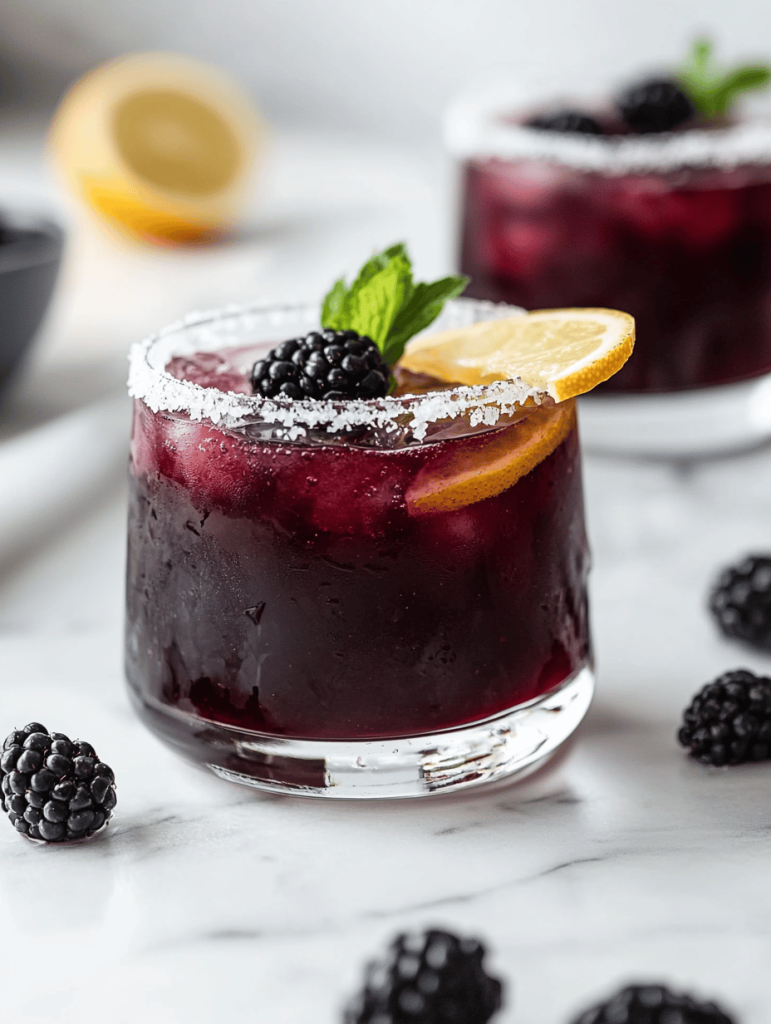
  • Enchanting Black Magic Margarita for a Haunted Halloween

    Enchanting Black Magic Margarita for a Haunted Halloween

    Halloween is my favorite time to get a little mischievous in the kitchen. I love creating drinks that look as spooky as they taste, and this Black Magic Margarita hits all the right notes of eerie and delicious. Its deep, swirling black hue reminds me of witches’ potions and mystical nights under the moon.

    The moment you pour this drink, you’re transported to a dimension where the ordinary turns extraordinary. The smoky aroma of tequila mingles with a hint of citrus, and the black salt rim adds an extra layer of enchantment. It’s perfect for impressing guests or treating yourself to a spooky cocktail even on a casual night.

    **WHY I LOVE THIS RECIPE?**

    • I adore how it transforms a classic margarita into something spellbinding and mysterious.
    • The black food coloring is so easy to work with, and it instantly adds drama to any gathering.
    • The combination of lime and tequila provides a bright contrast to the dark, moody appearance.
    • It’s a nostalgic twist on my favorite party cocktail, infused with a little Halloween magic.

    Black Magic Margarita

    This cocktail features a deep black hue created by food coloring, combined with tequila, lime juice, and orange liqueur. It is shaken until chilled and served with a salted rim, resulting in a smooth, vibrant drink with a slightly smoky aroma and a visually striking appearance.
    Prep Time 5 minutes
    Total Time 5 minutes
    Servings: 1
    Course: Main Course
    Cuisine: Cocktail
    Calories: 200

    Ingredients
      

    • 2 oz tequila
    • 1 oz lime juice freshly squeezed for bright flavor
    • 1 oz orange liqueur such as Cointreau or Triple Sec
    • 2 drops black food coloring
    • 1 pinch black salt for rimming the glass
    • ice cubes

    Equipment

    • Cocktail shaker
    • Jigger or measuring cup
    • Rimming plate or shallow dish

    Method
     

    1. Pour a generous amount of black salt onto a shallow dish to prepare the rim of your glass.
    2. Moisten the rim of your glass with a lime wedge, then carefully dip it into the black salt to coat the edge evenly.
    3. Fill a cocktail shaker halfway with ice cubes to chill the mixture thoroughly.
    4. Add the tequila, freshly squeezed lime juice, orange liqueur, and black food coloring to the shaker.
    5. Secure the lid and shake vigorously until the mixture is well combined and chilled, about 15–20 seconds. You should hear a lively rattle from the ice.
    6. Strain the mixture into the prepared glass, pouring carefully over the salted rim for a dramatic, swirling black drink.
    7. Garnish with a lime wheel or a spooky straw if desired, and enjoy immediately to experience the smoky aroma and vibrant dark appearance.

    Notes

    For an extra spooky touch, add dry ice for bubbling effects, but handle with care.

    This Black Magic Margarita captures the spirit of Halloween perfectly. Its bold look and robust flavors make it a standout for any festive gathering. Plus, its simple ingredients and easy steps make it a foolproof choice for spooky cocktail enthusiasts.

    As the season’s chill sets in, this drink adds a splash of fun and mystery to any occasion. Whether you’re hosting a party or enjoying a quiet night in, it’s sure to add a little mystique and a lot of flavor to your evening.

  • Frozen Lemonade Dreams: The Unexpected Charm of a Lemonade Slushie

    Frozen Lemonade Dreams: The Unexpected Charm of a Lemonade Slushie

    When summer heat starts knocking at the door, I find myself craving more than just a cold drink. I yearn for a treat that’s both refreshing and a little wild—enter the lemonade slushie. Its icy texture and zesty burst remind me of childhood adventures, but with a modern twist that makes it perfect for today’s spontaneous poolside gatherings.

    This recipe is not just about slush; it’s about transforming simple ingredients into a moment of chaos and delight. The splash of lemon, the cool whisper of ice, and that faint sugary aroma create a symphony of sensory joys. It’s the kind of concoction that feels like a secret, exciting escape from routine.

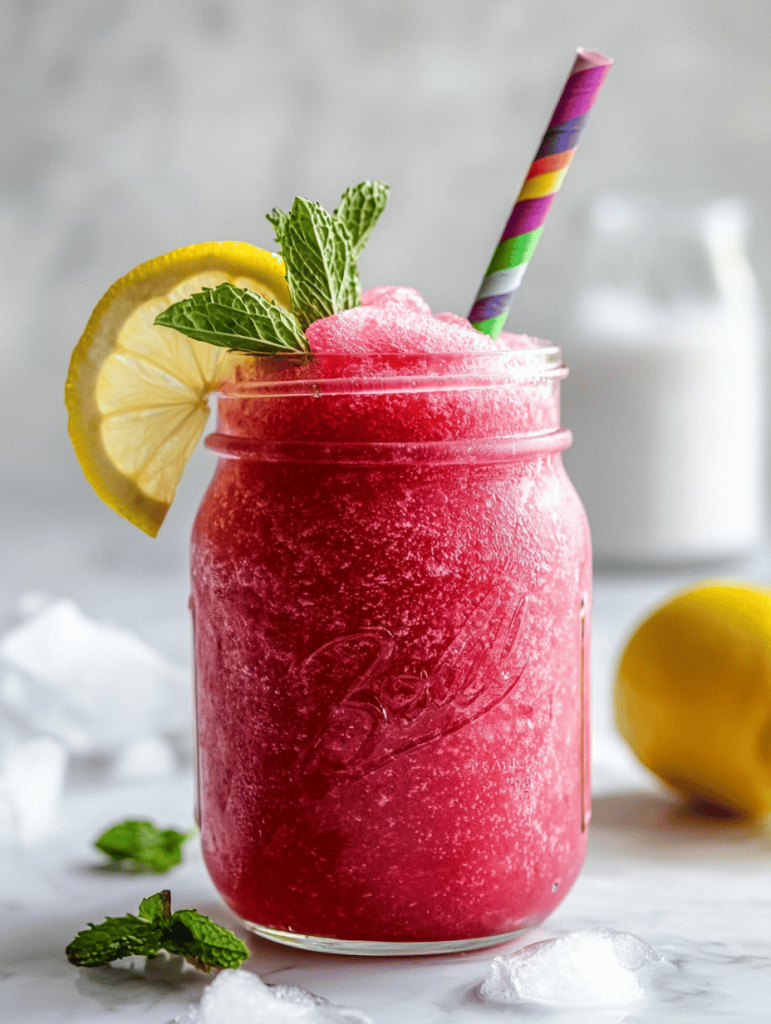
    Lemonade Slushie

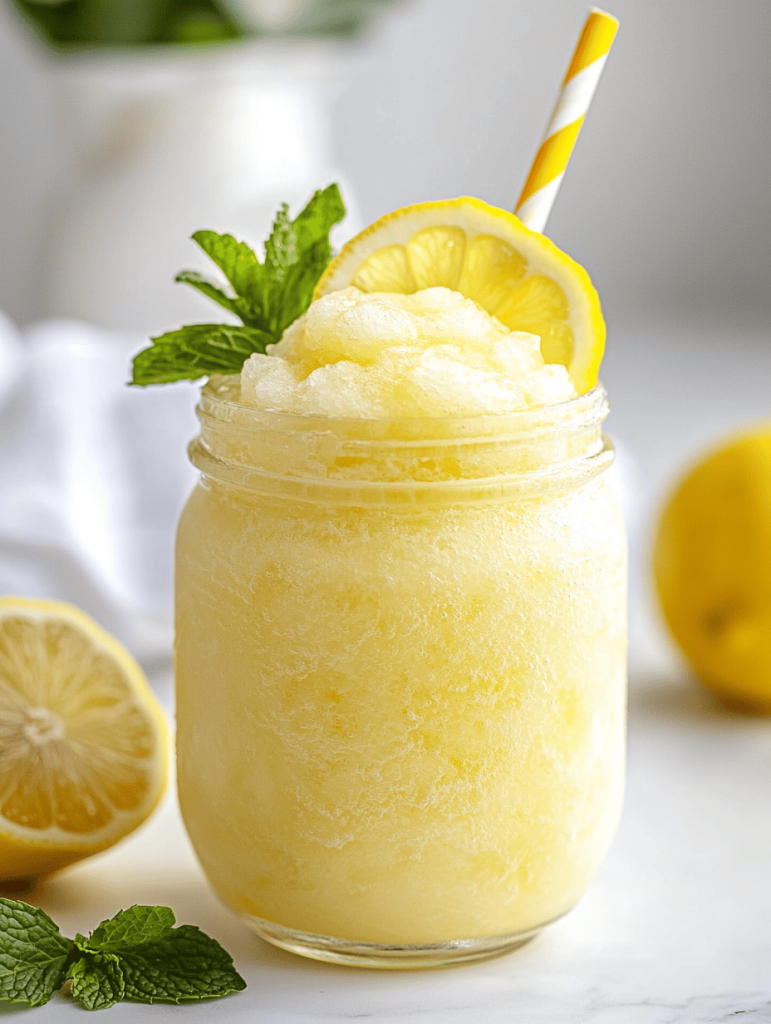
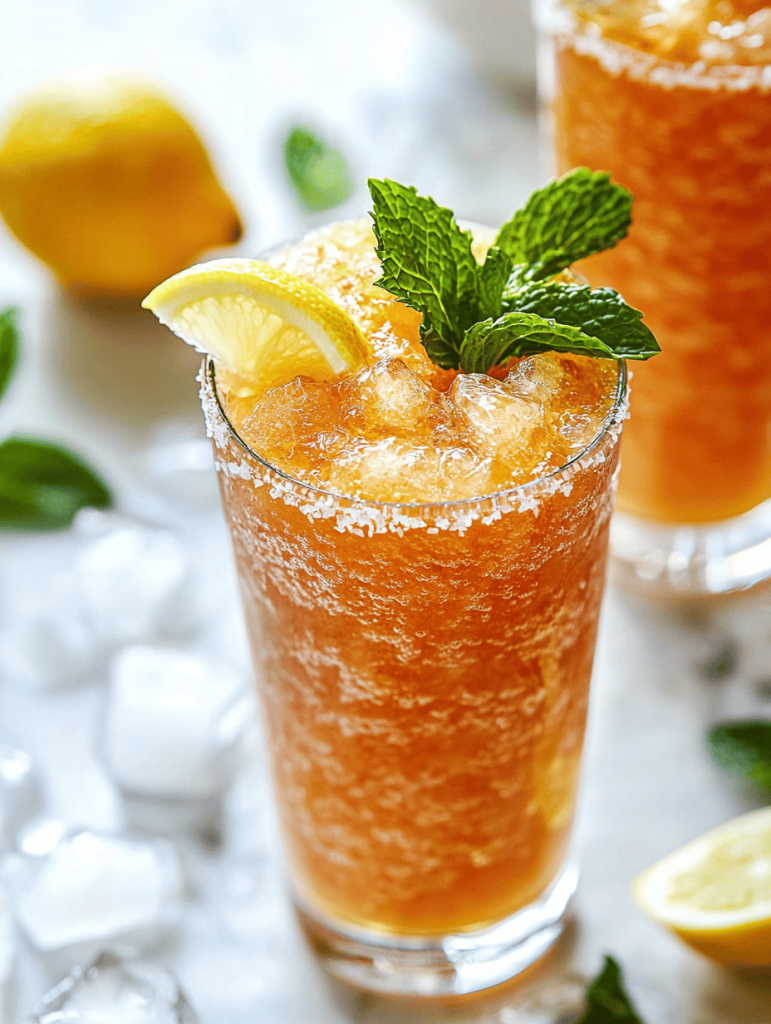
    The lemonade slushie is a frozen beverage made by blending fresh lemon juice, sweetener, and ice until smooth and icy. It has a bright, tangy flavor with a refreshing, granular texture that melts in the mouth, resembling a frozen lemon treat. The final appearance is a vibrant, icy pink or yellow slush with a slightly granular consistency.
    Prep Time 10 minutes
    Total Time 10 minutes
    Servings: 2
    Course: Main Course
    Cuisine: Universal
    Calories: 120

    Ingredients
      

    • 1/2 cup freshly squeezed lemon juice about 2-3 lemons
    • 1/4 cup granulated sugar or honey/agave syrup
    • 2 cups ice cubes about 1 cup per serving
    • 1 tbsp water to help dissolve sugar

    Equipment

    • Blender
    • Measuring cups and spoons
    • Citrus juicer or reamer

    Method
     

    1. Juice the lemons using a citrus reamer or juicer until you have about half a cup of fresh lemon juice, then set aside.
    2. In a small bowl, combine the sugar with the water and stir until the sugar is completely dissolved to create a simple syrup.
    3. Pour the fresh lemon juice into the blender, add the cooled simple syrup, and blend briefly to combine.
    4. Add the ice cubes to the blender and start blending on low speed, then increase to high until the mixture is slushy and smooth, about 30-45 seconds.
    5. Stop the blender and check the texture; it should be icy and scoopable but not completely icy like a snow cone. If needed, add a few more ice cubes and blend again for a few seconds.
    6. Pour the lemonade slushie into glasses and serve immediately with optional lemon slices or mint for garnish.

    Changing seasons or a sweltering day, this lemonade slushie is a versatile hero. It’s perfect for impromptu parties or solo moments when you need a tiny rebellion against the heat. The best part? It’s quick, forgiving, and a little fun in every scoop.

    As the summer wanes or edges of unplanned chaos appear, this frozen treat promises a brief retreat. Keep a stash of lemons and ice in your freezer. This simple pleasure can be your go-to rescue, turning everyday moments into small celebrations.

  • The Funky Art of Crafting a Coca-Cola Slushie with a Secret Twist

    The Funky Art of Crafting a Coca-Cola Slushie with a Secret Twist

    Ever wondered how to transform your everyday soda into a summer masterpiece? This coke slushie recipe isn’t just about freezing soda; it’s about unlocking a nostalgic flavor that’s been lurking in childhood memories. By adding a touch of citrus and a dash of vanilla, each sip becomes an adventure, swirling in flavors that surprise and delight.

    As the ice melts into that iconic caramel sweetness, you’ll feel the chaotic joy of childhood summers from behind the patio table. It’s just the right mix of chaos and simplicity, perfect for spontaneous get-togethers or solo cooling sessions. The best part? It takes less than five minutes to whip up, and the results are stunningly satisfying.

    Coke Slushie

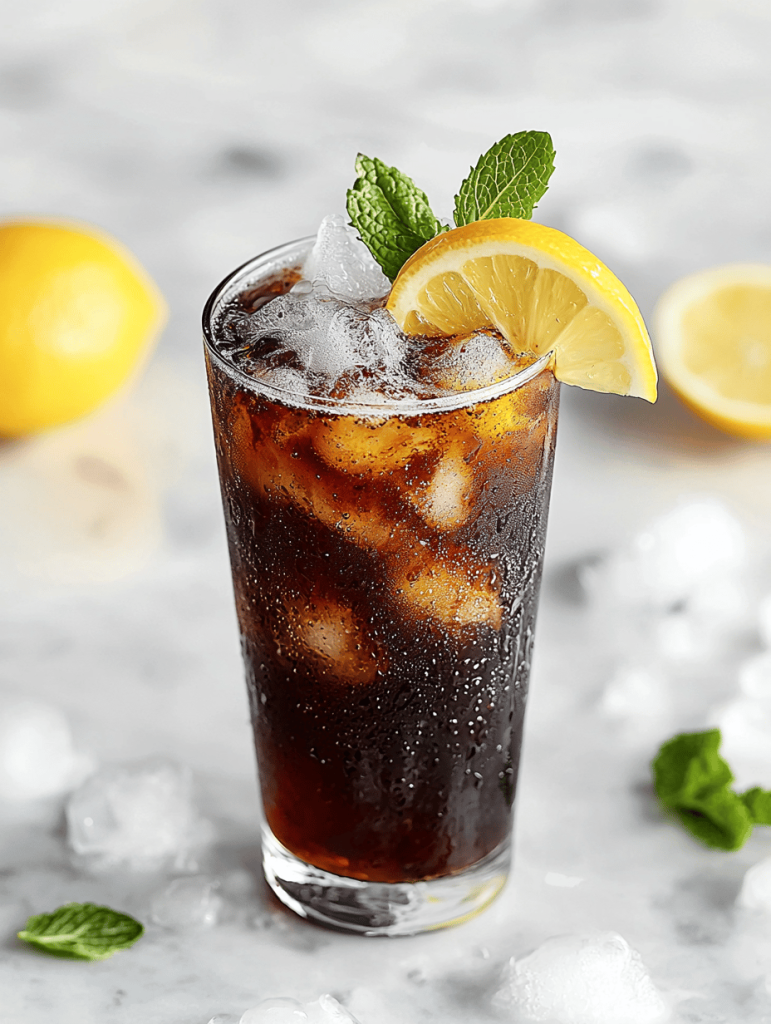
    This Coke slushie is made by freezing soda with added citrus and vanilla flavors, resulting in a semi-frozen, icy beverage with a smooth, slushy texture. The mixture transforms from liquid to a frosty, caramel-colored treat as the ice crystals develop, offering a nostalgic visual and taste experience.
    Prep Time 5 minutes
    Total Time 5 minutes
    Servings: 2
    Course: Main Course
    Cuisine: fusion
    Calories: 150

    Ingredients
      

    • 2 cups cola soda chilled
    • 1/2 teaspoon vanilla extract
    • 1 tablespoon fresh lemon juice optional but adds citrus flavor
    • 1 cup ice cubes

    Equipment

    • Freezer
    • Mixing spoon or straw
    • Measuring cups and spoons

    Method
     

    1. Pour the chilled cola soda into a freezer-safe container, then add vanilla extract and fresh lemon juice for extra flavor.
    2. Add the ice cubes to the mixture, stirring gently to distribute evenly.
    3. Place the container in the freezer and let it chill for at least 4 hours, giving it a stir every 30 minutes to help develop a uniform slush texture.
    4. Once frozen to a semi-ice, semi-liquid state with slushy texture, remove from the freezer.
    5. Use a spoon or straw to scoop and mix the slushie, smoothing out any ice crystals for a creamy consistency.
    6. Serve immediately in glasses, garnished with a lemon wedge if desired, and enjoy the refreshing, caramel-flavored slush!

    Notes

    For a smoother consistency, blend the frozen mixture briefly before serving.
    This coke slushie isn’t just a drink; it’s a portal to carefree afternoons and lazy weekend memories. It’s perfect for hot days when you crave something sweet and icy but want a little extra kick of flavor. Plus, it’s so easy to customize—adding your favorite fruit, a splash of rum, or even a sprinkle of salt can turn it into your personal summer badge.

    Keep this recipe handy for last-minute gatherings or when you just need a quick mental escape. With minimal effort and maximum flavor, it’s an unbeatable way to chill out. Stay cool and let those icy swirls of soda remind you of the simple joys that sparkle on sunny days.

  • Chill Out with an Unexpected Twist: The Milkshake Slushie

    Chill Out with an Unexpected Twist: The Milkshake Slushie

    Ever wondered how to turn a simple milkshake into a icy, refreshing treat that surprises your taste buds? This milkshake slushie takes familiar flavors and transforms them into a chilly delight perfect for hot days or a quick pick-me-up. It’s not just a frozen drink; it’s an adventure in texture and temperature.

    What makes this recipe stand out is the playful way it combines creamy richness with icy crunch. Whether you use classic vanilla, chocolate, or even fruity flavors, the process guarantees a frosty, mouthwatering splash of flavor in every sip. Plus, it’s surprisingly easy to whip up with ingredients you already have in your pantry.

    Milkshake Slushie

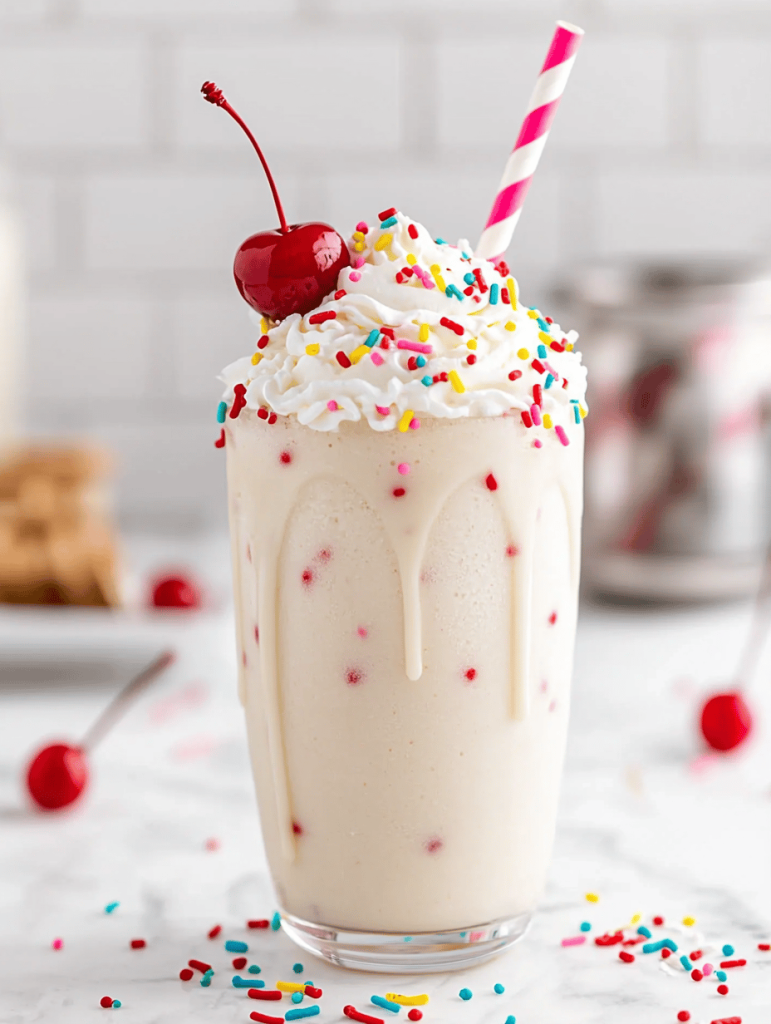
    This milkshake slushie is a cold, icy beverage made by blending milk, flavorings, and ice until smooth. The resulting drink has a frosty, granular texture with a vibrant, colorful appearance, perfect for hot days or a refreshing treat. It combines creamy richness with crunchy ice for an enjoyable sensory contrast.
    Prep Time 10 minutes
    Total Time 10 minutes
    Servings: 2
    Course: Main Course
    Cuisine: International
    Calories: 200

    Ingredients
      

    • 1 cup milk
    • 2 scoops vanilla ice cream
    • 1 cup ice cubes
    • 2 tablespoons sugar syrup optional for sweetness
    • 1/2 teaspoon vanilla extract
    • Optional food coloring or fruit purees for color and flavor variations

    Equipment

    • Blender
    • Measuring cups and spoons

    Method
     

    1. Add milk, vanilla ice cream, ice cubes, sugar syrup, and vanilla extract to the blender.
    2. Secure the lid and blend on high speed for about 30-45 seconds until the mixture is smooth and slightly frosty, with tiny ice particles visible.
    3. Pause to check the texture—if it’s too thick, add a splash more milk and blend briefly to loosen.
    4. If desired, add a few drops of food coloring or a spoonful of fruit purees for vibrant flavor and appearance. Blend again for a few seconds to incorporate.
    5. Pour the slushie mixture into glasses, filling about three-quarters full for a generous serve.
    6. Serve immediately with a fun straw or spoon to enjoy the icy, creamy texture.

    Notes

    For an extra icy texture, add more ice and blend longer. Use different flavorings to customize your slushie like chocolate syrup or berry purees.
    Turning the humble milkshake into a slushie opens up a world of possibilities for quick cool-downs and creative flavor combos. It’s a playful, satisfying way to enjoy summer’s heat or a lazy afternoon craving. Plus, it’s a quick blend away from being your new go-to dessert fix without the fuss.

  • Unusual Twist: Spiked Pi Colada Slushie for the Adventurous

    Unusual Twist: Spiked Pi Colada Slushie for the Adventurous

    Exploring tropical drinks often reminds me of lazy summer afternoons, but this pi colada slushie takes that nostalgia and adds a daring twist. Instead of the usual smooth blend, I infuse a subtle kick of rum, perfect for those who want their frozen treat with a punch. The chill of coconut and pineapple combines with a surprising spicy undertone, making each sip an adventure.

    Using unexpected ingredients like toasted coconut flakes or a dash of hot sauce can turn this classic into something exhilarating. It’s not just a frozen beverage; it’s a story of contrasts—sweet meets spicy, smooth meets wild. This recipe is perfect for summer parties or a daring solo refreshment when the heat gets relentless.

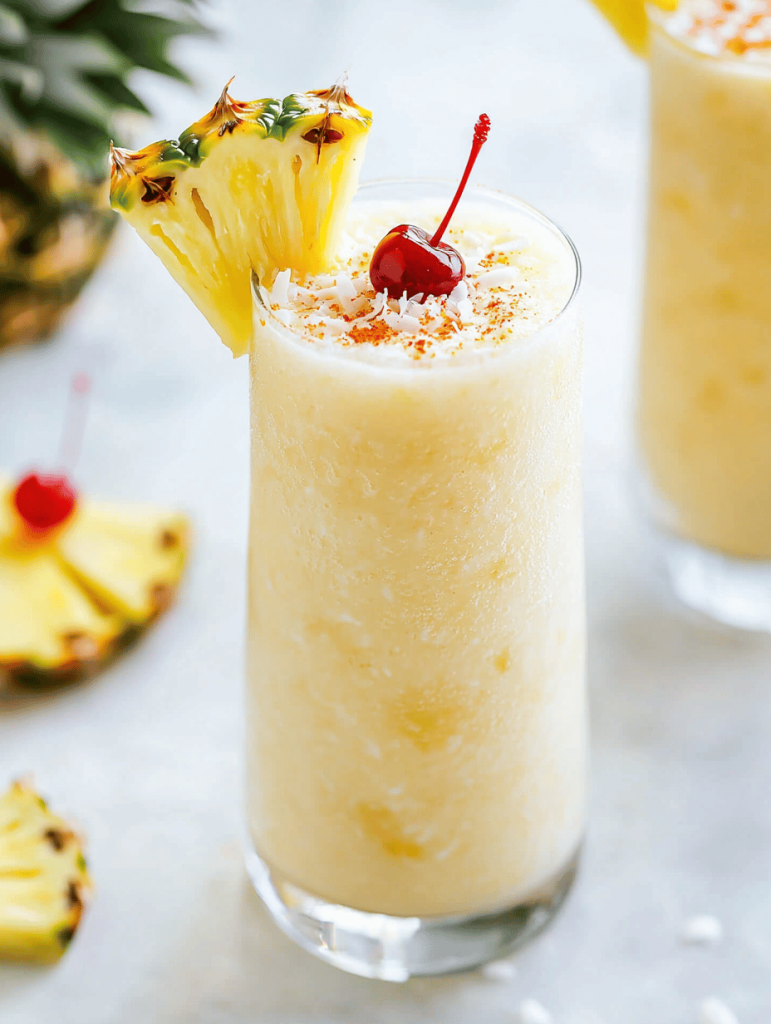
    Spicy Piña Colada Slushie

    This frozen beverage blends pineapple and coconut with a splash of rum, resulting in a smooth, icy texture with a tropical aroma. The addition of hot sauce or toasted coconut flakes introduces a spicy contrast, creating a refreshing yet bold drink with a vibrant appearance. It is served as a thick, frosty slushie perfect for hot days or adventurous palates.
    Prep Time 10 minutes
    Total Time 10 minutes
    Servings: 2
    Course: Main Course
    Cuisine: Tropical
    Calories: 180

    Ingredients
      

    • 1 cup frozen pineapple chunks preferably frozen for a thick slush
    • 1 cup coconut milk full-fat for creaminess
    • 2 oz white rum adjust to taste
    • 1/2 teaspoon hot sauce optional for spicy kick
    • 2 tablespoons toasted coconut flakes for garnish and extra flavor
    • 1 cup extra ice cubes if needed to thicken

    Equipment

    • Blender
    • Measuring cups

    Method
     

    1. Add the frozen pineapple chunks, coconut milk, rum, and hot sauce into the blender.
    2. Pulse the blender a few times to start breaking down the fruit and liquids, then blend on high until the mixture is smooth and icy, about 30-40 seconds. You should see a thick, frosty texture with no large chunks remaining.
    3. If the mixture is too thick, add a splash of extra coconut milk or ice cubes and blend again until reaching your desired consistency—creamy and scoopable, not too runny.
    4. Pour the slushie into glasses, allowing the icy mixture to mound slightly over the rim for an inviting look.
    5. Sprinkle toasted coconut flakes on top for added texture and aroma, enhancing the visual appeal and flavor contrast.
    6. Serve immediately with a straw or spoon, enjoying the bright tropical flavors and spicy undertones in every frosty sip.

    Notes

    For a more intense spice flavor, increase hot sauce slightly or experiment with a dash of cayenne pepper.

    This pi colada slushie isn’t just a drink; it’s a daring escape in a glass. It celebrates the joys of tropical flavors with an extra layer of excitement that keeps everyone guessing. When the weather sizzles, this cool, bold cocktail will stand out as a favorite.

    Whether you prefer your slushie with a little extra spice or just as classic as ever, this recipe adapts easily. It’s a fun way to enjoy summer’s sunshine with a twist that will turn heads—and taste buds. Cheers to unexpected flavors and frozen adventures that make the season truly memorable.

  • The Secret Dehydration Twist: Watermelon Slushie Revival

    The Secret Dehydration Twist: Watermelon Slushie Revival

    Imagine biting into a perfectly ripe watermelon on a hot summer day. Instead of just eating it, I let a little chaos take over and turned it into a revitalizing slushie with a secret twist. This isn’t your regular frozen treat; it’s a cold splash of nostalgia with a modern kick.

    The exact moment I discovered the magic? When I accidentally left a watermelon in the freezer and found it becoming a crunchy, icy delight. I realized that this accidental freeze could be harnessed into something irresistibly refreshing and oddly sophisticated. Now, each summer, I eagerly chase that frozen moment of bliss.

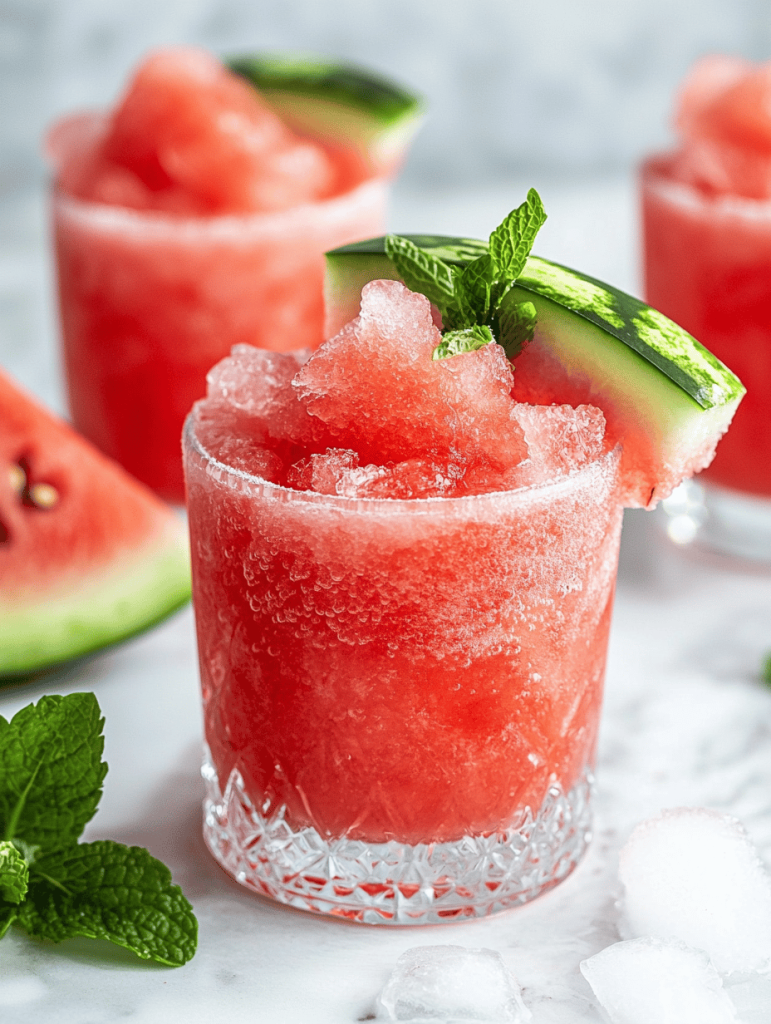
    Watermelon Freeze Slushie

    This frozen treat combines ripe watermelon with a hint of citrus and a touch of sweetness, blended into a refreshing slushie with a smooth, icy texture. The dish is prepared by freezing watermelon and then blending it into a slushy consistency, perfect for hot days and visually vibrant served in a glass.
    Prep Time 10 minutes
    Total Time 10 minutes
    Servings: 2
    Course: Main Course
    Cuisine: Summer
    Calories: 70

    Ingredients
      

    • 4 cups watermelon cubes seedless, ripe watermelon
    • 1 tablespoon fresh lemon juice adds a tangy contrast

    Equipment

    • Freezer
    • Blender
    • Knife
    • Cutting board

    Method
     

    1. Cut ripe watermelon into bite-sized cubes and spread them out on a tray.
    2. Place the watermelon cubes in the freezer and freeze for at least 2 hours, or until solid and icy.
    3. Once frozen, remove the watermelon cubes from the freezer and allow them to sit for a few minutes to slightly soften.
    4. Add the frozen watermelon cubes to a blender along with the fresh lemon juice.
    5. Blend on high speed until the mixture becomes slushy and smoothly blended, with a texture similar to crushed ice.
    6. Pour the slushie into glasses, letting the icy pink mixture mound slightly over the rim.
    7. Garnish with a small slice of lemon or a sprig of fresh mint if desired for added visual appeal and aroma.
    8. Serve immediately with a straw or spoon, enjoying the cold, chunky texture of this summer refresher.
    This watermelon slushie isn’t just a drink; it’s a celebration of summer’s simple perfection. It’s quick to whip up and perfect for spontaneous gatherings or solo refreshment.

    As the days grow hotter, I find myself craving that icy burst of sweet watermelon, especially when paired with a sprig of mint or a squeeze of lime. It’s a reminder that sometimes, the best things come from a little bit of happy chaos in the kitchen.

  • The Unexpected Charm of Spiced Peach Slushie

    The Unexpected Charm of Spiced Peach Slushie

    Imagine chilling with a drink that combines the sweet juiciness of ripe peaches with a whisper of cinnamon and a splash of lemon. This peach slushie is more than just a summer treat—it’s a nostalgic hug wrapped in a frosty glass, reminding me of roadside fruit stands and lazy afternoons. I recently discovered that blending in a hint of ginger elevates this simple drink to something extraordinary.

    This recipe is a secret weapon during heatwaves or when friends drop by unexpectedly. It’s quick to whip up, yet packed with enough flavor layers to make anyone ask for the recipe. Plus, it’s a fantastic way to use up those ripe peaches that almost reach their “save for smoothies” stage.

    ## WHY I LOVE THIS RECIPE?

    – It feels like a cozy memory in every sip, reminding me of summers past.
    – The spices turn a basic slushie into something full of warmth and depth.
    – It’s versatile—perfect for brunch, movie nights, or solo sipping.
    – Using fresh peaches makes the flavor genuinely bright and natural.
    – The bright orange color makes any table brighter.

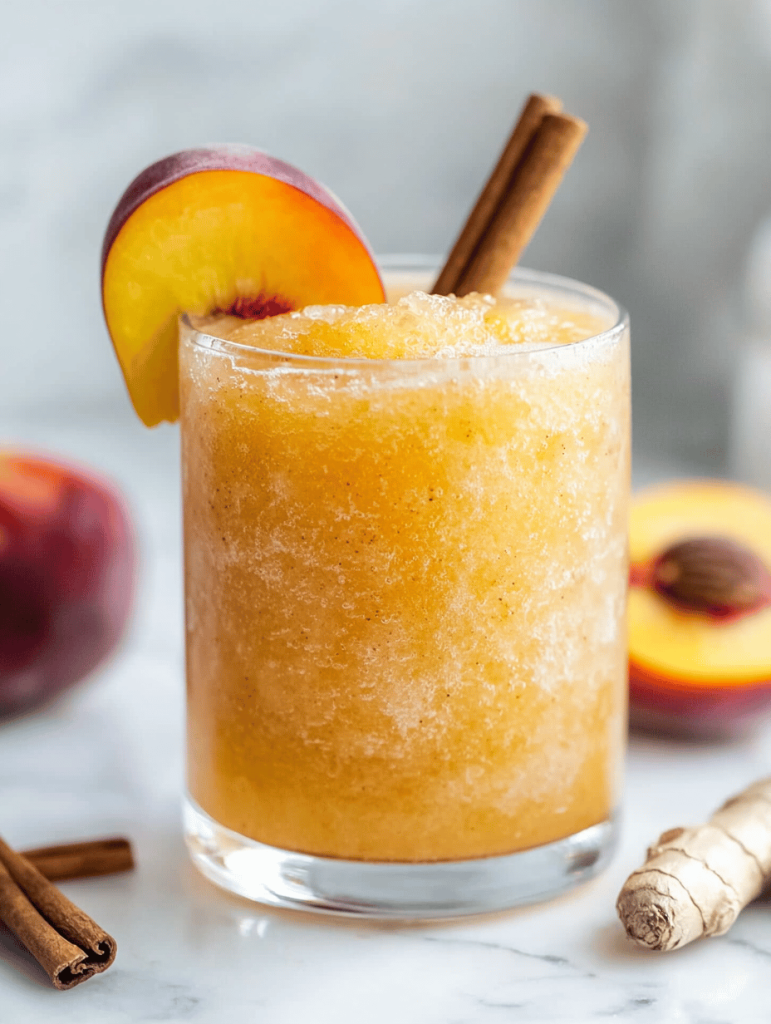
    Peach Cinnamon Ginger Slushie

    This peach slushie is a blended frozen beverage made with ripe peaches, cinnamon, lemon juice, and a hint of ginger, resulting in a bright, icy drink with layered warm and citrus flavors. The mixture is smooth and frosty, with a vibrant orange hue and a slightly thick texture suitable for sipping or serving in glasses.
    Prep Time 10 minutes
    Total Time 10 minutes
    Servings: 2
    Course: Main Course
    Cuisine: fusion
    Calories: 150

    Ingredients
      

    • 4 cups ripe peaches, peeled and sliced pitted and peeled
    • 1 tsp ground cinnamon adds warmth
    • 1 tbsp fresh lemon juice brightens flavor
    • 1 tsp fresh ginger, grated adds a spicy kick
    • 1 tbsp honey or maple syrup optional for sweetness
    • 1 cup ice cubes for the icy texture
    • 1/2 cup cold water

    Equipment

    • Blender
    • Paring knife
    • Cutting board

    Method
     

    1. Slice the peaches in half, remove the pits, and peel if needed. Place the peach slices in the blender.
    2. Add the ground cinnamon, fresh lemon juice, grated ginger, and honey to the blender with the peaches.
    3. Pour in the cold water and add the ice cubes to help achieve a frosty, slush-like consistency.
    4. Secure the lid on the blender and blend on high speed until the mixture is smooth, thick, and frosty, about 30-60 seconds. You should see a vibrant orange color with tiny flecks of spice.
    5. Check the consistency and add more water or ice if you want it thinner or frostier, then blend again for a few seconds.
    6. Pour the slushie into chilled glasses and garnish with a small peach slice or a sprinkle of cinnamon if desired. Serve immediately for the best icy texture and fresh flavor.

    Notes

    You can adjust the sweetness by adding more honey or syrup. For extra flavor, consider garnishing with fresh mint or a dash of additional cinnamon.
    This peach slushie isn’t just a refreshing drink; it’s a little celebration in a glass. Whether it’s a scorching summer day or a moment you crave something sweet and cool, this recipe hits the spot. The best part? It’s so easy that you’ll want to make it all season long.

    As the sun dips lower and the peaches reach their peak, I find myself blending this again and again. It’s a simple pleasure that warms the soul while cooling the body, a perfect harmony of flavors and textures. Cheers to unexpected delights and summer’s sweet serenade.

  • The Secret Nostalgia Behind Kool Aid Slushies

    The Secret Nostalgia Behind Kool Aid Slushies

    Imagine a scorching summer day, the sun blazing overhead, and your childhood in your mind’s eye. I recently stumbled upon a forgotten concoction that instantly transported me back to simpler times: the humble Kool Aid slushie. This vibrant, icy treat isn’t just teenage nostalgia; it’s also a surprisingly versatile summer refresher.

    What’s more unexpected is how this simple drink can be jazzed up with fresh fruit or a splash of sparkling water. It’s a playful celebration of flavor, color, and carefree summer days. I’ll show you how to craft this multi-layered burst of chilly joy in your own kitchen, no fancy equipment needed.

    Kool Aid Slushie

    A Kool Aid slushie is a frozen beverage made by mixing flavored Kool Aid with sugar and water, then freezing it until solid. It is then broken into icy, colorful slush with a refreshing, slightly granular texture, ideal for hot summer days. The result is an eye-catching, chilly treat perfect for cooling down and enjoying vibrant flavors.
    Prep Time 10 minutes
    Cook Time 4 hours
    Total Time 4 hours 10 minutes
    Servings: 2
    Course: Main Course
    Cuisine: Global
    Calories: 120

    Ingredients
      

    • 1 packet Kool Aid powder flavor of your choice
    • 1/2 cup granulated sugar adjust to taste if needed
    • 2 cups cold water

    Equipment

    • Measuring cups
    • Freezer-safe container
    • Fork or spoon for scraping

    Method
     

    1. In a mixing bowl, whisk together the Kool Aid powder, sugar, and water until the sugar is fully dissolved and the mixture is vibrant and uniform in color.
    2. Pour the mixture into a freezer-safe container, spreading it out evenly, and place it in the freezer.
    3. Freeze the mixture for about 4 hours, checking occasionally; it should become solid but still scoopable.
    4. Once frozen, use a fork or spoon to scrape and break up the slush into icy, granular chunks.
    5. Serve the Kool Aid slushie in glasses, optionally garnished with fresh fruit or a slice of citrus for extra flair.
    6. Enjoy the refreshing, icy texture and bright flavors as a cool summer treat!

    Often, it’s the simplest recipes that usher in the biggest smiles. A Kool Aid slushie reminds us that even in our busiest lives, a splash of childhood cheer can refresh our spirit.

    As temperatures climb and the season calls for cool escapes, this treat offers a quick getaway. No matter how chaotic your day, a glass of this icy delight can turn the mundane into a moment of joy.

  • Chill Out with this Unusual Iced Tea Slushie Twist

    Chill Out with this Unusual Iced Tea Slushie Twist

    Many think of iced tea as a simple refreshment, but lately, I’ve been transforming it into something cooler and more exciting—an iced tea slushie with a surprising kick of flavor. It’s like capturing a summer breeze in every sip, with a texture that’s halfway between a drink and a dessert. Perfect for those sweltering days when you want something cold, yet crave a bit of adventure.

    The best part? This recipe whips up in minutes, using ingredients you probably already have tucked away. It’s a playful way to reimagine tea time, especially when friends drop by unannounced or you need a quick getaway from mundane drinks. It’s more than a treat; it’s a tiny celebration in a glass.

    Iced Tea Slushie

    This iced tea slushie is made by blending brewed tea with ice and sweetener until smooth, resulting in a slushy, icy beverage with a vibrant flavor. The texture is semi-frozen and creamy, resembling a dessert more than a drink, perfect for hot days. It combines the bright notes of tea with a chilled, refreshing consistency.
    Prep Time 5 minutes
    Cook Time 10 minutes
    Total Time 15 minutes
    Servings: 2
    Course: Main Course
    Cuisine: Cold Beverages
    Calories: 100

    Ingredients
      

    • 2 cups hot brewed tea cooled to room temperature
    • 1 cup ice cubes plus extra for serving if desired
    • 2 tablespoons honey or simple syrup adjust to taste

    Equipment

    • Kettle or pot for boiling
    • Blender
    • Measuring cups
    • Straw or stirrer

    Method
     

    1. Brew a strong cup of tea using your preferred tea bags or leaves, then let it cool completely to prevent melting the ice too quickly.
    2. Pour the cooled tea into a blender, add the honey or simple syrup, and blend briefly to combine the sweetener evenly throughout.
    3. Add the ice cubes to the blender, then blend on high until the mixture becomes thick, slushy, and evenly icy in texture. This should take about 30-60 seconds.
    4. Stop blending and check the texture — it should be scoopable, with a smooth, semi-frozen consistency. If it’s too runny, add a few more ice cubes and blend again.
    5. Pour the slushie into glasses, garnishing with a slice of lemon or a sprig of mint if desired for extra visual appeal.
    6. Serve immediately with a straw or stirrer, enjoying the cold, refreshing, and textured ice slushiness.

    Notes

    For extra flavor, infuse the tea with herbs like mint or basil before cooling. Adjust sweetness to personal taste. This recipe is flexible—try different tea flavors for variety.
    This iced tea slushie feels like a mini vacay in your hand, especially when the sun blazes down. It’s a perfect way to cool off while savoring a familiar flavor in a new form. Whether served at brunch or enjoyed as a solo afternoon escape, it always refreshes and uplifts.

    Enjoy making this simple yet delightfully different beverage. It’s a chilly, sweet reminder that sometimes, a small change can turn a regular day into something memorable.

  • Spook-tacular Halloween Monster Mash Punch!

    Spook-tacular Halloween Monster Mash Punch!

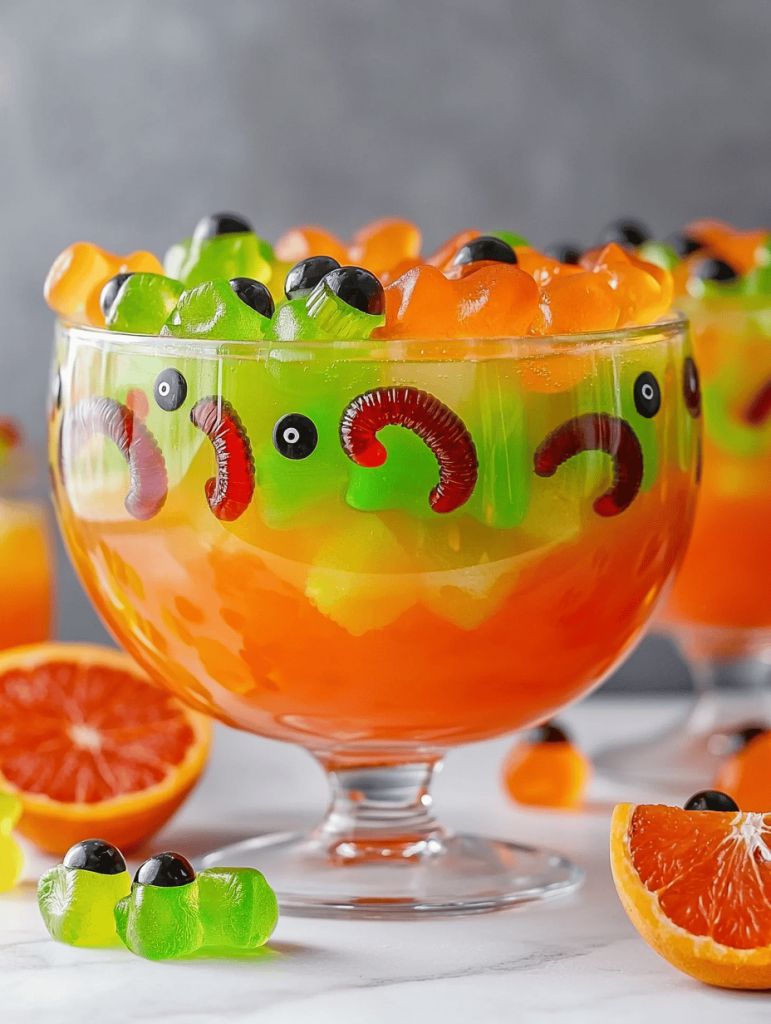
    Halloween nights call for a twist on traditional drinks, and this Monster Mash Punch offers just that. The vibrant mix of neon colors and eerie bubbling effects create a visual spectacle that excites both kids and adults alike. It’s a chance to turn your party into a mad scientist’s lab, with every glass bursting with spooky surprises.

    What makes this punch stand out is its playful chaos—think glowing ice cubes and swirling slime-like layers. It’s not just a beverage; it’s an experience, a conversation starter that boosts the spooky spirit of the night. Plus, its simple ingredients mean you can whip it up while busy carving pumpkins or decorating the haunted house.

    Monster Mash Punch

    Monster Mash Punch is a vibrant, colorful beverage featuring layered neon liquids and glowing ice cubes, creating a spooky, bubbling effect suitable for Halloween parties. It combines fruit juices, soda, and playful garnishes to produce a swirling, visual spectacle with a bubbly, slightly thickened texture. The final presentation is a fun, eerie-looking punch that mesmerizes guests with its glowing and swirling effects.
    Prep Time 20 minutes
    Cook Time 10 minutes
    Total Time 30 minutes
    Servings: 8
    Course: Main Course
    Cuisine: Halloween
    Calories: 150

    Ingredients
      

    • 4 cups orange juice preferably chilled
    • 2 cups pineapple juice
    • 1 liter lemon-lime soda chilled
    • 1 cup blue raspberry syrup adds neon color
    • 1 cup green sports drink for neon effect and flavor
    • blue ice cubes glowing ice cubes made with glow sticks or LED lights

    Equipment

    • Large clear punch bowl
    • Measuring cups and spoons
    • Mixing spoon
    • Slotted spoon
    • Ice cube trays
    • Glow stick or LED light (optional) for glow effect

    Method
     

    1. Fill the punch bowl halfway with orange juice and pineapple juice, creating a bright base color. Use a mixing spoon to gently combine the liquids, watching for a vibrant orange hue to develop.
    2. Add the blue raspberry syrup and green sports drink to the mixture, pouring slowly along the sides to encourage layered swirling effects. Stir gently to blend the colors slightly while maintaining some separation for visual impact.
    3. Carefully pour the chilled lemon-lime soda into the mixture to introduce bubbles and fizz, giving the punch a lively, bubbly texture. Stir gently to combine but keep some effervescence intact.
    4. Prepare glowing ice cubes by freezing small glow sticks or LED lights inside water in ice cube trays. Once frozen, place these glowing cubes into the punch, spreading them evenly for a spooky glow.
    5. Add the glowing ice cubes to the punch just before serving. The cubes will emit an eerie glow and slowly melt, releasing extra color and glow to enhance the spooky visual effect.
    6. Stir the punch gently to distribute the glowing effects and ensure everything remains layered and vibrant. Serve immediately in cups with some glowing ice for a bubbling, neon spectacle that’s perfect for Halloween festivities.

    Notes

    Use caution when handling glow sticks or LED lights to ensure safety. For best glow effect, serve immediately after adding glowing ice cubes.
    As the night winds down, the remnants of this ghoulish drink leave a sweet, fruity smell lingering in the air. It captures the fun, frights, and fantastic chaos of Halloween perfectly. Making this punch is a delightful way to add a splash of creepy creativity to your holiday celebration, creating memories as wild and colorful as the night itself.