Category: Appetizers

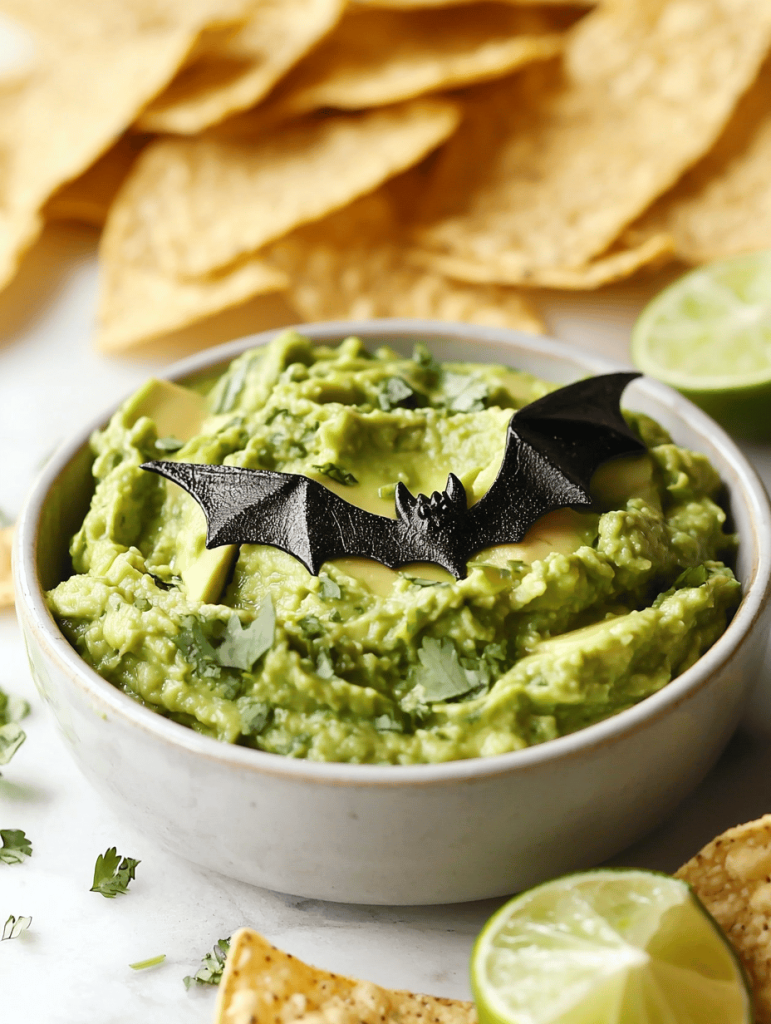
  • Spooky Bats and Creepy Cravings: Halloween Guacamole with Tortilla Chips

    Spooky Bats and Creepy Cravings: Halloween Guacamole with Tortilla Chips

    Halloween snuck up on me this year, bringing a surge of nostalgic chills and giggles. This time, I decided to turn the simple guacamole into a spooky spectacle, perfect for last-minute parties or mischievous snacks. The smell of ripe avocados mingles with a dash of smoky paprika, creating an inviting aroma that screams, “Boo!” as guests arrive.

    Transforming everyday snacks into eerie edible art is my kind of chaos. These bat-shaped tortilla chips tucked into vibrant green guacamole keep the mood playful and the crowd guessing. It’s a miniature celebration in every bite, bursting with freshness and just the right touch of spookiness.

    Spooky Bat-Shaped Guacamole with Tortilla Chips

    This dish features creamy guacamole made from ripe avocados blended until smooth, seasoned with smoky paprika and fresh lime juice. The guacamole is served with bat-shaped tortilla chips, creating a playful, visually striking appetizer with a vibrant green color and crispy texture to contrast the creamy dip.
    Prep Time 10 minutes
    Total Time 10 minutes
    Servings: 4
    Course: Main Course
    Cuisine: American
    Calories: 180

    Ingredients
      

    • 3 ripe avocados halved, pitted
    • 1 small lime juiced
    • 1/2 teaspoon smoked paprika adds smoky flavor
    • 1/2 teaspoon salt to taste
    • 1 small clove garlic minced
    • 4 small tortilla chips preferably cut into bat shapes or cut into rounds and shaped

    Equipment

    • Mixing bowl
    • Fork or potato masher
    • Knife
    • Cutting board
    • Baking sheet
    • Bat-shaped cookie cutter or stencil

    Method
     

    1. Cut the avocados in half, remove the pits, and scoop the flesh into a mixing bowl.
    2. Add freshly squeezed lime juice to the avocado and use a fork or potato masher to mash until smooth and creamy.
    3. Stir in the minced garlic and smoked paprika, tasting and adjusting seasoning with salt as needed to enhance flavor.
    4. Mix well until all ingredients are evenly combined, and the guacamole has a vibrant green color with a slight sheen.
    5. Preheat your oven to 375°F (190°C). Arrange the tortilla chips on a baking sheet.
    6. If your chips are not already bat-shaped, use a cookie cutter or stencil to cut shapes into rounds or cut into bat silhouettes for a spooky effect.
    7. Bake the chips in the preheated oven for about 8-10 minutes, or until they are crispy and golden at the edges.
    8. Remove the chips from the oven and let them cool slightly on a wire rack for a few minutes—this helps them crisp up further.
    9. Transfer the creamy guacamole to a serving bowl and arrange the bat-shaped tortilla chips around it, creating a spooky and inviting presentation.
    10. Enjoy your festive and fun Halloween snack, perfect for parties or mischievous munching.

    Notes

    For extra spookiness, you can use black or dark-colored tortilla chips or add a small edible eye to each bat shape.
    As the night winds down, I love how these Halloween guacamole bats spark joy and conversation. They’ve become my go-to for turning a simple appetizer into a memorable moment. It’s a reminder that sometimes, playful bites are what make celebrations truly special.

    Whether you’re hosting a haunted house or just craving something creepy-good, this recipe is perfect. The bright green avocados and dark bat-shaped chips make every scoop feel like a tiny Halloween party. Keep the fun going, and enjoy the chaos of the season.

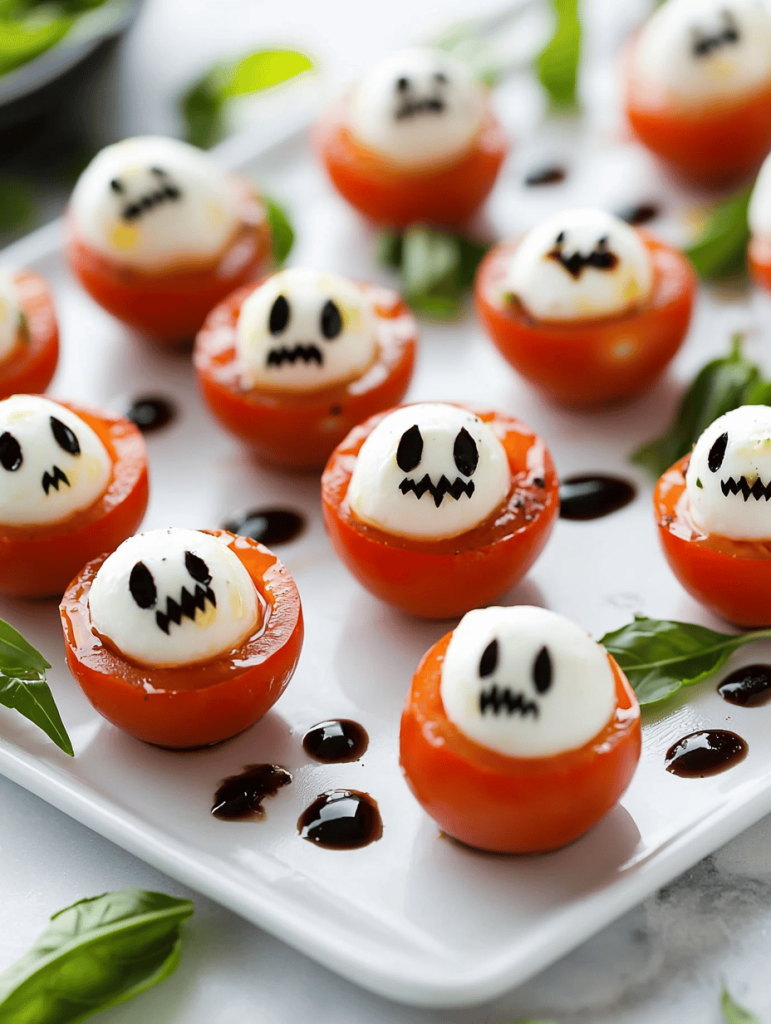
  • Spine-Chillingly Cute Halloween Eyeball Caprese Bites

    Spine-Chillingly Cute Halloween Eyeball Caprese Bites

    Why I Love This Recipe?

    • The playful twist on classic Caprese makes a spooky statement on any Halloween table.
    • The use of cherry tomatoes and mozzarella creates a fresh, bright flavor with a creepy flair.
    • It’s surprisingly simple, but the visual impact rivals more elaborate creations.
    • Perfect for both chaos in the kitchen and delightful horror aesthetics.

    AVOID MY DISASTER (You7re Welcome)

    • FORGOT the eyes? The mayo might slide off; add a dab of pesto for better sticking power.
    • DUMPED too many eyes on one bite? Spread them out for a less spooky cluster.
    • OVER-TORCHED the cheese? It turns rubbery; keep a close eye and use a lighter flame.
    • MISPLACED the small capers? They make perfect irises—double-check before assembly.

    QUICK FIXES THAT SAVE YOUR DAY

    • WHEN the mozzarella slips, pat it dry with paper towel to help stick the eyes better.
    • SPLASH a little balsamic reduction for a blood-red dribble—morbidly mesmerizing.
    • PATCH a soggy tomato with a fresh basil leaf if it gets too juicy.
    • SHIELD the cheese with a sprinkle of paprika to hide minor burned spots.
    • WHEN in doubt, use a toothpick to reattach a stubborn eye or caper for perfect placement.

    Spooky Caprese Bites

    This dish features cherry tomatoes, small mozzarella balls, and capers assembled to resemble creepy eyeballs. The ingredients are skewered or arranged to create a spooky, visually striking appetizer with a fresh, bright flavor and contrasting textures of juicy, creamy, and briny elements.
    Prep Time 15 minutes
    Total Time 15 minutes
    Servings: 4
    Course: Main Course
    Cuisine: American
    Calories: 50

    Ingredients
      

    • 20 pieces cherry tomatoes preferably bright red
    • 20 pieces small fresh mozzarella balls ciliegine size works well
    • 10 small capers for irises
    • 2 tablespoons balsamic reduction optional, for drizzling

    Equipment

    • Toothpicks or small skewers
    • Plate or serving platter

    Method
     

    1. Set all ingredients nearby for easy assembly. Prepare a clean platter to arrange your spooky eyeballs.
    2. Thread a cherry tomato onto a toothpick or small skewer, followed by a mozzarella ball, then finish with a caper pressed into the mozzarella to resemble an iris.
    3. Repeat this process for all sets, creating a collection of creepy eyeballs ready to serve.
    4. Arrange the assembled eyeballs spaced evenly on the platter for a balanced, spooky presentation.
    5. If desired, drizzle the balsamic reduction over the eyeballs or around the platter for a blood-red, eerie effect.
    6. Serve immediately to enjoy the fresh, bright flavors and striking appearance.

    Notes

    For extra creepiness, add small slivers of black olive as pupils or use edible food coloring to enhance the eyeball effect.
    These eyeball Caprese bites bring a fun, spooky twist to the holiday. The burst of fresh basil and tangy balsamic pair beautifully with the creamy cheese and juicy tomato. It’s a playful way to celebrate Halloween with minimal fuss but maximum impact.

    Enjoy these creepy little bites as a quick appetizer or spooky party snack. They fit right into the season’s obsession with cute kitsch and delicious bites. Creating these little eyeballs is a playful ritual that marks the start of the spooky festivities.

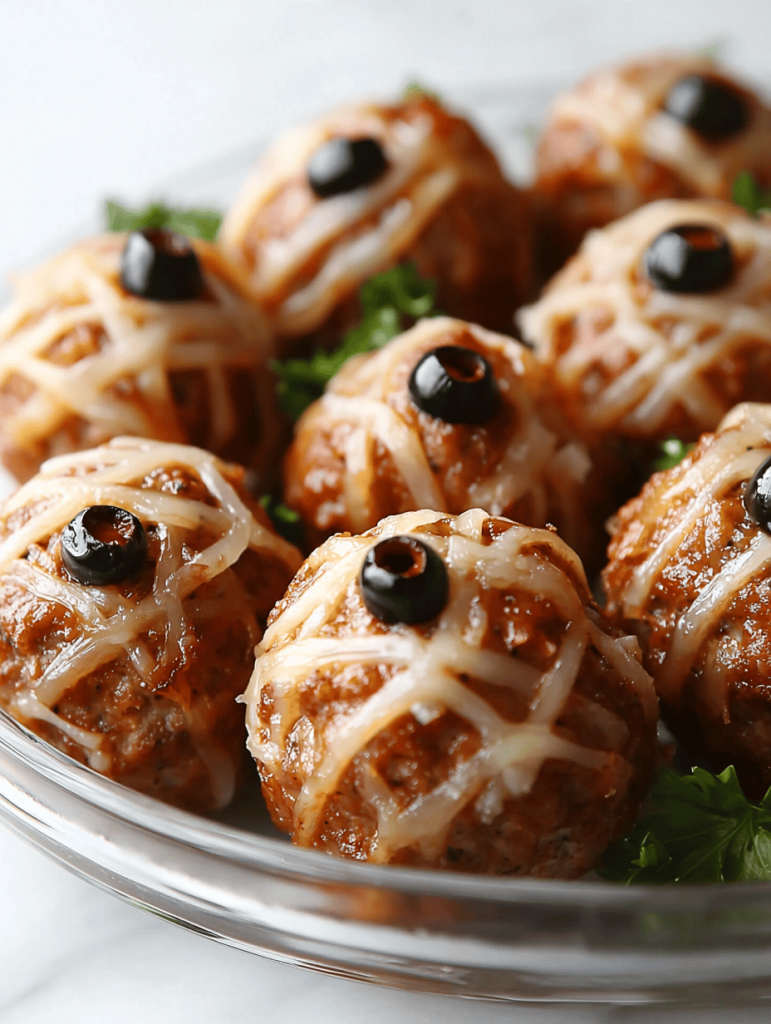
  • Spooky Delight: Halloween Mummy Meatballs That Have Everyone Talking

    Spooky Delight: Halloween Mummy Meatballs That Have Everyone Talking

    Every October, I find myself in search of treats that combine nostalgia with a touch of chaos. This year, I stumbled upon a playful idea that transforms classic meatballs into adorable, spooky mummies perfect for Halloween parties. The idea of wrapping meatballs in crepe-like strips and giving them tiny, googly eyes makes me giggle every time I prepare them.

    The best part? These mummy meatballs are surprisingly simple to assemble, even with a chaotic kitchen. The aroma of seasoned beef mingling with warm spices fills the air, setting the perfect spooky scene. Plus, they’re so fun to share and create a little messy magic with family and friends.

    Spooky Mummy Meatballs

    Spooky mummy meatballs are bite-sized beef meatballs seasoned with warm spices, simmered until cooked through, and then wrapped with thin crepe strips to resemble mummies. The final dish features tender meatballs with a slightly crispy exterior, decorated with tiny googly eyes for a playful Halloween look.
    Prep Time 20 minutes
    Cook Time 30 minutes
    Total Time 50 minutes
    Servings: 4
    Course: Main Course
    Cuisine: American
    Calories: 250

    Ingredients
      

    • 1 lb ground beef preferably 80/20 fat ratio
    • 1/2 cup breadcrumbs plain or seasoned
    • 1 large egg beaten
    • 2 tsp warm spices such as paprika, cumin, garlic powder
    • to taste salt and pepper
    • 1 cup milk for thinning the crepe batter
    • 1 cup flour all-purpose
    • 2 large eggs for crepe batter
    • 2 tbsp melted butter for the crepes
    • small pair googly eyes for decorating

    Equipment

    • Mixing bowl
    • Skillet or frying pan
    • Small saucepan
    • Whisk
    • Slotted spoon
    • Baking sheet
    • Parchment paper
    • Small round cookie cutter or glass

    Method
     

    1. Combine ground beef, breadcrumbs, beaten egg, warm spices, salt, and pepper in a mixing bowl. Mix everything together until thoroughly combined.
    2. Shape the mixture into small meatballs, about 1 to 1.5 inches in diameter, and place them on a parchment-lined baking sheet.
    3. Heat a skillet over medium heat and add a little oil. Cook the meatballs, turning occasionally, until they are browned on all sides and cooked through, about 8-10 minutes. Remove and set aside.
    4. While the meatballs are cooking, prepare the crepe batter by whisking together flour, eggs, milk, and melted butter until smooth. Let it rest for a few minutes to relax the gluten.
    5. Heat a small non-stick pan over medium heat and lightly grease it. Pour a thin layer of batter into the pan, tilting to spread evenly. Cook for about 1-2 minutes until the crepe is lightly golden, then flip and cook for another 30 seconds. Repeat with remaining batter.
    6. Once the crepes are cooled enough to handle, cut them into strips roughly 1/4 inch wide and about 4 inches long to resemble mummy wrapping strips.
    7. Wrap each cooked meatball with two or three crepe strips, overlapping slightly to mimic bandages. Secure the ends gently so strips stay in place.
    8. Place the wrapped meatballs on a serving platter. Dot each mummy with tiny googly eyes to give them a spooky, playful expression.
    9. Arrange the mummified meatballs, and they are ready to serve. Serve warm or at room temperature for a fun Halloween appetizer.

    As the platter of mummy meatballs disappears quickly, I’m reminded how a little whimsy brings people together. This recipe is a perfect blend of comfort, fun, and seasonal spirit. It’s a reminder that sometimes, the simplest dishes make the best memories.

    Making these little mummies isn’t just about the food. It’s about the joy of playful cooking, the giggles over wiggly eyes, and the shared delight of a creative Halloween feast. Here’s to more chaos and less perfection, making every dish a small celebration.

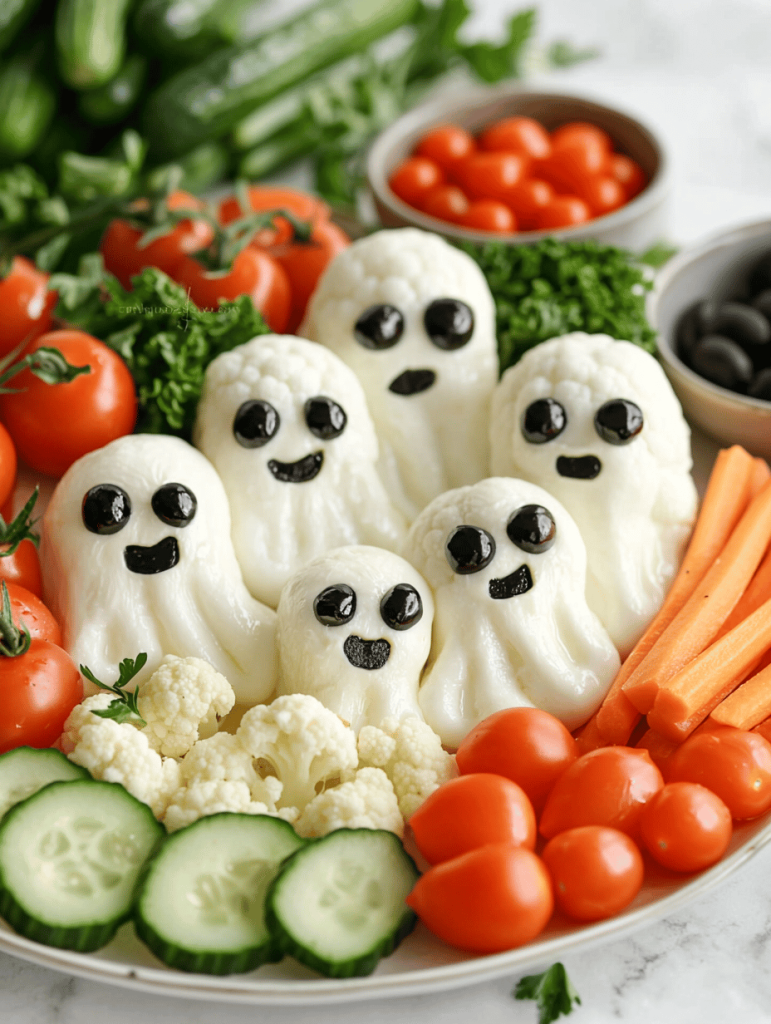
  • Spooky Snacks: The Halloween Ghost Veggie Platter That Kids & Ghouls Will Love

    Spooky Snacks: The Halloween Ghost Veggie Platter That Kids & Ghouls Will Love

    Every October, I scramble for creative ways to make healthy eating fun for kids and adults alike. This Halloween Ghost Veggie Platter transforms plain vegetables into spooky, adorable ghosts that easily become the star of any gathering. It’s a playful touch that makes munching on carrots, cucumbers, and celery feel like an enchanted ritual.

    What sets this recipe apart is its simplicity and charm; no complex tools or ingredients needed. Just a few slices of cheese, some black olives, and your favorite fresh veggies turn into tiny, smiling spirits. It’s the perfect combination of spooky and nutritious—an instant hit I look forward to year after year.

    Halloween Ghost Veggie Platter

    This Halloween-themed veggie platter features plain vegetables transformed into adorable ghost shapes. Sliced cucumbers, carrots, and celery are decorated with cheese and olive faces to resemble little spirits, creating a playful and nutritious presentation. The final result is a colorful, whimsical display perfect for festive gatherings.
    Prep Time 15 minutes
    Total Time 15 minutes
    Servings: 8
    Course: Main Course
    Cuisine: American
    Calories: 50

    Ingredients
      

    • 2 cups cucumber slices Cut into rounds about 1/4 inch thick
    • 2 carrots baby carrots Whole, for shaping ghosts
    • 1 cup celery sticks Cut into manageable pieces
    • 1 cup cheddar cheese Cut into small slices or shapes for ghost bodies and faces
    • 1/2 cup black olives Sliced into small rounds for eyes and mouths

    Equipment

    • Sharp knife
    • Cutting board
    • Small piping bags or plastic sandwich bags
    • Black olives

    Method
     

    1. Arrange the cucumber slices on a large serving platter to serve as the ghost bodies, leaving space between each.
    2. Slice each baby carrot lengthwise and gently carve or break the ends into a slightly pointed or frayed shape to resemble ghostly tails.
    3. Place a baby carrot on top of each cucumber slice to form the tail of the ghost. Secure if needed with a small piece of cheese or a toothpick.
    4. Cut small pieces of cheddar cheese into irregular shapes for the ghost faces, and tuck them onto the front of each cucumber to create a friendly face.
    5. Use slices of black olives to make eyes and tiny mouths. Attach the olive slices onto the cheese with a tiny dab of cream cheese or just gently press them in place.
    6. Arrange the celery sticks around the platter as additional spooky ghosts or as dipping sticks for vegetables.
    7. Optionally, use small piping bags or plastic sandwich bags with a corner snipped off to pipe small dots of cheese for extra facial features or decoration.
    8. Double-check that all the faces look cheerful and spooky enough for Halloween fun. Adjust as needed with extra cheese or olive pieces.
    9. Serve the spooky ghost veggie platter immediately, or refrigerate briefly to keep the cheeses firm. Enjoy the playful, healthy centerpiece!

    Serving up this eerie veggie ghost platter is a delightful way to embrace the season’s whimsical spirit. The kids love hunting down their favorite veggies transformed into little spirits, and I love how effortless it is to pull together. Plus, it’s a fresh, crunchy addition to any Halloween table that everyone appreciates.

    As the seasonal decorations come out and the spooky playlist kicks in, this Halloween veggie platter adds a touch of playful charm. It’s a reminder that creative, healthy food doesn’t have to be complicated—sometimes, just a few smiles and a bit of cheese do the trick for a memorable celebration.

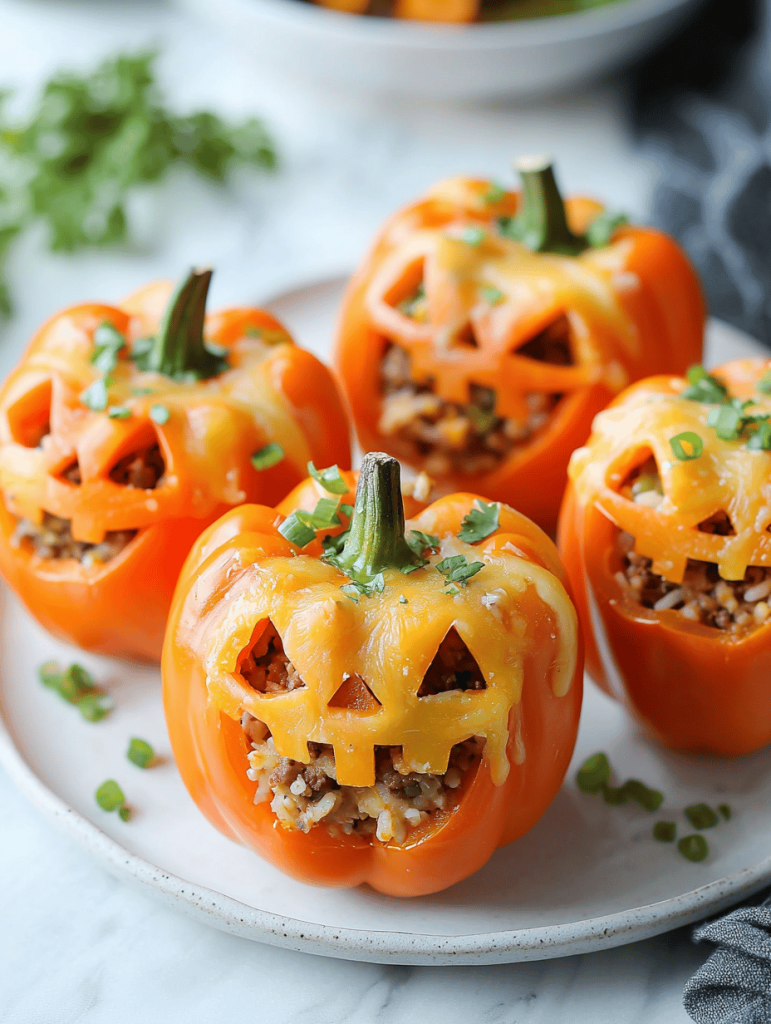
  • Spooky Sweetness: Halloween Stuffed Bell Pepper Jack-o’-Lanterns

    Spooky Sweetness: Halloween Stuffed Bell Pepper Jack-o’-Lanterns

    Halloween is the perfect time to embrace playful, edible decorations that double as a meal. These stuffed bell pepper Jack-o’-Lanterns are not just festive—they’re a surprising combination of savory filling and fun presentation. It’s the rare recipe that makes kids giggle and grown-ups feel a bit nostalgic.

    Imagine slicing into a bright orange pumpkin, only to find a hearty, cheesy filling nestled inside. The aroma of roasted peppers mixed with melting cheese fills the kitchen with a warm, inviting scent. Whether for a party or a family dinner, these Jack-o’-Lanterns transform simple ingredients into a fun masterpiece.

    Stuffed Bell Pepper Jack-o’-Lanterns

    These stuffed bell pepper Jack-o’-Lanterns are vibrant orange peppers hollowed out and carved into festive pumpkin faces. They are filled with a savory cheese and rice mixture, then baked until tender and bubbly, resulting in a playful, edible decoration with a hearty texture. The final presentation showcases carved peppers with a melted cheese filling peeking through the facial cuts.
    Prep Time 20 minutes
    Cook Time 30 minutes
    Total Time 50 minutes
    Servings: 4
    Course: Main Course
    Cuisine: American
    Calories: 250

    Ingredients
      

    • 4 large bell peppers preferably orange for Jack-o’-Lantern look
    • 1 cup cooked rice preferably short-grain or medium-grain
    • 1 cup shredded cheddar cheese for filling and topping
    • 1/2 cup cookbook mince or finely chopped onion adds flavor to the filling
    • 2 cloves garlic minced
    • 1 tbsp olive oil
    • to taste salt and pepper

    Equipment

    • Sharp knife
    • Cutting board
    • Mixing bowl
    • Baking sheet
    • Spoon

    Method
     

    1. Preheat your oven to 375°F (190°C). Carefully cut the tops off each bell pepper and remove seeds and membranes, creating a hollowed-out pumpkin shape.
    2. Use a sharp knife to carve faces onto each pepper, creating eyes, a nose, and a jagged mouth to resemble Jack-o’-Lanterns.
    3. Heat olive oil in a skillet over medium heat, then add minced garlic and chopped onion. Sauté until fragrant and the onion becomes translucent, about 3-4 minutes.
      4 large bell peppers
    4. Mix the cooked rice with the sautéed garlic and onion, then stir in half of the shredded cheese. Season with salt and pepper to taste.
      4 large bell peppers
    5. Spoon the filling mixture into each carved pepper, pressing gently to fill evenly up to the opening.
    6. Place the stuffed peppers on a baking sheet lined with parchment paper or a silicone mat. Top each with the remaining shredded cheese for a melty finishing touch.
      4 large bell peppers
    7. Bake in the preheated oven for 25-30 minutes, until the peppers are tender and the cheese is bubbly and golden.
    8. Remove from the oven and let cool slightly before serving, showcasing the carved faces with melted cheese spilling out.

    Notes

    For extra fun, use different vegetable parts to add details to the carved faces or experiment with colored peppers for more variety.
    Making these Halloween stuffed peppers is a delightful way to celebrate the season while satisfying hungry bellies. They invite creativity, allowing you to carve different expressions and fill them with all your favorite ingredients. Each bite combines the smoky sweetness of roasted peppers with the gooey, cheesy core.

    As the night airs down and kids go trick-or-treating, you’ll have a savory visual treat that’s surprisingly easy to prepare. This recipe is a reminder that holiday fun can be both whimsical and comforting—perfect for the cozy, spooky vibe of October nights.

  • Spooky Spectacle: Halloween Deviled Egg Eyeballs That Will Haunt Your Table

    Spooky Spectacle: Halloween Deviled Egg Eyeballs That Will Haunt Your Table

    Halloween parties are the perfect chance to embrace the spooky and eerie. This year, I decided to craft a dish that combines classic deviled eggs with a grotesque twist—eyeballs that look just as creepy as they taste. The moment I set these mini eyeballs on the platter, my friends’ faces lit up with delight and tiny screams.

    Transforming simple ingredients into something that looks like a set from a horror movie might seem daunting, but these deviled egg eyeballs come together quickly. The real magic is in their chilling presentation, which makes them perfect for a themed gathering or a holiday fright fest. Plus, they’re surprisingly delicious with a smooth, tangy filling that balances out the spooky appearance.

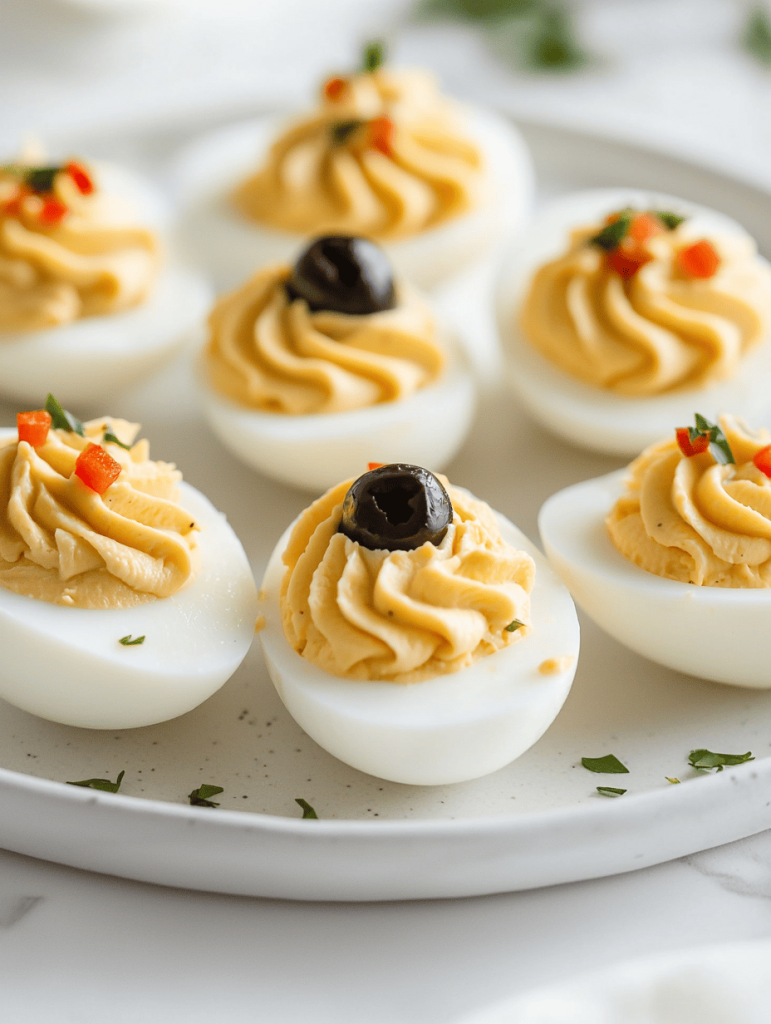
    Deviled Egg Eyeballs

    This dish features classic deviled eggs with a spooky twist, transforming them into creepy eyeballs perfect for horror-themed parties. The eggs are boiled, halved, and filled with a tangy yolk mixture, then topped with an olive slice to mimic an eerie eyeball appearance. The final result is a smooth, creamy filling with a striking visual impact.
    Prep Time 20 minutes
    Cook Time 10 minutes
    Total Time 30 minutes
    Servings: 12
    Course: Main Course
    Cuisine: American
    Calories: 80

    Ingredients
      

    • 6 large large eggs for boiling
    • 2 tbsp mayonnaise for filling
    • 1 tsp yellow mustard adds tanginess
    • to taste salt and pepper for seasoning
    • 12 small black olives for eyeball pupils
    • 12 slices pickled green olives to slice for iris

    Equipment

    • Saucepan
    • Mixing bowl
    • Small spoon
    • Piping bag or plastic sandwich bag
    • Knife

    Method
     

    1. Place the eggs in a saucepan and cover with cold water. Bring to a boil over medium-high heat, then reduce to a simmer and cook for 10 minutes. Transfer eggs to cold water to cool completely, then peel off the shells.
    2. Slice each egg in half lengthwise and carefully remove the yolks into a mixing bowl, keeping the whites intact.
    3. Mash the yolks with mayonnaise and mustard until smooth and creamy. Season with salt and pepper to taste, adjusting flavors as needed.
    4. Using a piping bag or a plastic sandwich bag with the corner snipped off, fill the egg white cavities with the yolk mixture, creating a rounded, intuitive shape that resembles an eyeball.
    5. Slice the pickled green olives into small rings to form the iris of the eyeball, and place one onto each filled egg, pressing lightly so it sits securely on the yolk filling.
    6. Slice the black olives thinly to create the pupil, and carefully place a small piece in the center of the green olive ring to complete the creepy eyeball look.
    7. Arrange the finished deviled egg eyeballs on a serving platter, and refrigerate for at least 15 minutes before serving to let the flavors meld and the presentation chill.

    Notes

    For an extra creepy effect, add edible red food coloring to the yolk mixture for bloodshot veins or extra eerie touches.
    These deviled egg eyeballs are more than just a meal—they’re a conversation starter and a memorable chapter in your Halloween feast. As you slice into them, the creamy yolk filling spills out like a creature from the depths, adding to the eerie fun.

    Enjoy creating these creepy treats, and have fun watching your friends’ reactions. The mix of familiar flavors with a ghastly look makes for a perfect Halloween surprise. And who knows? Maybe they’ll even haunt your dreams in the best way possible.

  • Spiders & Cheddar: The Haunted Cheese Ball That Spooks Your Snack Table

    Spiders & Cheddar: The Haunted Cheese Ball That Spooks Your Snack Table

    As October chills settle in, I love crafting recipes that embrace the spooky season with a touch of whimsy and a dash of chaos. This Halloween Spider Cheese Ball isn’t just a dip; it’s a miniature arachnid spectacle that invites giggles and awe at every party. With its creepy crawly appearance and creamy center, it’s the perfect centerpiece for a devilish gathering.

    The idea of turning a simple cheese ball into a spider invites a playful challenge. Every step from molding the cheesy orb to adding the spindly legs feels like assembling a tiny culinary monster. It’s a fun project that awakens my inner kid—because food should be as fun as it is delicious.

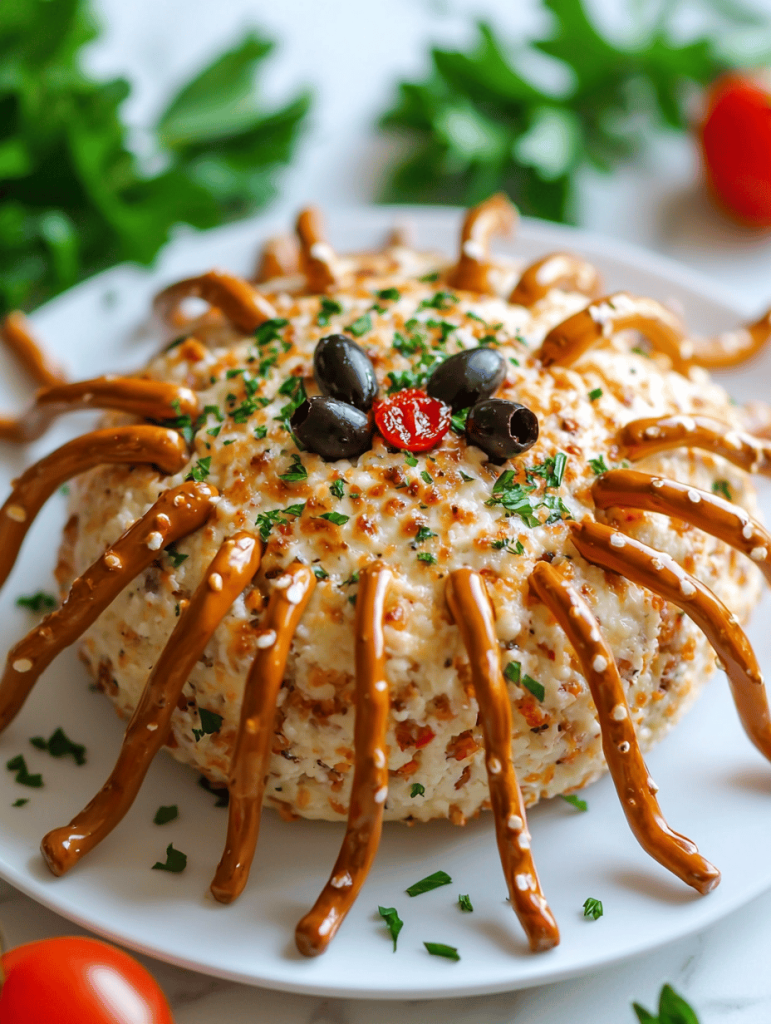
    Halloween Spider Cheese Ball

    This Halloween Spider Cheese Ball is a creamy cheese-based dip shaped into a spherical body with spindly leg extensions, resembling a spooky spider. The cheese mixture is flavored with herbs and softened until smooth, then molded and decorated with pretzel sticks or sliced almonds for legs to create a whimsical and creepy centerpiece for Halloween gatherings.
    Prep Time 20 minutes
    Cook Time 10 minutes
    Total Time 30 minutes
    Servings: 8
    Course: Main Course
    Cuisine: Halloween
    Calories: 180

    Ingredients
      

    • 8 oz cream cheese softened
    • 1 cup shredded cheddar cheese
    • 1 tablespoon fresh chopped chives
    • 1 teaspoon garlic powder
    • 1/2 cup crushed crackers or pretzels
    • 8 pretzel sticks pretzels (for spider legs) cut in half if very long
    • 1 small carrot or yellow bell pepper for spider eyes

    Equipment

    • Mixing bowl
    • Plastic wrap
    • Baking sheet
    • Small paring knife or toothpick

    Method
     

    1. In a mixing bowl, beat the softened cream cheese until smooth and creamy, which takes about 1-2 minutes.
    2. Add the shredded cheddar cheese, chopped chives, and garlic powder to the bowl. Mix thoroughly until all ingredients are well combined and the mixture is evenly colored.
    3. Scoop the cheese mixture onto a piece of plastic wrap and shape it into a tight, round sphere. Wrap it completely and chill in the refrigerator for about 15 minutes to firm up.
    4. Once chilled, unwrap the cheese ball and place it on a baking sheet lined with parchment paper. This forms the spider’s main body.
    5. Break the pretzel sticks in half or into desired lengths to make spider legs. Insert the pretzel legs into the sides of the cheese ball, spreading them evenly around to mimic spider legs.
    6. Slice a small piece from the carrot or yellow bell pepper and cut tiny rounds for the spider’s eyes. Attach these to the front of the cheese ball using small bits of cheese or a toothpick.
    7. Arrange the completed spider cheese ball on a serving plate. Optionally, add extra pretzels or crackers around it for a festive presentation.
    8. Serve the Halloween Spider Cheese Ball with crackers or vegetables and enjoy the spooky, delicious centerpiece.

    Notes

    Use fresh ingredients for best flavor. Adjust the number of legs for desired spider appearance. Chill well before serving to help shape and set the cheese ball.
    This Halloween, let your imagination run wild with this spider cheese ball. It’s a conversation starter and a crowd-pleaser, combining comfort food with a spooky twist. Whether your guests are young or just young at heart, the surprise element makes it a memorable centerpiece.

    So, gather your ingredients, embrace a bit of chaos in the kitchen, and prepare to wow everyone with a little edible monster. After all, the best holiday memories often start with the most unexpected bites.

  • Spooktacularly Cute: Halloween Mummy Hot Dogs

    Spooktacularly Cute: Halloween Mummy Hot Dogs

    What makes this recipe stand out is the playful presentation—wrapped in crispy, bandage-like strips of puff pastry or dough. The smell of sizzling hot dogs and baking pastry fills the air with anticipation. It’s a hit with kids and adults alike, for its mix of savory crunch and adorable design.

    Hot Dog Bandages

    This dish features hot dogs wrapped in strips of puff pastry, creating a playful and crispy snack. The pastry is baked until golden and crunchy, forming adorable bandage-like wraps around the hot dogs. The result is a savory, flaky treat with a satisfying crunch and appealing appearance.
    Prep Time 10 minutes
    Cook Time 20 minutes
    Total Time 30 minutes
    Servings: 4
    Course: Main Course
    Cuisine: American
    Calories: 250

    Ingredients
      

    • 4 pieces hot dogs
    • 1 sheet puff pastry thawed if frozen

    Equipment

    • Baking sheet
    • Parchment paper

    Method
     

    1. Preheat your oven to 400°F (200°C) and line a baking sheet with parchment paper.
    2. Roll out the puff pastry lightly to smooth out creases and then cut it into strips approximately 1 inch wide.
    3. Wrap each hot dog tightly with a strip of puff pastry, overlapping slightly to resemble bandages.
    4. Place the wrapped hot dogs seam-side down on the prepared baking sheet, spacing them apart.
    5. Bake in the preheated oven for about 15-20 minutes, or until the pastry is puffed and golden brown.
    6. Remove from the oven and allow to cool slightly — the pastry should be crisp and flaky.
    Whether you’re hosting a party or just want to surprise your family, these mummy hot dogs bring delight in every bite. Plus, they smell incredible right out of the oven, with that warm, toasty aroma that screams fall. A fun, festive dish that never fails to get smiles.