Author: EthanCole

  • Autumn’s Hidden Gem: The Enchanting Roasted Pumpkin Soup

    Autumn’s Hidden Gem: The Enchanting Roasted Pumpkin Soup

    As the air turns crisp and leaves crunch underfoot, I find myself craving more than just a warm drink. I dive into the earthy aroma of roasted pumpkin, its scent filling my kitchen with hints of cinnamon and nutmeg. This isn’t just soup; it’s a cozy journey back to childhood autumns, flavored with the season’s richest bounty.

    Roasting pumpkin enhances its natural sweetness, creating a velvety base that feels like a hug in a bowl. I like making it in the slow moments of fall, when time slows and comfort is king. It’s surprisingly simple, yet each spoonful feels like a secret, seasonal treasure.

    Roasted Pumpkin Soup

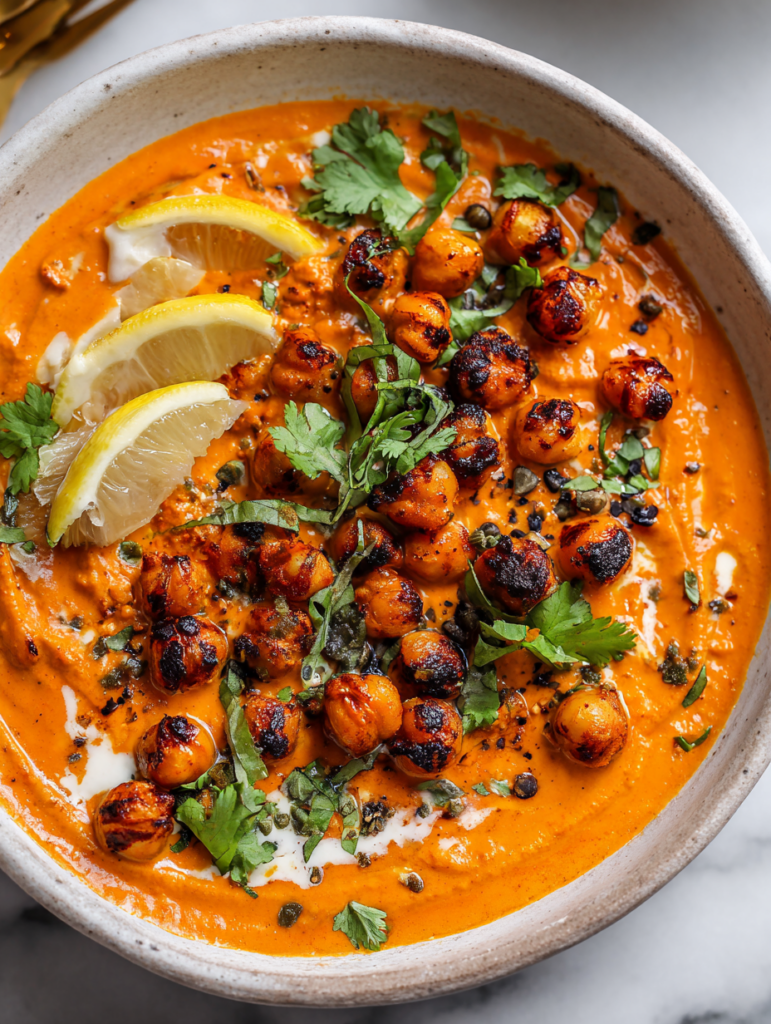
    This roasted pumpkin soup features pureed pumpkin flesh blended into a smooth, velvety consistency, flavored with warming spices like cinnamon and nutmeg. The pumpkin is roasted until caramelized, enhancing its natural sweetness, and the soup is finished with a creamy base, resulting in a vibrant orange, comforting dish with a silky texture.
    Prep Time 15 minutes
    Cook Time 45 minutes
    Total Time 1 hour
    Servings: 4
    Course: Main Course
    Cuisine: Seasonal
    Calories: 180

    Ingredients
      

    • 1 kg pumpkin peeled, seeded, and cut into chunks
    • 2 tablespoons olive oil for roasting
    • 1 small onion chopped
    • 2 cloves garlic minced
    • 1 teaspoon ground cinnamon
    • 1/2 teaspoon ground nutmeg
    • 4 cups vegetable broth
    • 1/2 cup heavy cream optional, for creaminess
    • to taste salt and pepper

    Equipment

    • Baking sheet
    • Blender or immersion blender
    • Large pot
    • Cooking spoon
    • Measuring cups and spoons

    Method
     

    1. Preheat the oven to 400°F (200°C). Spread pumpkin chunks on a baking sheet, drizzle with olive oil, and toss to coat. Roast for about 30-40 minutes until the flesh is tender and slightly caramelized around the edges.
    2. Meanwhile, warm a large pot over medium heat. Add chopped onion and cook, stirring occasionally, until it becomes translucent and fragrant, about 5 minutes.
    3. Once the pumpkin is roasted and cooled slightly, scoop the flesh into a blender. Add a splash of vegetable broth and blend until smooth and creamy.
    4. Add the garlic, cinnamon, and nutmeg to the cooked onions in the pot. Stir and cook for another minute until the spices are fragrant.
    5. Pour the pumpkin puree into the pot with the onion and spice mixture. Stir well to combine everything evenly.
    6. Gradually add the vegetable broth, stirring to incorporate the puree into a smooth soup base. Bring the mixture to a gentle simmer.
    7. Allow the soup to simmer for about 10-15 minutes, stirring occasionally, to let the flavors meld and the soup thicken slightly.
    8. If using, stir in the heavy cream to add richness and creaminess to the soup. Season with salt and pepper to taste.
    9. Use an immersion blender or carefully transfer the soup to a blender to blend until completely smooth and velvety.
    10. Return the blended soup to the pot if necessary, warm through, and adjust seasoning as needed.
    11. Serve the soup hot, garnished with a drizzle of cream or a sprinkle of fresh herbs if desired. Enjoy the cozy, seasonal flavors.
    This roasted pumpkin soup bridges the gap between rustic tradition and modern flavor adventures. Its smooth, sweet profile makes it perfect for a family dinner or a quiet evening alone with a good book.

    As autumn fades, I’ll still crave this warm, fragrant bowl that’s both nostalgic and fresh. It’s a reminder that sometimes, the simplest ingredients transform into something truly magical. So, I keep a pot simmering, savoring each comforting scoop while the season lasts.

  • The Unexpected Charm of Spiced Peach Slushie

    The Unexpected Charm of Spiced Peach Slushie

    Imagine chilling with a drink that combines the sweet juiciness of ripe peaches with a whisper of cinnamon and a splash of lemon. This peach slushie is more than just a summer treat—it’s a nostalgic hug wrapped in a frosty glass, reminding me of roadside fruit stands and lazy afternoons. I recently discovered that blending in a hint of ginger elevates this simple drink to something extraordinary.

    This recipe is a secret weapon during heatwaves or when friends drop by unexpectedly. It’s quick to whip up, yet packed with enough flavor layers to make anyone ask for the recipe. Plus, it’s a fantastic way to use up those ripe peaches that almost reach their “save for smoothies” stage.

    ## WHY I LOVE THIS RECIPE?

    – It feels like a cozy memory in every sip, reminding me of summers past.
    – The spices turn a basic slushie into something full of warmth and depth.
    – It’s versatile—perfect for brunch, movie nights, or solo sipping.
    – Using fresh peaches makes the flavor genuinely bright and natural.
    – The bright orange color makes any table brighter.

    Peach Cinnamon Ginger Slushie

    This peach slushie is a blended frozen beverage made with ripe peaches, cinnamon, lemon juice, and a hint of ginger, resulting in a bright, icy drink with layered warm and citrus flavors. The mixture is smooth and frosty, with a vibrant orange hue and a slightly thick texture suitable for sipping or serving in glasses.
    Prep Time 10 minutes
    Total Time 10 minutes
    Servings: 2
    Course: Main Course
    Cuisine: fusion
    Calories: 150

    Ingredients
      

    • 4 cups ripe peaches, peeled and sliced pitted and peeled
    • 1 tsp ground cinnamon adds warmth
    • 1 tbsp fresh lemon juice brightens flavor
    • 1 tsp fresh ginger, grated adds a spicy kick
    • 1 tbsp honey or maple syrup optional for sweetness
    • 1 cup ice cubes for the icy texture
    • 1/2 cup cold water

    Equipment

    • Blender
    • Paring knife
    • Cutting board

    Method
     

    1. Slice the peaches in half, remove the pits, and peel if needed. Place the peach slices in the blender.
    2. Add the ground cinnamon, fresh lemon juice, grated ginger, and honey to the blender with the peaches.
    3. Pour in the cold water and add the ice cubes to help achieve a frosty, slush-like consistency.
    4. Secure the lid on the blender and blend on high speed until the mixture is smooth, thick, and frosty, about 30-60 seconds. You should see a vibrant orange color with tiny flecks of spice.
    5. Check the consistency and add more water or ice if you want it thinner or frostier, then blend again for a few seconds.
    6. Pour the slushie into chilled glasses and garnish with a small peach slice or a sprinkle of cinnamon if desired. Serve immediately for the best icy texture and fresh flavor.

    Notes

    You can adjust the sweetness by adding more honey or syrup. For extra flavor, consider garnishing with fresh mint or a dash of additional cinnamon.
    This peach slushie isn’t just a refreshing drink; it’s a little celebration in a glass. Whether it’s a scorching summer day or a moment you crave something sweet and cool, this recipe hits the spot. The best part? It’s so easy that you’ll want to make it all season long.

    As the sun dips lower and the peaches reach their peak, I find myself blending this again and again. It’s a simple pleasure that warms the soul while cooling the body, a perfect harmony of flavors and textures. Cheers to unexpected delights and summer’s sweet serenade.

  • Unexpected Delight: Roasted Butternut Squash & Carrot Soup That Transforms Autumn

    Unexpected Delight: Roasted Butternut Squash & Carrot Soup That Transforms Autumn

    What makes this dish truly special is its simplicity—no fancy ingredients, just honest vegetables roasted to perfection and blended into a smooth, luscious puree. It’s a celebration of seasonal produce, reminding us that great flavor often comes from the humblest of ingredients. Every spoon delivers that warm, slightly sweet, and slightly smoky taste that feels like getting a cozy hug.

    Roasted Vegetable Puree

    This dish features a blend of seasonal vegetables roasted until tender and then pureed into a smooth, velvety consistency. It highlights simple techniques like roasting and blending to create a warm, slightly sweet, and smoky-flavored puree with a luscious texture.
    Prep Time 10 minutes
    Cook Time 40 minutes
    Total Time 50 minutes
    Servings: 4
    Course: Main Course
    Cuisine: generic
    Calories: 120

    Ingredients
      

    • 3 cups mixed seasonal vegetables (e.g., carrots, sweet potatoes, squash) peeled and chopped
    • 2 tbsp olive oil for roasting
    • to taste salt and pepper for seasoning
    • 1/4 cup vegetable broth or water to help blend to smoothness

    Equipment

    • Baking sheet
    • Blender or food processor
    • Spatula
    • Knife
    • Cutting board

    Method
     

    1. Preheat your oven to 400°F (200°C). Spread the chopped vegetables evenly on a baking sheet and drizzle with olive oil. Toss to coat all pieces thoroughly.
    2. Roast the vegetables in the oven for about 30-40 minutes, until they are tender and slightly caramelized around the edges, filling your kitchen with a warm, sweet aroma.
    3. Remove the vegetables from the oven and let them cool slightly until safe to handle. Transfer the roasted vegetables to a blender or food processor.
    4. Add a splash of vegetable broth or water to the blender. This helps facilitate blending into a smooth puree.
    5. Blend the mixture on high speed until you achieve a silky, uniform texture. You may need to stop and scrape down the sides occasionally.
    6. Taste the puree and season with salt and pepper as needed. Give it a quick blend to incorporate the seasoning evenly.
    7. Pour the hot vegetable puree into serving bowls. The final dish should be velvety and slightly glossy, with a warm, inviting color and aroma.
    In a world obsessed with quick fixes and conveyor-belt meals, this soup offers a moment of pause and effort that truly pays off. It’s one of those dishes that feels just right—simple, nourishing, and deeply satisfying. A quiet celebration of what seasonal vegetables can do when treated with a little patience and love.

  • Spooky Sweetness: Halloween Pumpkin Rice Krispie Treats

    Spooky Sweetness: Halloween Pumpkin Rice Krispie Treats

    As the air turns crisp and orange leaves dance on the sidewalks, I find myself craving a treat that captures the essence of fall with a playful twist. This year, I decided to craft something unexpected for Halloween — pumpkin-flavored Rice Krispie treats that look as adorable as they taste. The combination of sweet marshmallow and warm pumpkin spices makes every bite a nostalgic yet festive experience.

    What sets these treats apart is not just their flavor, but their vibrant orange hue and the joy of creating something both simple and striking. They’re perfect for spooky parties or a cozy evening watching horror classics with loved ones. Plus, they add a splash of whimsy to any candy table without demanding hours in the kitchen.

    Pumpkin-Flavored Rice Krispie Treats

    These Rice Krispie treats are made by melting marshmallows with butter and mixing in warm pumpkin puree and spices, resulting in a vibrant orange, chewy snack. They are pressed into a pan to set, creating a soft, sticky, and festive treat with a slight crunch from the cereal. The final product is a colorful, pumpkin-spiced dessert perfect for Halloween or fall gatherings.
    Prep Time 15 minutes
    Cook Time 10 minutes
    Total Time 25 minutes
    Servings: 12
    Course: Main Course
    Cuisine: American
    Calories: 150

    Ingredients
      

    • 6 cups Rice Krispies cereal
    • 10 ounces marshmallows mini or large, depending on preference
    • 4 tablespoons unsalted butter
    • 1 cup canned pumpkin puree not pumpkin pie filling
    • 1 teaspoon cinnamon ground
    • 1/2 teaspoon nutmeg ground
    • 1/4 teaspoon clove ground
    • 1/4 teaspoon ginger ground

    Equipment

    • Large saucepan
    • Rubber spatula
    • 9×13 inch baking pan
    • Parchment paper or non-stick spray

    Method
     

    1. Grease your baking pan or line it with parchment paper to prevent sticking.
    2. In a large saucepan, melt the butter over medium heat until it starts bubbling and smells rich.
    3. Add the marshmallows to the melted butter and stir continuously until completely melted and smooth, creating a gooey mixture.
    4. Stir in the pumpkin puree along with the cinnamon, nutmeg, clove, and ginger until the mixture is fragrant and uniform in color.
    5. Remove the saucepan from heat and immediately fold in the Rice Krispies cereal until evenly coated with the pumpkin-spiced marshmallow mixture.
    6. Using a spatula, press the mixture into the prepared baking pan, spreading it out evenly to about 1-inch thickness.
    7. Press down gently to compact the treats, ensuring they hold together well.
    8. Let the treats cool at room temperature for at least 30 minutes, or until they are firm enough to cut.
    9. Once cooled, cut into squares or rectangles with a sharp knife for clean edges.
    10. Arrange the treats on a serving platter and enjoy their soft, sticky, and festive flavor.

    Notes

    For an extra touch, decorate with mini chocolate chips or orange sprinkles before serving.

    These pumpkin Rice Krispie treats are a delightful way to celebrate the season’s flavors with minimal fuss. The first bite brings that perfect crunch followed by gooey marshmallow and the comforting aroma of cinnamon and nutmeg. They’re a reminder that you don’t need elaborate ingredients to make memorable holiday sweets.

    Enjoy these treats as a charming centerpiece or a fun gift for friends and family. They capture the spirit of Halloween—playful, spooky, and sweet—without any fuss. Every batch is a small reminder that the simplest ideas often bring the biggest smiles, especially when flavored with a little seasonal magic.

  • Spooky Sweetness: Halloween Pumpkin Cheesecake Bars with a Twist

    Spooky Sweetness: Halloween Pumpkin Cheesecake Bars with a Twist

    As October’s chill sets in, I find myself craving desserts that tell a story of nostalgia with a dash of chaos. These Halloween Pumpkin Cheesecake Bars are not your average treat—they’re a carnival of textures and flavors, blending the creamy richness of cheesecake with the spicy kiss of fall pumpkin. What makes them truly special? A secret swirl of caramel that sneaks a hint of warmth through every bite.

    Imagine a buttery graham cracker crust, topped with velvety pumpkin mixture, all crowned with a whip of cinnamon-spiced cream. I love how they balance sweetness and spice, echoing the cozy chaos of Halloween night. Plus, they look downright spooky, yet taste like a sweet hug that comforted me through many haunted seasons.

    ## WHY I LOVE THIS RECIPE?
    – It captures the essence of fall in every bite, from cinnamon to nutmeg.
    – The caramel swirl adds an unexpected gooey surprise that delights the senses.
    – Perfect for parties—children and adults will cheer for the bold flavors.
    – Making it is a playful chaos that ends with a delightful, comforting reward.

    Halloween Pumpkin Cheesecake Bars

    These Pumpkin Cheesecake Bars feature a buttery graham cracker crust topped with a velvety pumpkin-spiced filling. Swirled with caramel and finished with cinnamon-spiced whipped cream, they combine creamy textures with fruity and spicy flavors, finished with a glossy, inviting appearance.
    Prep Time 20 minutes
    Cook Time 40 minutes
    Total Time 1 hour
    Servings: 12
    Course: Main Course
    Cuisine: American
    Calories: 350

    Ingredients
      

    • 1 1/2 cups graham cracker crumbs about 10 full sheets crushed
    • 1/4 cup granulated sugar
    • 1/2 cup unsalted butter melted
    • 16 oz cream cheese softened
    • 1 cup granulated sugar
    • 1 cup canned pumpkin not pie filling
    • 3 large eggs
    • 1 1/2 teaspoons ground cinnamon
    • 1/2 teaspoon ground nutmeg
    • 1/4 teaspoon ground cloves
    • 1/4 teaspoon salt
    • 1/3 cup caramel sauce for swirling
    • 1 cup heavy cream
    • 2 tablespoons powdered sugar
    • 1 teaspoon ground cinnamon for whipped cream

    Equipment

    • 8×8-inch baking pan
    • Mixing bowls
    • Electric mixer
    • Spatula
    • Whisk
    • Measuring cups and spoons
    • Parchment paper

    Method
     

    1. Line the baking pan with parchment paper and in a mixing bowl, combine the graham cracker crumbs and sugar. Pour in the melted butter and mix until the crumbs are evenly coated and the mixture looks like wet sand. Press this mixture firmly into the bottom of the prepared pan to form an even crust.
    2. In a large bowl, beat the softened cream cheese until smooth and creamy, about 2-3 minutes. Add the sugar and continue beating until combined, and the mixture is fluffy.
    3. In a separate bowl, whisk together the pumpkin, eggs, cinnamon, nutmeg, cloves, and salt until smooth. Gently fold this pumpkin mixture into the cream cheese batter until fully incorporated.
    4. Pour the pumpkin filling over the prepared crust, spreading it out evenly with a spatula. Tap the pan gently on the counter to release any air bubbles and create a smooth top.
    5. Spoon the caramel sauce in small dollops over the pumpkin filling. Use a toothpick or skewer to swirl the caramel into the filling to create a marbled effect.
    6. Bake in a preheated oven at 325°F (160°C) for about 40 minutes, or until the edges are set and the center slightly jiggles when shaken. Let the bars cool completely in the pan on a wire rack.
    7. In a chilled bowl, whip the heavy cream with powdered sugar, cinnamon, until stiff peaks form. Spread or pipe the cinnamon-spiced whipped cream over the cooled bars.
    8. Slice into squares and serve, enjoying the combination of creamy, spiced pumpkin filling, crunchy crust, and swirl of caramel in each bite.
    Baking these Halloween Pumpkin Cheesecake Bars has become a seasonal ritual I genuinely look forward to. The aroma of pumpkin mixed with warm spices quickly fills my kitchen, turning even the busiest day into a cozy celebration. Every slice reminds me of autumns past and the simple joys of sharing something sweet.

    This recipe isn’t just about the taste; it’s about creating moments of joy amid the fall chaos. Whether for a festive gathering or a quiet evening alone, these bars bring a touch of magic to any moment. As the season changes, I find comfort in the little traditions, and these bars are now one of my favorites.

  • Autumn Harvest One-Pan Chicken Delight: A Cozy Sunday Feast

    Autumn Harvest One-Pan Chicken Delight: A Cozy Sunday Feast

    Cooking a meal that reflects the senses of fall can be a challenge. But what if you could capture the crisp air, the vibrant colors, and the aroma of roasted chestnuts in a single skillet? This one-pan fall chicken dinner is a celebration of seasonal produce and comforting flavors, all cooked together to simplify your busy weekend.

    Imagine tender chicken breasts nestled among sweet butternut squash, tangy apples, and fragrant herbs. The skillet sizzles with a warm, inviting aroma that promises a hearty yet light dish. It’s a perfect way to make the most of autumn’s bounty without the fuss of multiple pots and pans.

    This recipe is not just about taste; it’s about embracing those cozy, lazy weekends when a simple, nourishing meal can turn a regular day into a celebration of fall.

    One-Pan Fall Chicken Dinner

    This skillet dish features tender chicken breasts cooked with roasted butternut squash, sliced apples, and fragrant herbs, creating a hearty yet comforting autumn meal. The ingredients are browned and simmered together, resulting in a colorful, aromatic dish with a tender texture and a golden, caramelized appearance.
    Prep Time 15 minutes
    Cook Time 35 minutes
    Total Time 50 minutes
    Servings: 4
    Course: Main Course
    Cuisine: American
    Calories: 350

    Ingredients
      

    • 4 pieces chicken breasts skinless, boneless
    • 2 cups butternut squash peeled and diced
    • 2 apples sliced apples any tart variety like Granny Smith
    • 3 cloves garlic minced
    • 2 tablespoons olive oil
    • 1 teaspoon fresh thyme chopped
    • 1 teaspoon ground cinnamon
    • to taste salt and pepper
    • 1 cup chicken broth

    Equipment

    • Skillet or large ovenproof frying pan
    • Knife
    • Cutting board
    • Tongs or spatula
    • Measuring spoons

    Method
     

    1. Pat the chicken breasts dry, then season both sides generously with salt, pepper, and a pinch of cinnamon.
    2. Heat the skillet over medium heat and add a tablespoon of olive oil. Once hot, carefully place the chicken breasts in the pan and sear for 5-6 minutes on each side until golden brown.
    3. Remove the chicken from the skillet and set aside on a plate. In the same pan, add the remaining tablespoon of oil and toss in the minced garlic. Sauté for about 30 seconds until fragrant.
    4. Add the diced butternut squash to the skillet and cook for 8-10 minutes, stirring occasionally, until it begins to soften and develops light caramelization.
    5. Stir in the sliced apples, chopped thyme, and a pinch more cinnamon. Cook for another 4-5 minutes until the apples are slightly tender but still holding their shape.
    6. Place the browned chicken breasts back into the skillet among the vegetables. Pour in the chicken broth and bring to a gentle simmer.
    7. Cover the skillet with a lid or foil and cook for 15-20 minutes, until the chicken is cooked through and the squash is tender, with the sauce slightly thickened.
    8. Remove the skillet from heat, check seasoning, and adjust with salt and pepper as needed. Let the dish rest for a couple of minutes so flavors meld.
    9. Jane the skillet gently and serve the chicken and vegetables warm, spooning the flavorful pan juices over each portion.
    This dish is a reminder that a hearty meal can be simple and soul-satisfying. The mix of roasted fall veggies and juicy chicken makes it versatile enough to serve for any occasion. Plus, it’s the kind of dish that makes your home smell like comfort.

    With the seasons changing, embracing ingredients like apples, squash, and fresh herbs feels just right. This recipe offers a warm, filling option that’s ideal for chilly nights or lazy weekends. It’s a small, delicious celebration of everything autumn has to offer.

  • Spooky Bats and Creepy Cravings: Halloween Guacamole with Tortilla Chips

    Spooky Bats and Creepy Cravings: Halloween Guacamole with Tortilla Chips

    Halloween snuck up on me this year, bringing a surge of nostalgic chills and giggles. This time, I decided to turn the simple guacamole into a spooky spectacle, perfect for last-minute parties or mischievous snacks. The smell of ripe avocados mingles with a dash of smoky paprika, creating an inviting aroma that screams, “Boo!” as guests arrive.

    Transforming everyday snacks into eerie edible art is my kind of chaos. These bat-shaped tortilla chips tucked into vibrant green guacamole keep the mood playful and the crowd guessing. It’s a miniature celebration in every bite, bursting with freshness and just the right touch of spookiness.

    Spooky Bat-Shaped Guacamole with Tortilla Chips

    This dish features creamy guacamole made from ripe avocados blended until smooth, seasoned with smoky paprika and fresh lime juice. The guacamole is served with bat-shaped tortilla chips, creating a playful, visually striking appetizer with a vibrant green color and crispy texture to contrast the creamy dip.
    Prep Time 10 minutes
    Total Time 10 minutes
    Servings: 4
    Course: Main Course
    Cuisine: American
    Calories: 180

    Ingredients
      

    • 3 ripe avocados halved, pitted
    • 1 small lime juiced
    • 1/2 teaspoon smoked paprika adds smoky flavor
    • 1/2 teaspoon salt to taste
    • 1 small clove garlic minced
    • 4 small tortilla chips preferably cut into bat shapes or cut into rounds and shaped

    Equipment

    • Mixing bowl
    • Fork or potato masher
    • Knife
    • Cutting board
    • Baking sheet
    • Bat-shaped cookie cutter or stencil

    Method
     

    1. Cut the avocados in half, remove the pits, and scoop the flesh into a mixing bowl.
    2. Add freshly squeezed lime juice to the avocado and use a fork or potato masher to mash until smooth and creamy.
    3. Stir in the minced garlic and smoked paprika, tasting and adjusting seasoning with salt as needed to enhance flavor.
    4. Mix well until all ingredients are evenly combined, and the guacamole has a vibrant green color with a slight sheen.
    5. Preheat your oven to 375°F (190°C). Arrange the tortilla chips on a baking sheet.
    6. If your chips are not already bat-shaped, use a cookie cutter or stencil to cut shapes into rounds or cut into bat silhouettes for a spooky effect.
    7. Bake the chips in the preheated oven for about 8-10 minutes, or until they are crispy and golden at the edges.
    8. Remove the chips from the oven and let them cool slightly on a wire rack for a few minutes—this helps them crisp up further.
    9. Transfer the creamy guacamole to a serving bowl and arrange the bat-shaped tortilla chips around it, creating a spooky and inviting presentation.
    10. Enjoy your festive and fun Halloween snack, perfect for parties or mischievous munching.

    Notes

    For extra spookiness, you can use black or dark-colored tortilla chips or add a small edible eye to each bat shape.
    As the night winds down, I love how these Halloween guacamole bats spark joy and conversation. They’ve become my go-to for turning a simple appetizer into a memorable moment. It’s a reminder that sometimes, playful bites are what make celebrations truly special.

    Whether you’re hosting a haunted house or just craving something creepy-good, this recipe is perfect. The bright green avocados and dark bat-shaped chips make every scoop feel like a tiny Halloween party. Keep the fun going, and enjoy the chaos of the season.

  • The Secret Nostalgia Behind Kool Aid Slushies

    The Secret Nostalgia Behind Kool Aid Slushies

    Imagine a scorching summer day, the sun blazing overhead, and your childhood in your mind’s eye. I recently stumbled upon a forgotten concoction that instantly transported me back to simpler times: the humble Kool Aid slushie. This vibrant, icy treat isn’t just teenage nostalgia; it’s also a surprisingly versatile summer refresher.

    What’s more unexpected is how this simple drink can be jazzed up with fresh fruit or a splash of sparkling water. It’s a playful celebration of flavor, color, and carefree summer days. I’ll show you how to craft this multi-layered burst of chilly joy in your own kitchen, no fancy equipment needed.

    Kool Aid Slushie

    A Kool Aid slushie is a frozen beverage made by mixing flavored Kool Aid with sugar and water, then freezing it until solid. It is then broken into icy, colorful slush with a refreshing, slightly granular texture, ideal for hot summer days. The result is an eye-catching, chilly treat perfect for cooling down and enjoying vibrant flavors.
    Prep Time 10 minutes
    Cook Time 4 hours
    Total Time 4 hours 10 minutes
    Servings: 2
    Course: Main Course
    Cuisine: Global
    Calories: 120

    Ingredients
      

    • 1 packet Kool Aid powder flavor of your choice
    • 1/2 cup granulated sugar adjust to taste if needed
    • 2 cups cold water

    Equipment

    • Measuring cups
    • Freezer-safe container
    • Fork or spoon for scraping

    Method
     

    1. In a mixing bowl, whisk together the Kool Aid powder, sugar, and water until the sugar is fully dissolved and the mixture is vibrant and uniform in color.
    2. Pour the mixture into a freezer-safe container, spreading it out evenly, and place it in the freezer.
    3. Freeze the mixture for about 4 hours, checking occasionally; it should become solid but still scoopable.
    4. Once frozen, use a fork or spoon to scrape and break up the slush into icy, granular chunks.
    5. Serve the Kool Aid slushie in glasses, optionally garnished with fresh fruit or a slice of citrus for extra flair.
    6. Enjoy the refreshing, icy texture and bright flavors as a cool summer treat!

    Often, it’s the simplest recipes that usher in the biggest smiles. A Kool Aid slushie reminds us that even in our busiest lives, a splash of childhood cheer can refresh our spirit.

    As temperatures climb and the season calls for cool escapes, this treat offers a quick getaway. No matter how chaotic your day, a glass of this icy delight can turn the mundane into a moment of joy.

  • Chill Out with this Unusual Iced Tea Slushie Twist

    Chill Out with this Unusual Iced Tea Slushie Twist

    Many think of iced tea as a simple refreshment, but lately, I’ve been transforming it into something cooler and more exciting—an iced tea slushie with a surprising kick of flavor. It’s like capturing a summer breeze in every sip, with a texture that’s halfway between a drink and a dessert. Perfect for those sweltering days when you want something cold, yet crave a bit of adventure.

    The best part? This recipe whips up in minutes, using ingredients you probably already have tucked away. It’s a playful way to reimagine tea time, especially when friends drop by unannounced or you need a quick getaway from mundane drinks. It’s more than a treat; it’s a tiny celebration in a glass.

    Iced Tea Slushie

    This iced tea slushie is made by blending brewed tea with ice and sweetener until smooth, resulting in a slushy, icy beverage with a vibrant flavor. The texture is semi-frozen and creamy, resembling a dessert more than a drink, perfect for hot days. It combines the bright notes of tea with a chilled, refreshing consistency.
    Prep Time 5 minutes
    Cook Time 10 minutes
    Total Time 15 minutes
    Servings: 2
    Course: Main Course
    Cuisine: Cold Beverages
    Calories: 100

    Ingredients
      

    • 2 cups hot brewed tea cooled to room temperature
    • 1 cup ice cubes plus extra for serving if desired
    • 2 tablespoons honey or simple syrup adjust to taste

    Equipment

    • Kettle or pot for boiling
    • Blender
    • Measuring cups
    • Straw or stirrer

    Method
     

    1. Brew a strong cup of tea using your preferred tea bags or leaves, then let it cool completely to prevent melting the ice too quickly.
    2. Pour the cooled tea into a blender, add the honey or simple syrup, and blend briefly to combine the sweetener evenly throughout.
    3. Add the ice cubes to the blender, then blend on high until the mixture becomes thick, slushy, and evenly icy in texture. This should take about 30-60 seconds.
    4. Stop blending and check the texture — it should be scoopable, with a smooth, semi-frozen consistency. If it’s too runny, add a few more ice cubes and blend again.
    5. Pour the slushie into glasses, garnishing with a slice of lemon or a sprig of mint if desired for extra visual appeal.
    6. Serve immediately with a straw or stirrer, enjoying the cold, refreshing, and textured ice slushiness.

    Notes

    For extra flavor, infuse the tea with herbs like mint or basil before cooling. Adjust sweetness to personal taste. This recipe is flexible—try different tea flavors for variety.
    This iced tea slushie feels like a mini vacay in your hand, especially when the sun blazes down. It’s a perfect way to cool off while savoring a familiar flavor in a new form. Whether served at brunch or enjoyed as a solo afternoon escape, it always refreshes and uplifts.

    Enjoy making this simple yet delightfully different beverage. It’s a chilly, sweet reminder that sometimes, a small change can turn a regular day into something memorable.

  • Spook-tacular Halloween Monster Mash Punch!

    Spook-tacular Halloween Monster Mash Punch!

    Halloween nights call for a twist on traditional drinks, and this Monster Mash Punch offers just that. The vibrant mix of neon colors and eerie bubbling effects create a visual spectacle that excites both kids and adults alike. It’s a chance to turn your party into a mad scientist’s lab, with every glass bursting with spooky surprises.

    What makes this punch stand out is its playful chaos—think glowing ice cubes and swirling slime-like layers. It’s not just a beverage; it’s an experience, a conversation starter that boosts the spooky spirit of the night. Plus, its simple ingredients mean you can whip it up while busy carving pumpkins or decorating the haunted house.

    Monster Mash Punch

    Monster Mash Punch is a vibrant, colorful beverage featuring layered neon liquids and glowing ice cubes, creating a spooky, bubbling effect suitable for Halloween parties. It combines fruit juices, soda, and playful garnishes to produce a swirling, visual spectacle with a bubbly, slightly thickened texture. The final presentation is a fun, eerie-looking punch that mesmerizes guests with its glowing and swirling effects.
    Prep Time 20 minutes
    Cook Time 10 minutes
    Total Time 30 minutes
    Servings: 8
    Course: Main Course
    Cuisine: Halloween
    Calories: 150

    Ingredients
      

    • 4 cups orange juice preferably chilled
    • 2 cups pineapple juice
    • 1 liter lemon-lime soda chilled
    • 1 cup blue raspberry syrup adds neon color
    • 1 cup green sports drink for neon effect and flavor
    • blue ice cubes glowing ice cubes made with glow sticks or LED lights

    Equipment

    • Large clear punch bowl
    • Measuring cups and spoons
    • Mixing spoon
    • Slotted spoon
    • Ice cube trays
    • Glow stick or LED light (optional) for glow effect

    Method
     

    1. Fill the punch bowl halfway with orange juice and pineapple juice, creating a bright base color. Use a mixing spoon to gently combine the liquids, watching for a vibrant orange hue to develop.
    2. Add the blue raspberry syrup and green sports drink to the mixture, pouring slowly along the sides to encourage layered swirling effects. Stir gently to blend the colors slightly while maintaining some separation for visual impact.
    3. Carefully pour the chilled lemon-lime soda into the mixture to introduce bubbles and fizz, giving the punch a lively, bubbly texture. Stir gently to combine but keep some effervescence intact.
    4. Prepare glowing ice cubes by freezing small glow sticks or LED lights inside water in ice cube trays. Once frozen, place these glowing cubes into the punch, spreading them evenly for a spooky glow.
    5. Add the glowing ice cubes to the punch just before serving. The cubes will emit an eerie glow and slowly melt, releasing extra color and glow to enhance the spooky visual effect.
    6. Stir the punch gently to distribute the glowing effects and ensure everything remains layered and vibrant. Serve immediately in cups with some glowing ice for a bubbling, neon spectacle that’s perfect for Halloween festivities.

    Notes

    Use caution when handling glow sticks or LED lights to ensure safety. For best glow effect, serve immediately after adding glowing ice cubes.
    As the night winds down, the remnants of this ghoulish drink leave a sweet, fruity smell lingering in the air. It captures the fun, frights, and fantastic chaos of Halloween perfectly. Making this punch is a delightful way to add a splash of creepy creativity to your holiday celebration, creating memories as wild and colorful as the night itself.